No rise blues: An ode to sourdough bakers

Many bakers send me private photos of their loaves attached with rude, judge-y remarks. 

“Pancakes.” 

“F$%#-ing catastrophe.”

“Dismal deflation.”

“Friggin’ flat tire.” 

These are just a few of the adjectives frustrated bakers announce when a loaf doesn’t bounce up to the height they had seen in their dreams or worse still, Instagram.   

I try to console with “That happens to me all the time…” but that never really helps soften a defeated sourdough baker’s fall from grace. 

Let’s face it. Not everyone has the patience or stamina for sourdough baking, especially if you have done some or all of the following:

  1. Mixed the levain late one night.
  2. Spent the following day sloshing together a long list of ingredients in a bowl, each scoop of flour, splash of water and sprinkle of salt meticulously measured by the gram or ounce.
  3. Tugged and stretched and folded every 30 minutes for an entire afternoon or morning before shaping an unbelievably sticky blob into a boule or baton.
  4. Transferred your shaped loaves into a flour-lined banneton (upside-down, no less) searched for a shower cap or plastic wrap amid a drawer packed tornado-style with measuring cups, spoons and bench scrapers, your fingers sticky with a floury adhesive plastered on everything you touched including the handle of the fridge where the loaves will retire — yet rise —  overnight until early the next morning, grumpy and tired, you remove said sourdough loaves ever so gingerly, turn their upside-down forms upright on a parchment paper-covered sheet, score each with a sharp razor blade tremulously pinched between bent, arthritic fingers, don elbow-high, warrior-thick oven mitts, reach into a 500 F degree oven without pulling another muscle, place a hot Lodge combo cooker on the range top, remove its cover,  slide a scored loaf into it, replace the lid, emit a bovine-like moan while lifting the five-ton, molten hot-lidded combo cooker, bend back down again into the hellish heat to settle one pan and remove the next until both loaves are now blessedly in their baking place, covered until the timer dings in 20 minutes to uncover what could be the most blissful or depressing sight you’ve seen in the past 48 hours of your baking life. 

Who cares if you’ve created a splattered 2-inch pool of dough, and not the eight-inch-high bursting boule of your dreams? 

You do, if you have read this far.  Several decades of baking have taught me several lessons or simple rules. 

Rule one for success. To be a sourdough baker you must be obsessed if not on the verge of masochistic.     

Rule two. When the lid comes off and the dough has spread like a pool of blood, tell your ego to shut-up and wonder why. (If George hadn’t been curious, he wouldn’t have lived through all those books).  Was my starter fresh, strong and resilient enough?  Did I shape the boule to have sufficient tension? Am I scoring art or slashing their hearts? Is my flour organic, local and freshly milled? Am I using chlorinated water or sweet spring H2O?

Rule three. Know your dough like the back of your hand, the nose on your face, your third eye, whatever.  When you fail, try the very same bread recipe again, yes, again, without complaining or holding your breath. Just observe.  Do that three-day process all over again making it a meditation on sticky versus wet, pliable versus loose. Wonder how far you can gently stretch the dough without tearing. Do you want to maintain those bubbles or press them out? What is the ambient temperature of your kitchen? Have you tried putting a thermometer in your flour, dough or water? 

Last rule: Post every winner on Instagram and quietly embrace your losers. Listen to your palate because sourdough ugly ducklings offer up rich, artisanal flavours you’ll never taste in store-bought.

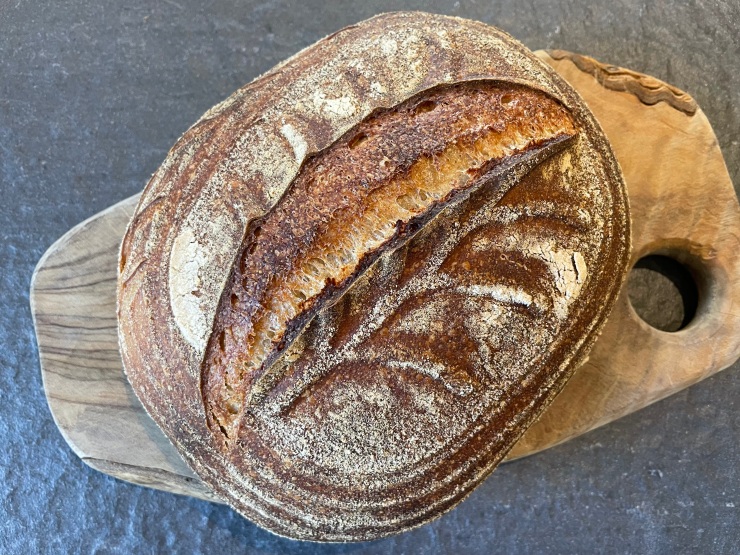
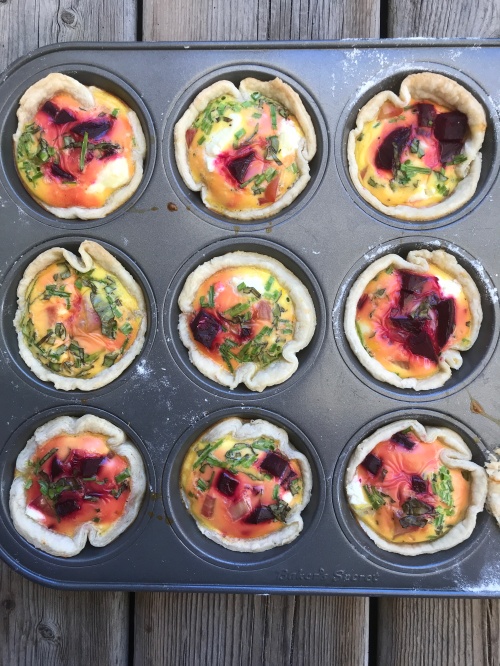
Apple Pecan Sourdough

Makes 2 loaves

This bread is adapted from Sarah Owen’s brilliant Butternut Squash and Cherry Bread found in Sourdough. Freshly ground flour ramps up the taste factor 100 per cent. 

Stiff levain

30 g 100% hydration starter

60 g  water

85 g  organic, unbleached hard white bread flour

Final dough

175 g stiff levain

250 g thick, preferably homemade apple sauce

355 g water

45 g honey

525 g organic, unbleached hard white bread flour

140 g whole spelt flour

30 g whole rye flour

14 g sea salt (Guérande, a gray, coarse salt from Brittany is my favourite for bread)  

1 cup toasted pecan pieces

Make the levain in a medium bowl, mix with your hand and knead into a small ball. Cover with plastic wrap and leave to ferment at room temperature for 8 to 10 hours or when it is tightly domed. (You can refrigerate after 7 hrs and keep there for up to 6 hrs if your schedule requires).

In a large bin or bowl, combine stiff levain, apple sauce, water and honey. Using your hand, break up and squeeze the levain until it breaks down into a bubbly, cloudy mix.  Add flour, spelt and flour, mixing with your hands,  a Danish dough whisk or large spoon. Cover and leave to autolyze for about 20 minutes. Sprinkle over with salt and mix it into the dough, squeezing and grabbing the dough, with a moist hand until a dough forms with no dry flour bits. Cover and bulk ferment for 2 hours, turning and folding every 30-40 minutes.  Fold in toasted pecans and continue to ferment another 1-2 hours, or until the dough is puffy and almost doubled in size, knowing that hot summer temperatures raise dough faster. 

Sprinkle brown rice flour inside lined bowls or bannetons to prevent sticking. On a lightly floured surface, halve the dough into two pieces, shape and place seam-side up, covering with shower caps or closed plastic bags. Refrigerate 8-12 hours. 

Preheat two Lodge combo cooker pans in the bottom rack of a 500 F oven. Depending on your oven this will take 30-60 min.

Remove raised loaves from the refrigerator, uncover and place a piece of parchment paper and small cutting board over each one. Flip each one over to release the dough and score. Wearing heavy duty oven gloves, remove one heated combo cooker. Remove the cover. Slide the scored loaf into the shallow bottom pan, replace cover and return to the oven. Repeat. Reduce the oven to 450 F and set timer for 20 minutes.  Carefully remove covers and leave to bake another 15-25 min, until loaves are golden brown. Cool on baking rack for an hour before serving.  

Tip

Making your own applesauce is easy to do. Core and quarter 4 large organic apples, place in a medium saucepan, add 1/2 cup water, cover and heat on medium.  Cook, stirring occasionally for about 5 minutes or until the apples are soft enough to mash into a puree. 

Tip

Toasting nuts and seeds brings out rich flavour but it’s easy to burn them, instead. Try toasting in a dry frying pan over medium-high heat, stirring and watching until golden brown. It helps to have raw ones nearby to compare colouring. If smoke appears, take off heat immediately.


Banana Pecan Flax Bread

Banana Pecan Flax Bread

These dark brown loaves are sweet, airy and bursting with whole grains. I always have a bag of really ripe bananas in my freezer ready to do their job. I freeze bananas in their skins and defrost on the counter in a big bowl after rinsing with tepid water. Don’t worry about all the water expelled and mash until well combined. If you aren’t using frozen bananas, reduce the cooking time by 5 or 10 min. Sourdough discard improves the crumb of this quick bread, but is optional. 

Preheat oven 350 F

1 ½ cups organic all-purpose white

1 ½ cups whole spelt, emmer, spring wheat or red fife 

½ cup ground flax seed

1 tbsp baking powder 

1 tsp baking soda

1 tsp salt

1/2 tsp cinnamon 

2/3 cup organic sunflower, canola oil or melted unsalted butter 

1 ¼ cup brown sugar

4 eggs

6-8 ripe bananas 

½ cup plain yogurt

1/2 -1 cup refrigerated sourdough discard (up to 1 month old) * optional

1 cup toasted pecans or walnuts

In a large bowl, whisk together all purpose, spelt, ground flax seed, baking powder, baking soda, salt and cinnamon.   

Cream oil or butter with brown sugar in an electric mixing bowl using the whisk attachment. Add eggs, one by one. Mix in mashed bananas, yogurt and sourdough discard, if using.  

Add dry ingredients to wet and mix/fold gently until combined.  

Pour into two greased bread loaf pans.   

Bake 60-70 minutes or until a tester comes out clean from the centre of the loaf.  Allow to rest in the pans for 5 minutes. Carefully turn out on to baking racks and leave to cool.

Soup, A Way of Life

Years ago I bought a big, thick cookbook titled “Soup” with a perplexing subheading: “A way of life”. 

I’ve pondered the logic of that title forever. How could a bowlful of tomato, bean or chicken noodle soup determine one’s lifestyle?  Wasn’t this the domain of style or taste?  

But it turns out soup is just that — especially at breakfast. 

When I first witnessed Taipei office workers perched on stools at early morning street stalls slurping down hot steaming bowlfuls of doujiang, while dipping crispy, deep-fried bread sticks into a hot melange of soy bean soup, I knew it wasn’t for me. I could abide by doujiang as a late night snack, especially for its fabled anti-hangover abilities, but nope, not the morning after.

Ditto, say soup naysayers, when it comes to a dinner revolving around soup. A small appetizer, perhaps, but who in their right mind would make soup the star after six? 

Hot summer temperatures also tend to drive many people as far from soup as possible.  Yet not so in the Caribbean where scalding bowlfuls of callaloo or black-eyed pea soup not only assuage hunger but -get this- reduce body heat with cooling streams of sweat.

If anyone is guilty of a soup lifestyle, it’s me. It’s my go-to meal for lunch, dinner and snacks in between.  I make it by the vat full, counting on numerous labeled leftovers to pile into the freezer, otherwise known as my kitchen’s Taste Archives.  

Next time you ponder your lifestyle, consider pouring more soup into it. 

“Potage

This lush green soup  can be served hot or cold, preferably with a dollop of sour cream or cream-top yogurt and a flurry of fresh herbs.  

2 Tbsp olive oil

1 cooking onion, chopped

2 celery stalks, chopped

1 carrot, chopped

2 broccoli heads and stalks, chopped and separated

6 cups chicken or vegetable stock

1 cup frozen green peas

2 cups packed spinach leaves 

1 bay leaf

1 tsp dijon mustard

1/2 tsp cayenne

1/2 tsp freshly ground black pepper

1 tsp salt  

2 tbsp white wine or white balsamic vinegar

1/2-1 cup sour cream 

Green onions 

Fresh mint

Heat a large pot, add oil and sauté onion, celery, carrot and broccoli stalks until tender and fragrant. Add stock and bring to a boil.  Add broccoli florets, peas, spinach leaves, bay leaf, dijon mustard, cayenne, black pepper, salt and white wine or vinegar.   Simmer covered until just tender, about 5-7 minutes. Remove bay leaf. Puree with an immersion blender. Whisk in sour cream or yogurt.  Serve hot immediately or refrigerate and serve chilled. Garnish with fresh mint and green onions.


Potato Bread

Whenever I buy a big bag of potatoes, I like to bake them all as soon as I can, before they languish in a cupboard, start to sprout and end up in the compost. I choose organic because they have double the flavour and nutrition.  

I scrub them under running water, but I don’t peel them. I prick each with a fork and leave them to dry on a clean tea towel as the oven heats to 425F.  Once it’s ready and hot, I open the oven and try to put each tater on the hot rack without any fall-throughs to the oven floor. I love the sizzling sputter when the cold potato skins hit the hot bars. 

It’s impossible to over-bake a potato, they just get fluffier and more intensely flavoured with time — but it is possible to have potato explosions when the taut, tight skin breaks. That’s why I prick them, to release the hot air. Yet, if you leave a little guy in there too along alongside bigger potatoes that are still under-done, you may hear a commotion behind the oven door and find sticky potato confetti splattered throughout. 

The best time to eat a baked potato is when it is hot out of the oven with a melting nob of butter and a sprinkle of Vancouver Island salt. 

The second best time is to bake it, again, in bread. 

Potatoes and bread are partners in starch crime. A potato makes bread fluffier and the crumb richer. If you prefer to boil your potatoes, save the (cooled) cooking water, for that also makes a flavour-filled difference when added to levain, sourdough or yeasted dough. 

The recipe below is loaded with garlic, too.  Roasting garlic takes away the harsh bite of fresh and turns it into a sticky, spreadable goo.  Equally sticky is this bread’s stiff levain. Running a plastic bowl scraper under water may help to remove it from the bowl in a large piece which you can break into chunks using wet hands. 

Freshly baked bread, whether it contains potatoes or not, will make your friends and family delirious with joy and is worth every sticky messy gooey part of the cleanup.  

Roasted Potato, Garlic and Spelt Levain

Adding potatoes to bread dough creates a fluffy, richly flavoured crumb, especially with the addition of roasted garlic. Yukon gold or yellow-fleshed potatoes are perfect for the job, but fingerlings are just as tasty, too. 

2 medium potatoes (9 ounces) organic yellow-fleshed or Yukon gold potatoes  

1 head organic garlic

Sea salt

Fresh rosemary or thyme

1 tbsp olive oil

Preheat oven 425 F.  Slice 1/2 inch off  the top of the garlic head, place upright on a square of aluminum foil, sprinkle with sea salt, dried or fresh rosemary or thyme and a teaspoon of olive oil, pull four corners of foil to top and close. Place in the oven.  Prick potatoes with fork and place directly on the oven rack. Bake 45 min or until potatoes are tender and ready to explode.    

1.5 oz 100% hydration starter

6.2 oz spring water

9.6 oz white flour

In a medium glass bowl, knead starter, water and flour to create a stiff levain. Cover and leave on counter to rise and create a dome,  7-8 hrs.  I usually do this in the evening before bed.

11 oz organic whole spelt 

11 oz organic white all-purpose or bread flour 

13 oz spring water

9 oz roasted organic potatoes with skins on, crumbled 

All the gooey garlic squeezed out of the roasted head of garlic

.6 oz sea salt

Next morning, mix spelt, white flour, water, potatoes, garlic and sea salt in mixer with paddle to combine. Remove 1.5 ounce of the levain and reserve, labelled and dated in fridge. Spoon out remaining levain in chunks and add to shaggy dough.  Mix with dough hook for 3 min at first speed, increase to second speed and mix another 3 minutes, until dough is balling around the hook. Cover the bowl with plastic or a dinner plate and leave on counter for 45 min. Run your hand under water and start tugging the dough gently stretching it as far as you can without tearing then folding down on top. Repeat three more times, turning the bowl in quarters clockwise. Rest another 45 min. 

Shape the dough and place upside down or crease side up in rice flour-dusted bannetons. Cover with shower caps. Refrigerate 18-24 hours.

To bake, preheat two dutch ovens (I use LodgePan Combo Cookers) in a 500 oven for 30-60 min depending on your oven. You want the pans to get dangerously hot and you must wear long and durable oven gloves when moving the pans in and out of the oven. 

Remove fermented loaves from the fridge, take off shower caps and cut a piece of parchment paper to fit over each one.  Place a rimless baking sheet over the parchment and holding both baking sheet and banneton, flip it over, lift off banneton and score the dough as desired.  

Carefully remove one dutch oven from the oven, slide the scored dough into the base, cover and return to oven.  Repeat. Bake 20 min. Carefully remove the dutch oven lids, reduce to 450 F and bake 15-20 more minutes or until deep golden brown.

Allow to cool on baking rack for at least 30 minutes before serving.


Rhubarb: Fast & Fresh

Rhubarb. I really didn’t know if I should pick it. Nothing else in my April garden looked as ready.   

Yet there she was, boasting her verdancy amid a swirling carpet of troublesome buttercup and clumps of new grass. Rhubarb shouted out with big fat leaves the size of platters.  

She had erupted from the cold wet March soil as blood red crowns, quickly morphing into crinkly, neon-green bundles. I stopped trolling rhubarb for a couple of weeks and was shocked to find her wings unfurled.  Her massive (and toxic) wavy green leaves were hiding edible stalks beneath. 

She identifies as a fruit but is a vegetable, our lady rhubarb. 

I took a deep breath and harvested five stalks today, yanking each one from the base, a thin white filament sliced from the root ball clinging to the bottom of every stalk. 

In the kitchen, I washed and trimmed my April bounty, covering the base of a wide pot with a half-inch dice. Splash went sweet apple juice over the red chunks, just to cover.  I took a large spoon and scooped out an ample portion of fine, local honey from our friend and arborist Gordon MacKay. 

Covered, the rhubarb gently simmered for no more than 10 minutes dissolving into a tangy compote ready for breakfast yogurt, dessert-time ice cream or simply solo and divine.  

Roasted Carrots and Cabbage

Roasted Carrots and Cabbage with Rosemary

Easy and quick, this roasted pan of veggies is as fun to design as it is to eat. When peeling or slicing onions and cabbage do not pare off the core or stem end which holds the piece together when turning over halfway through the bake to expose all that caramelized deliciousness.    

2-4 tbsp olive oil

5 large carrots, peeled and cut into 4-5 inch sticks

6 cabbage wedges, core attached

1 small onion, peeled, quartered with core attached

10-12 cherry or grape tomatoes

4 garlic cloves, peeled or not

Rosemary, dried or fresh, de-stemmed

Salt

Freshly ground pepper

Chili pepper flakes 

Preheat oven to 425 F.

Spread 2 tablespoons of the olive oil into a rimmed baking sheet. 

Arrange carrots in a line down the middle and place 3 cabbage wedges above and below.  Scatter over with onion, tomatoes, garlic cloves and rosemary.  Sprinkle liberally with salt, freshly ground pepper and chilli pepper flakes, if desired.  Drizzle remaining olive oil on top. 

Bake on the top rack for 15 min, flip veggies over and return to oven until golden brown and fragrant, 15-20 more minutes.


dipping into soup

There is something so very gratifying about making soup again —  despite the sweltering August heat. The kitchen garden is busting with basil, tomatoes and zucchini. Meanwhile, the fridge is crowded with leftover this and that, daily harvests tucked into bags and fresh produce splurges found on sale.  

I open the crisper and am determined to find a destination for a clutch of golden beet greens that are still fresh and vibrant a whole week after their yellow orbs were removed. Wouldn’t these greens taste fine in a vegan bean soup? I pounce on two cups of leftover bean dip:  the genesis.  Laced with lemon, rosemary and smoked paprika, this luscious dip on the blog last week will be this week’s soup base.  

I yank out a medium pot, heat it on medium-high, waiting a minute or two before drizzling the base with two tablespoons of olive oil. Next up, a chopped yellow onion and two stalks of celery sprinkled over by a confetti of golden beet leaf stalks. 

Down in our basement, where the rat once lived, I survey the contents of my standup freezer door where each of the four shelves is lined with green-lidded yogurt containers.  Most are full of chicken or bean stock.  Others contain soup. Some are pasta sauces. All are meticulously labelled. I grab two white bean stock containers and climb up the rickety wood stairs.

In a flash, a soup base is born. It’s strange to spoon my cold bean dip into the caramelized onions, celery and beet stalks but magic happens when I pour in the broth and a cloudy, creamy liquid swirls beneath.

More veg! I cut a yellow bell pepper into mouthfuls and a dozen grape tomatoes into quarters. A cob of corn is sliced into a pile of niblets that are shoved with my chef’s knife into the mix. I find a small patty pan squash and a zebra-striped zucchini from today’s harvest and chop them up. 

I fiddle with seasoning, starting small with salt — just a  teaspoon — then lashings of ground black pepper, a big pinch of chilli flakes and 1/2 teaspoon of smoked paprika.  On with the cover and a low simmer for 10 minutes or so. 

Another taste of this soup-in-the-making tells me lemon from the dip is too loud.  I blunt it with tomato paste.  I don’t open a can, I find a flattened sheet of tomato paste frozen into a thin, easy-to-break sheet from the flavour drawer in my kitchen freezer. Baggies full of frozen bay laurel and kaffir lime leaves, lemon grass, chopped herbs, galangal, whole Thai red chili peppers and lime juice cubes are just a reach away from stovetop soups, curries and sauces.

I toss in a square inch of paste along with another 1/2 teaspoon of kosher salt and a sprig of basil, pinched from the garden just moments ago,

Another taste. This soup is still asking for more…

I give it a wallop, smashing two cloves of hard-neck garlic just harvested by a Cowichan Valley young farmers’ collective. The smash is so sticky, papery thin garlic skins become glued to my fingers. Sticky garlic can only mean one thing: Rich, garlicky bite. I sprinkle the sticky crumble over the bubbling soup’s surface and chuckle and natter on to myself, laughing like a witch.

Last step and we find ourselves at the beginning again. Those beet greens. I slice then slide them off my cutting board, the green mound melting instantly into a sea of beans. I turn off the heat.  It’s done. Soup again. 

Garden Vegetable Bean Dip Soup

Totally unorthodox, this soup’s success rests on humus or bean dip. Clean out the contents of your fridge with this nutritious brew, substituting any of my additions with your own fridge or garden finds. 

2 tbsp olive oil

1 cooking onion, chopped

2 stalks celery, chopped

1 bunch golden beet stalks, minced 

2 cups bean dip

6 cups white bean vegetable stock

1 yellow bell pepper, cubed

1 small zucchini, 1/2-inch dice

1 patty pan squash, sliced

4 small boiled potatoes, cubed

6 grape tomatoes, quartered

Niblets from one cob of corn

1-2 tsp salt

1/2 tsp freshly ground black pepper

1 tbsp tomato paste

1/2 tsp smoked paprika

Big pinch chili flakes 

2 cloves garlic, smashed and minced

Beet greens, sliced 

Heat a medium pot on medium-high. Add oil, onion, celery and beet stalks and saute until tender. Add bean dip and stock.  Bring to a boil.  Add bell pepper, zucchini, patty pan squash, potatoes, tomatoes and corn. Season with salt, black pepper, tomato paste, paprika, chilli flakes and simmer, covered for 10-15 minutes or until tender. Add garlic and beet greens and cook a final minute or two.

White Bean & Rosemary Dip

Let’s take the pulse on pulses. I’m talking dried legumes that grow inside pods, be it beans, peas or lentils. 

So much value in every bite.  Full of protein. Packed with fibre. What kitchen can survive without these yummy little packages?

Open my pantry and you’ll find shelf upon shelf of peas – like chickpeas, green peas and black-eyed peas. 

Then there are beans. Kidney-shaped in black, red and white. Black ones, often called turtle and fermented into a salty Chinese condiment. Italian variations like cannellini (white kidney) beans or ceci (chickpeas) beans, borlotti, butterbeans, lupini beans and fava. 

We haven’t even mentioned lentils! Small red ones (also called Egyptian) are one of the quickest you can cook, while green and brown lentils take a few more minutes. But those French babies dubbed Le Puy are my favourite. 

Indian cuisine revels in pulses and you’ll find the largest selection with the most confusing appellations in ethnic food aisles and Indian grocery stores.

Many turn to canned beans instead of dried, for convenience sake. I like to soak and cook pulses in bulk. Once they’re tender, drained and cooled, I freeze and label in two cup containers.  

No matter which pulse moves you the most, your health (and the earth) will thank you if you eat them regularly. 

White Bean and Rosemary Dip

This easy dip needs a food processor to become sublime.  Yes, you can hand-mash canned beans into a delicious affair but I like to use cooked dried beans, which provide more flavour and texture but call out for strong maceration. Do NOT use a blender. Dried beans you hydrate and cook yourself are not only cheaper than canned, but contain zero sodium compared to the oodles found in canned.

1 garlic clove

2 cups cooked white beans such as kidney, navy or cannelinni

Juice of one lemon

1 tbsp chopped fresh rosemary (aprox 5-inch sprig)

1/2 tsp hot smoked paprika

1/4 cup extra virgin olive oil

1/2-1 tsp kosher salt

1-2 tbsp water * optional

Freshly ground black pepper

With the food processor blade running, drop garlic clove down the tube to mince. Add beans, lemon juice, rosemary and paprika and mix until well combined.  Pour oil through feeding tube while the blade is running.  Add water, if needed, to make the puree the right consistency.  Season with salt and black pepper. Serve in a bowl, garnished with a whole sprig of rosemary, a light drizzle of olive oil and a pinch of Vancouver Island flaky salt.

Corn Salsa Salad

Corn Salsa Salad

This colourful summer salad is full of spunk thanks to key salsa notes: lime juice, garlic, chilli flakes and a big handful of cilantro. For the best optics, chop all your veggies the same size. This salsa/salad holds well in the fridge for 2-3 days if you have any leftovers.

2 cobs fresh corn

1/2 large red onion, chopped

1 medium cucumber, chopped

1 red bell pepper, chopped

10 grape tomatoes, chopped

1/2 cup chopped honeydew or cantaloupe

1 Tbsp olive oil

Juice of one lime

1 clove garlic, minced

1/2 tsp salt

1/2-1 tsp chili flakes 

1/4 cup finely chopped cilantro

Bring a medium pot of unsalted water to boil and cook corn 8 minutes. (Salt toughens the kernels). Remove corn and set aside until cool enough to handle. Remove the kernels and place in a large bowl, mixing with cucumbers, red bell pepper, tomatoes and melon. Toss with oil, lime juice, garlic, salt, chilli flakes and cilantro.

rhubarb Rhubarb

I first set eyes on rhubarb in my Toronto childhood backyard. I didn’t know it was edible but did notice its big, fat, leafy presence.   

My mom, an avid gardener, ignored it. Her passions skewed to flowers. We often shared a loving look at her peonies or roses together, but chives were as far as she’d go in the green department.  

Writing about and researching fruits and veggies most of my life, I’ve always been a little dubious of the childhood rhubarb recollections relayed to me by friends. They always shake their greying heads with revelatory passion, recounting how they had dipped freshly grown rhubarb into a jar of sugar.  All this, standing alone in the middle of a vegetable patch at the age of five or six.  Uh, huh? I tried this sugar dip trick recently and couldn’t spit the rhubarb out fast enough. 

Let’s be real folks, rhubarb is one sour mofo. Don’t get me wrong. I can embrace sour but with rhubarb, it’s always begs for more sugar than the rest of the gang.

On the plus side, I adore growing this so-called fruit that’s actually a vegetable. A perennial, rhubarb really grows itself.  It’s the first to poke through the soil in early spring, starting with little red bumps and furled, neon green leaves that stretch out dramatically into a monster of a bush in a few weeks. Rhubarb grown in greenhouses is usually pinker (and deceptively sweeter-looking)  than my garden’s red-green, tannic stalks. 

Alas, the colour of a rhubarb stalk has nothing to do with ripeness.   

This veggie calls out in its pretend, fruit voice for our sweetest of attentions.  It loves to be buffeted in a blanket of sugar, butter and carbs. That’s all it wants.  Maybe you’ll want it too if you give in to the sweetness rhubarb demands.

IMG_0610

Strawberry Rhubarb Crisp

Crisps are a simple, easy dessert for fruit-filled success that are just as good — if not better — for breakfast the following day. Einkorn and oats are a match made in whole grain heaven.  There’s a reason strawberries and rhubarb pair so well. They are seasonal sisters in the garden and sugary strawberries help abate all that rhubarb pucker.

2 1/2 cups sliced strawberries

2 1/2 cups rhubarb, diced into 1/2 inch cubes

1/2 cup white sugar

1 Tbsp corn starch 

2 tbsp blanched almond slivers, toasted

3/4 cup whole einkorn 

1/4 cup brown sugar

1/2 tsp ground cardamom

1/4 tsp salt 

1 stick cold unsalted butter, diced

1 cup oatmeal

In a round 8-cup ceramic or glass dish, toss strawberries and rhubarb chunks with white sugar and corn starch.

In a food processor bowl, blitz toasted almonds, einkorn, brown sugar, cardamom and salt with a few pulses in the food processor.  Add butter cubes and pulse until they are pea-sized morsels. Combine with oatmeal and layer over the fruit. 

Bake in 375 F oven for 40-45 min or until top is golden brown and fruit is bubbling beneath.


IMG_0609 

Nettle quiche

My first bite of nettle quiche was a take-out slice from Duncan’s Garage Bakery and Cafe. Every mouthful was a culinary revelation. Dark chunks of earthy greenness couched among creamy eggs, mushrooms, salty feta and buttery, flaky pastry –  this quiche bewitched. 

It did something else.  It tapped into my brain’s ever-pulsing cooking lobes, prompting synapses to pop like corn. I had to make this. 

The next day, my beleaguered husband is inevitably involved. We’re on Stony Hill Trail and I’ve sniffed out some nettles. Stinging nettles. David is holding a large plastic bag open as widely as he can, while I clip and clip, wearing gloves and laughing. These wild plants are the kind I’ve seen posted on Instagram inside rich, green, layered cakes slathered with icing. The kind that can leave a prickly sensation on your skin for hours, if not days. David is leaning as far away from me as he can,  knowing the sting from this nettle too well. Years ago, he’d picked an innocent bunch of leaves to vigorously wipe bicycle grease from his hands only to inflict a painful 48-hour reaction. I notice a sideways grimace from him as I stuff each bright green bundle perilously close to his bare hands and arms. 

IMG_9836Once home, I carry my two bulging forest bags into the kitchen. I climb a step stool and reach for the tallest pasta pot I can safely lift down without breaking my neck. Once boiling and salted, the water is ready for my nettles to take the plunge.  I put my muddy garden gloves back on. I’d wear clean oven gloves were it not for the dexterity the tongs required.  

In and out. Quickly. Each plunge was a messy affair, stems and leaves flying left and right as I pushed them into the water (not unlike squirming live crabs or lobsters who have seen the same fate.) But nettles die instantly. Each thorn is annulled in a nano-second ready to be pulled out limp from the black-grey water, as I inhale the rich, vegetal aroma. 

“Like spinach, but better,” opines my fellow spinach-lover as we dine.   

That’s after we pick up four dozen eggs at our favourite farm stand on Richard’s Trail.  Promise Valley always has their red cooler out, usually packed high with egg cartons and a big, blue freezer block wedged inside. Only once have we found the cooler empty,  our disappointment dashed by the appearance of the farm’s two pet goats pressing up against the fence their long, silky ears and wet noses begging for a scratch.

Just a week before that fateful nettle-filled bite at Duncan’s Garage, I was invited by dairy farmer Caroline Nagtegaal into Promise Valley’s hen house to witness “afternoon chores.”

“Want it?” asked this tiny blond woman in very tall boots as she smiled and giggled, offering me the handles of a large, wired egg basket.  We were standing with the hens, the air a cackling, bawk-ing din, intermingled with saw dust and chicken shit.  

IMG_0224“I’ve been doing this since I was five, but I still yelp when they nip me.”

Her hand was tucked under the rump of a Highline Brown, sitting proud and unruffled in one of a long line of boxes. Some boxes were empty, others occupied. All were lined with straw, tamped down into a nest-like well. Not all of Promise Valley’s 190 hens were inside that afternoon, but Rocky the Rescue Rooster was standing among a particularly talkative clutch collected around my ankles.   

IMG_0227
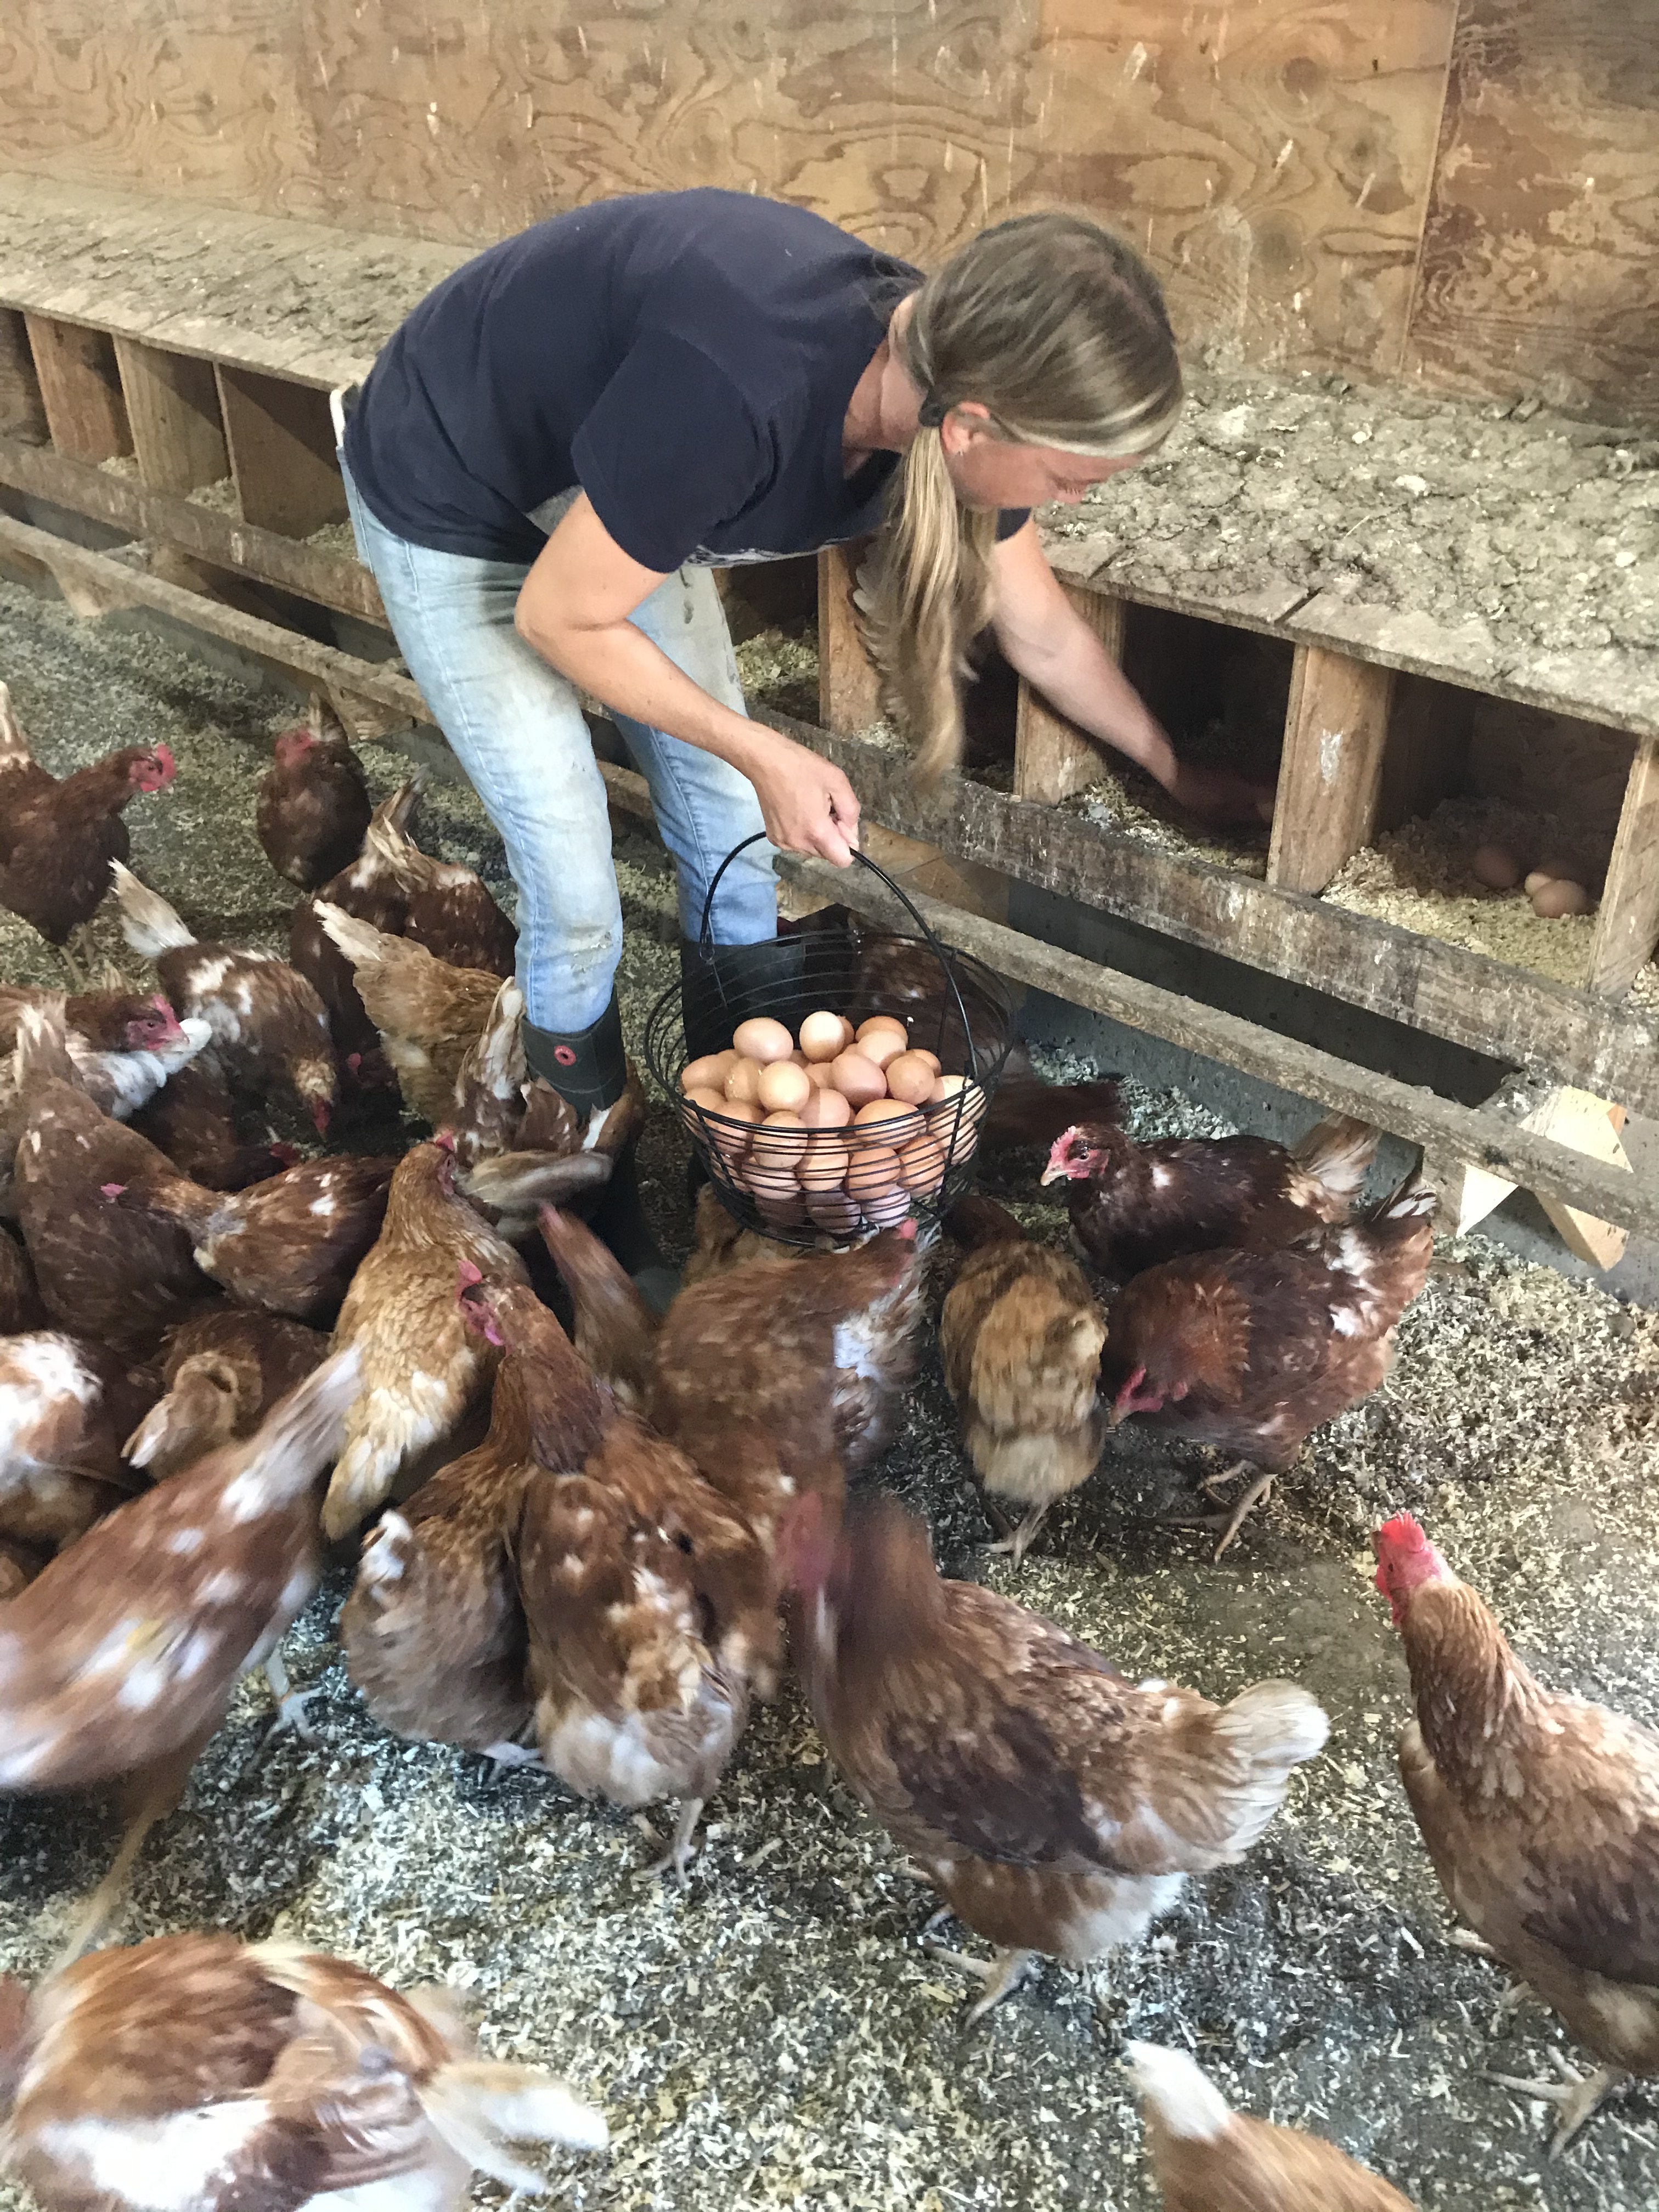
I chickened-out and made a tentative reach into an unoccupied box to find five or six abandoned eggs.  Brown and beige, these eggs were room-temperature to touch except one that radiated such warmth, it must have been freshly laid. 

Of course, that wasn’t my first instinct, holding that egg.  It felt like eggs I have cooled after hard-boiling, warm but ready to shell. Seeing the hen house, helping Caroline collect the eggs as she does every afternoon every single day, was a privilege for this city girl who is always thinking about food, its whereabouts and how it can be transformed into something delicious. 

Like quiche and nettles. 

I reach into the freezer and pull a small bag of dark, green frozen nettles, the product of my nettle forage with David. Each bulging bag’s forest-fresh contents had been flash-boiled, transferred tong-by-tongfull into a large ice bath and drained. I had removed all the stems, squeezed handfuls over the sink to remove excess liquid and bagged up my nettle cache for the freezer. 

Asparagus was roasting in the oven while chopped onions sizzled in butter on the stove-top.  I grated a chunk of white cheddar and beat half a dozen of Caroline’s eggs.  I dumped the eggs into a four-cup glass measure containing milk, seasoned with salt, pepper, cayenne and freshly grated nutmeg. 

I defrosted half a nettle bag’s contents in a bowl of cold water, then dispersed little mounds  along the bottom of my Einkorn and Red Fife pastry covered with soft, fragrant onions, followed by a showering of cooled roasted asparagus and grated cheddar. 

Once the quiche was safely tucked inside the oven, sitting on a rimmed baking sheet in case of  any run-off, I could relax and dream. Promise Valley is making the transition to organic and will soon be offering Guernsey milk and cream-top yogurt at their farm stand. When they open their doors I will be first in line, conjuring up more tasty recipes to share here at Mado Food.

IMG_0375

Nettle and Asparagus Quiche

If you don’t have stinging nettles substitute with spinach and pretend. 

2 tbsp butter

1/2 large cooking onion, chopped 

1 cup defrosted frozen nettles

6 spears cooked asparagus, sliced into 1- inch pieces

1 cup grated old cheddar

6 eggs, beaten

1 cup milk or cream

1/2 tsp salt

1/4 tsp nutmeg

1/8 tsp cayenne

Freshly ground pepper

Preheat oven to 400 F.

Heat butter in a frying pan and sauté onions until soft and fragrant. Set aside and cool. 

Arrange onions, nettles, asparagus and 3/4 cup of the grated cheddar on the bottom of the pie pastry crust that you have made (see recipe below) or bought frozen.

In a medium bowl or 4-cup measure, combine milk, eggs, salt, nutmeg, cayenne and freshly ground pepper.  Pour into the pie crust and top with remaining cheese.  

Bake on a rimmed baking sheet in the middle of the oven for 50-60 min or until the centre of the quiche is golden brown, set and the middle won’t jiggle when gently shook.  Remove from the oven and wait 10-20  minutes before serving (to further set and slice up well).


IMG_9965

Einkorn and Red Fife Pastry

This flavour-forward pastry dough is adapted from Flourist and will taste best if you use freshly ground, local grain. If you are stuck with supermarket-only options, use whole wheat pastry flour instead of Red Fife and white pastry flour instead of Einkorn and cut down the ice cold water to 1/4-1/2 cup. Yields 1 double crust pie pastry. Freeze the leftover single crust for your next quiche adventure.

1 2⁄3 (230g) cup True Grain Sifted Red Fife Flour

1 cup (138g) cup True Grain Whole Einkorn Flour

1/2 tsp salt

1 cup (227g) butter, cold and cut into cubes 

1 tbsp apple cider vinegar

3/4-1 cup ice cold water, or as needed

Pulse flour and salt In a food processor bowl once or twice to combine. Sprinkle over with cubed butter and process on high for 30 seconds or more, until butter is the size of small peas. Pour vinegar and ice cold water through the tube with the motor running, adding water by the tablespoon until it adheres into a mass. 

Transfer to a large sheet of waxed paper and press the crumbly mess into a round disc. Wrap well and refrigerate two hours or until firm. 

On a lightly floured surface, roll out half of the disc and arrange in a deep (5-cup/1.25L) pie dish.

IMG_9840

sourdough crackers

Sourdough Crackers

A great place to begin sourdough baking is with crackers or lavash. Every baker who keeps a starter alive has discard. Most of us hate to waste. Instead of tossing your discard away, simply add oil, salt and enough flour to create a soft dough. Most sourdough bread bakers obsess over getting a good rise, but you want crackers to be flat and these will be! Besides, SD discard makes these flatbreads much more flavourful.

Basic Dough

3.5 oz/100 g 100% hydration sourdough discard (SD) 

1 Tbsp olive oil

1 tsp salt

2-4 heaping Tbsp flour

Dough add-ins

1/4 cup Blue Cheese or goat cheese, crumbled

2 Tbsp Sun-dried tomatoes

1/4 cup toasted walnuts, pecans, sunflowers or sesame  seeds

1 Tbsp toasted cumin, coriander, ajwain, fennel or nigella

Chili flakes

Dried rosemary, thyme, sage or oregano

Roasted or finely chopped garlic

Top-ons

Flaky Vancouver Island or Maldon salt

Chili flakes

Once you have fed your starter, get ready to work with the discard or simply cover and leave in the fridge (up to 24 hrs) until you are ready to create cracker dough. Add olive oil, salt and two tablespoons of flour to the discard. Mix.  Add more flour, little by little, until a dough forms and you can knead it in the bowl a few times. 

Add-ins are all optional.  Any add-in ingredients high in moisture, such as soft cheese or roasted garlic may require that more than 4 tablespoons of flour are added to make a dough. 

Flour types will also affect dough formation. In general, cracker dough can take more processed white flour than it can whole or sifted grains, like rye, buckwheat, wheat, barley, cornmeal and spelt.  The more you experiment with different flours and add-ins, the more you will learn about your dough and what you like in a cracker. 

I like to add flaky salt and chill flakes as top-ons (even though the dough may contain both) for instant cracker-bite-appeal. 

Rolling out cracker dough is easy.  Lay out a piece of parchment paper on your counter and dust it and rolling pin with flour.  Roll dough out as thinly as possible. Sprinkle over with top-ons if desired. Prick with a  fork to create a regular pattern. 

Bake on a baking sheet at 325 F for 15-30 minutes.  A very thin cracker will cook faster than a thick one. 

Your cracker is ready to take out of the oven when it is browning around the edges. Remove parchment and using oven gloves, pick it up and see if it bends and is pliable in the middle of a cracker sheet.   If so, it needs more oven time. Sometimes I turn off the oven and leave the cracker sheet inside for an hour or so to really dry out. It’s a good sign if your sheet of dough has cracked in a few places and that may get you thinking about this product’s name.

Finally, how do you cut your crackers? I go with a rustic approach, breaking the baked cracker sheet or lavash into shards, serving in a tall glass. But you may want to use a pizza or ravioli cutter to cut the dough into triangles, rectangles or squares before baking. Ensure even baking by cutting all the shapes into similar shapes. Individually cut crackers will bake in 15-20 minutes.


Stir-Fry Success

The key to a great stir-fry lies in a few ground rules.

Number One: Don’t even think of turning on the heat and pulling out your wok if all your veggies and proteins aren’t prepped.

Number Two: Rely on a quick marinade to make proteins sing.

Number Three: Stir-fry pork, beef, chicken, seafood or tofu after you have stir-fried your perfectly chopped veggies. Keep the two separately stir-fried and mix it all together at the finale.

What makes stir-fried veggies so deliciously tender-crisp? Even size. Chop each carrot into a match-stick or uber-thin slice, preferably on a slant. Cut every broccoli or cauliflower floret as if identical. Shave off slices of Napa, green or purple cabbage.

If cutting veg isn’t your thing, you can go for bigger pieces, just make sure they are all the same size to ensure even cooking. Onions, bell peppers and bok choy stems stir-fry effortlessly if cut into equal-sized quarters or eighths. Green onions taste great cut into two-inch pieces. So do leeks. Green beans, snow and snap peas simply need stems removed.

Whether it is tofu, ground pork or sliced beef, all will taste better if they are marinated in soy and sherry for at least 10 minutes. I keep half pound portions of pork tenderloin, flank steak or boneless chicken thighs tucked away in my freezer. All are easier to slice thinly when partially frozen and can defrost fully while marinating.

A tablespoon of corn starch in a marinade will help thicken a stir-fry’s essential sauce. Nobody likes an oily stir-fry yet many stir-fry beginners add too much oil to the equation. The trick is to heat a dry wok on high heat (preferably gas) add oil (preferably a neutral organic one) and swirl it around to cover the wok’s sides, then start tossing in ingredients, very quickly.

Said ingredients must be ready within reach from the stovetop, including water or stock, essential for steaming vegetables once the wok gets dry, a phenom that happens within the first few minutes of your average stir-fry. Splash in half a cup of water or stock, put the lid on and let your stir-fry cook itself, gradually adding veggies starting with the longest-to-cook ones.

Seasoning is essential to taste and rare is the stir-fry in my kitchen that doesn’t contain freshly grated ginger and garlic. Because they are grated and cook in an instant, these seasonings can be added into the protein’s marinade or tossed in at the very beginning, stir-fried for just a few seconds before adding longer-cooking, bigger pieces of veggies such as onion, cabbage, peppers, broccoli, cauliflower, bok choy stems, Gai lan stems, chayote or kohlrabi.

The last thing I might throw into a stir-fry is sliced leaves, bean sprouts, snow peas or freshly chopped herbs. In the case of this recipe, I tossed in whole basil leaves just before sliding the entire event on to a big white platter.

Stir-Fried Pork with Peppers and Black Bean Sauce

Serve this on steamed rice or noodles.

1/2 lb/200g pork tenderloin, thinly sliced against the grain (or firm tofu)

1 Tbsp corn starch

1 Tbsp soy sauce

1 Tbsp cooking sherry or wine

1/2 tsp sambal oelek *optional

1/2 tsp sesame oil

1/2 tsp granulated sugar

Freshly ground black pepper

1/4 cup neutral oil, divided in half

1-inch knob ginger, peeled and finely grated

2 cloves garlic, finely grated

1/4 cup fermented black beans or 1 tbsp Lee Kum Kee black bean and garlic sauce

4 green onions, sliced into 2 inch pieces

1 small red onion, cut into eighths

2 bell peppers, thinly sliced

2 cups green beans, topped and tailed

1/2 cup water

8 leaves fresh basil or mint

In a medium bowl, combine sliced pork and corn starch. Add soy, sherry, sambal oelek, sesame oil, sugar, black pepper and set aside to marinate at least 10 minutes.

Heat wok on high. Add 2 tbsp oil and swirl around the sides. With a large Chinese spatula/shovel stir-fry ginger and garlic for 30 seconds, add black beans, green onions, red onion, bell peppers and green beans. Stir and cook until wok gets dry, add water, drizzling around the sides of the hot wok, stir until combined. Put the wok lid on. Wait until veggies are tender crisp, about 2-3 minutes. Transfer to platter.

Return the same wok to high heat, add remaining 2 tbsp of oil, swirl around sides. Add marinated pork or tofu, stir fry until golden brown, adding a tablespoon or more of water or stock if wok gets dry. Add reserved vegetables and fresh basil or mint. Stir to combine. Transfer to platter and serve immediately.

Shanghai Bok Choy

Whether it is green stemmed Shanghai bok choy or “regular” white-stemmed bok choy this vegetable is meant for the wok. Baby or full size, bok choy stir-fries beautifully when it is washed and chopped in similar sized pieces. Stir-fry the thicker stem portions first and toss in the chopped green leaves afterwards. Because greens release a lot of water while cooking, no extra water or stock is needed, but you will need a cover to steam until just done. 

2 tbsp oil  

1-inch fresh ginger, peeled and finely grated

1 lb/400g bok choy

1/2 tsp sea salt

Wash and prep the bok choy and ginger, arranging in bowls or plates beside the stove-top. Heat the wok on high.  Add oil, swirl to cover the sides of the wok and toss in ginger. Using a large Chinese spatula, stir for 10 seconds then add the chopped bok choy stems and sprinkle with salt. Stir-fry about 2 minutes or until slightly tender. Add all the chopped leafy ends, mix and cover. Leave to steam 1 or 2 minutes or until leaves are wilted and stems still firm but deliciously tender.

Smeared Cauliflower

Ginger Turmeric Smeared Cauliflower

Make this a vegan one-pan meal with the addition of chickpeas.  Serve with hunks of whole grain bread and a leafy green salad. 

Paste: 

2 tbsp olive oil

2 tbsp water

1 cooking onion, small, peeled and quartered

1 inch ginger, coarsely chopped

I inch turmeric, coarsely chopped

1 large clove garlic

1 tsp coriander powder

¼ tsp hot chili flakes

1 tsp cumin seeds

Salt and pepper

1 tbsp olive oil

1 head cauliflower, rinsed whole, cut into steaks, loose greens

6-8 grape tomatoes, sliced in half

1 cup chickpeas * optional

Preheat oven to 400 F

Whirl oil, water, onion, ginger, turmeric, garlic, coriander powder, hot chilli flakes, cumin seeds, salt and pepper in a small food processor.  

Brush oil evenly over the bottom of a rimmed baking sheet. Scatter cauliflower steaks and pieces and smear on paste with a spoon or basting brush. 

Bake 40 min. flipping halfway through.

Chinese Steamed Fish

As we usher in the New Chinese Year today, let’s eat fish!  Not only is fish a fine food to eat on Friday (especially if you’re Catholic) but if you’re speaking Mandarin, fish (鱼 yu) symbolizes prosperity, because  yu is a  homonym for surplus.

Steaming is a healthy and delicious way to cook fish creating a sumptuous sauce to spoon over rice.  Moreover, steam heat is gentle yet fast.  Cooking is done in 8-10 minutes.  Once your fillets pass the flake-test,  you can leave your fish covered in the steamer and it will stay warm while you set the table or finish stir-frying some Chinese greens like bok choy or gai lan.

Chinese-style steamed fish

1 lb/450 gm       sea bass, cod, salmon, haddock, tilapia or halibut fillet, cut into 4 pieces

Sauce:

2 TBS    black bean and garlic sauce OR 2 tsp soy sauce

2 tsp      toasted sesame oil

2 TBS      water

2 TBS      Japanese mirin or cooking sherry

1 three-inch knob ginger, peeled and thinly sliced into matchsticks

3 green onion OR 1 small leek, thinly sliced lengthwise

2 TBS      fresh coriander, chopped

Mix sauce ingredients in a small bowl.

Place fillets in a heat-proof dish that will fit inside an aluminum or bamboo steamer. (Or, create your own steamer by placing a rack set in a large skillet.)

Using a spoon, place an equal amount of sauce on each fillet. Sprinkle over with ginger matchsticks and green onions or leek.

Bring several inches of water to boil in the steamer. Wearing oven gloves, place the dish with fillets into the steamer.

Cover and steam 8-10 minutes on high, or until the fish flakes at the touch of a fork and is opaque in the middle.

Garnish with fresh coriander and serve over steamed rice.

© 2015 Madeleine Greey

Cookies! White choc macs

Fine baking is all about good ingredients and a reliable recipe.  That’s why I turned to one of my baking idols, Bonnie Stern, for this cookie recipe’s foundation.

Desserts, first published in 1988 and revised ten years later, is over 200 pages of sweet perfection. My revised paperback edition is well-loved, covered in stains and filled with dog-eared page after page of handwritten notes.  I found “Triple Chocolate Chip Cookies” on page 108, where I had scribbled “Great!” 20 years ago and made plans to substitute half the chocolate with macadamia nuts.

Mac lovers have a thing for these nuts from Hawaii and you’d think I’d have no trouble finding them on Vancouver Island, just 2,361 miles away…  After two supermarket scans, I had given up all macadamian hope until David pounced on two bags at Country Grocer in Cobble Hill.

Bonnie wrote this recipe after lunching with “Mr. Chocolate Himself” (Bernard Callebaut) making me woeful not to have a chunk of his white stuff in my cupboards. I had to make do with PC white chocolate chips.

Luckily, butter fared better. Freshly purchased from Cow-Op, I had a glorious half-pound of Avalon organic unsalted butter that was whipped into a frenzy by Krystal, driving our cookie operation inside the KitchenAid mixer.

Ten minutes earlier, Krystal had placed two cold eggs from the fridge into a bowl of warm water to gently warm them up to room temp for the bake. I knew Promise Valley’s farm stand eggs were the finest and freshest I could find, their deep orange yolks ready to enrich this already rich mix.

For added flavour and a hint of nutrition, I substituted all-purpose with True Grain’s Sifted Spelt. Whether it’s sprouted, whole or sifted, spelt doesn’t disappoint in chocolate cookies.

This recipe delivers gooey, sugar-loving smiles and zillions (okay, just 50) cookies. If you can, hide some in the freezer — a tactic I’ve employed too often to really call successful any more.

Macadamia White Chocolate Chip Cookies

1 cup/2 sticks               unsalted butter, softened

1 cup                              brown sugar

½ cup                             granulated sugar

2                                     eggs, room temp

1 ½ tsp                          vanilla extract

1 tsp                              water

2 cups                           whole, sprouted or sifted Spelt

1 tsp                              baking soda

½ tsp                             sea salt

1 cup                             white chocolate chips or shredded

1 cup                             macadamia nuts

Preheat oven to 350 F

In a mixer using the whisk attachment, cream butter, brown and granulated sugar on high for about 2 minutes or until very light. Mix in one egg at a time. Mix in vanilla and water.

In a medium bowl, whisk together spelt, soda and sea salt.

Add flour mixture to creamed butter in mixer using paddle attachment until combined.  Add white chocolate and nuts until just combined.

On a baking sheet lined with parchment, drop cookie mix by the teaspoon and gently roll into balls.

Bake 10-12 minutes or until golden brown. Leave on baking sheet for 5 min. before transferring to a cooling rack.

Finding Spot Prawns

It was the Insulation Guy who got me started on the Spot Prawns. He’d just removed his gloves to down a glass of water and was looking around my kitchen, sniffing out my latest exploit, staring at rows of hot and boiled jam jars clicking shut in BerNARdin burps.

“You like to cook?” he asked.

I laughed.

“Lucky living here, then! All the blackberries you could eat in a lifetime. I’ve got a secret spot where there’s so many I can fill the back of my pickup truck in an hour.”

Classic.  Every foodie forager on Vancouver Island seems to have a fabulous tale like this. Insulation guy had barely taken a breath before he started in with more.

“And the Spot Prawns… well geesh, they do a huge run, right over there,” he said, pointing out my kitchen window. “Near Salt Spring. We haul out hundreds during the season.”

“How?” I asked.

“We drop traps and pull ‘em up!”

He licked his lips and rubbed his hands together, savouring the thought.

“It’s like manna from the heavens.”

I didn’t see Insulation Guy again but kept thinking about those prawns. Yes, I braved thorns as big as nails and picked buckets full of blackberries, but we had neither boat nor trap to pull any semblance of seafood from the ocean.

Then our friend Dan motored into the Ladysmith marina wearing his trademark grin and aviation sunglasses.  We were off to spend a night at their cottage on DeCourcy, a nearby gulf island where everyone has a generator and a heart-stopping view of the surrounding mountains.

“The tide is low,” yells Dan over the boat’s motor. “So, we’ll just wave at Annabelle and the kids as we pass by the cottage then park the boat around the back.”

Low and high tides, undercurrents and water depths are the common language of any BC boater and Dan loves every drop. Whenever he’s behind the wheel, he’s smiling ear to ear. No matter if the boat thunks and crashes against oncoming surf or the wind slaps like an ice-cold face cloth, he’s blissed.

“My friend John lives over there,” he shouts, pointing to a rocky outcrop barely larger than a hockey rink.

“And this place? Bill built this. Incredible, isn’t it? And all by himself!”

I can barely see the outline of a structure. We are whipping by another stony outcropping. Rocks. Trees. Water. Land of the adventuresome. Dan is a great guide knowing every nook and cranny, not to mention all the locals and their stories. But it’s lost on me. The boat’s motor is loud, and wind is whistling through my ears, until I catch a fragment.

“You pull what?” I ask.

“We pull our prawns right over there. We’re having them for supper!”

I’d heard tell of Spot Prawns in Toronto, decades back, when trendy chefs first jumped on this wild, BC treasure. Once or twice I’d seen them dancing inside live tanks in Chinatown, looking more like insects than fish. But it was on Dan’s boat where I learned the little critters walked into baited traps plunged at least 200 feet below, the rope’s end marked in the choppy waters by a bright buoy.

One hot summer day we went with Dan’s family for an exciting “pull” as son Hogan tugged the cage trap out of the water, grabbing the rope hand over hand, predicting (or boasting) a good haul of “at least 60”.

Hogan guessed it right but took no interest in the gruesome act that followed: On-site head removal. His nine-year-old sister Naomi was a seasoned pro, twisting them off briskly with each snap of her wrist, tossing dislocated craniums into the sea over her right shoulder as her left hand dropped  still squirming, headless prawns into a pail of sea water at her feet.

Dinner was an intoxicating feast of lime and cilantro marinated shell-on prawns, flash-fried for two or three minutes until perfect pink by chef Annabelle in the kitchen her father had designed, every wall another floor-to-ceiling window overlooking DeCourcy’s rocky coast and glistening sea below.

Once Insulation Guy and Dan’s prawn pull had whetted our addiction, David and I began to search for more sources.  We went on a road trip to French Creek Seafood Ltd and gasped at the price of their retail prawns, double the easy $20 cash asked by the First Nations fisherman with a freezer chest in the parking lot. Closer to home, we scoured the commercial fishing docks at Cowichan Bay and came upon a boisterous, beer drinking bunch just finishing a day’s work.

They had nothing to sell, yet were full of empty promises, “Tomorrow. Same time!”

(Nada. We were dumb enough to return.)

Prawn-duped time after time, David and I finally met our culinary saviour. Bugs.

I won’t tell you his first or last name or where he pulls them… or how. After four, newbie years on V.I., we have come to learn some of the island’s food codes.  We abide faithfully, if we want to stay sated.

Once in a while Bugs’ unidentified wife hands me a parcel the size of a basketball, tightly taped  in a sheet of foamy PVC then she winks. These prawns are headless and packed in solid ice, all curly and brown-pink. They take a few hours to thaw in my sink, surrounded by water in a silver bowl.

Photo by Emma Barrett

It’s an easy shelling endeavour when both David and Krystal dig in to help. I suggest leaving tails on but am quickly out voted. The shells are surprisingly prickly, a reminder of their wildness, like blackberries. Each have bright white spots on the first and fifth abdominal segments, according to BCprawns.ca and a translucent red-orange carapace with white stripes on the thorax. And this fun-fact: Every spot prawn starts life as a male and transitions to female in its fourth year- a piece of trivia worth dropping among LGBTQ circles these days.

Spot Prawns have 10 pairs of legs, five for swimming and the rest for walking, all of which come in handy when escaping an octopus, one of their biggest predators. Human predators, whether it be recreational harvesters like Bugs or eager eaters like me can eat prawns raw or cooked. Many prawn aficionados insist on cooking in the shell to enjoy a moist and juicy feast. There are dozens of ways to prepare this delicacy but we all agree on one vital standard: the shorter the cooking time, the better.

Photo by Emma Barrett

Which leads me to stir-fries and the wisdom of Cantonese cuisine when it comes to seafood. Think freshly grated ginger, cooking wine, a little garlic and fermented black beans. These babies have a salty bite and depth of flavour that magically enhances each sweet Spot Prawn mouthful. Luckily, Lee Kum Kee in Hong Kong bottles black bean and garlic sauce and it’s easily sourced in most supermarkets. But user beware. Fermented black beans from a bottled garlic sauce or in dried form can overwhelm. Start small. You can always add more afterwards when tasting for seasoning.

Oh, and another thing — Never ever divulge more than the code name of your Spot Prawn supplier on your blog unless you really want to express deep gratitude to Bugs, in a local Vancouver Island kind of way.

madofood.com/…inese-braised-pork-belly/ ‎

Spot Prawns in Black Bean Sauce

The trick to a great stir-fry is to cook the protein and vegetables separately, combining both at the finale with lots of built-in sauce.  BC Spot Prawns or shrimp are juicy and firm when quickly flash-cooked but toughen and dry out with every crucial minute of over-cooking.  Serve this over steamed rice or rice noodles. It also works as an Asian baozi filling.  Serves 4.

2 tbsp  neutral oil, (ie canola, sunflower, safflower)

2 yellow onions, cut into 1/8ths

3 sweet bell peppers, green, yellow, red, tri-colour, cut into 2-inch chunks

1 tbsp neutral oil

2 lbs Spot Prawns or shrimp, shelled

3  garlic, finely grated or pressed

1 inch pc fresh ginger, finely grated

2 spring onions, cut into 2-inch chunks

1/4 cup sherry

1 tbsp black bean and garlic sauce OR ¼ cup fermented dried beans

1 tsp soy sauce

1/2 cup stock or water

¼ cup chopped fresh coriander

Heat oil in a large wok over high heat, add onions and peppers and stir-fry at high for 3-5 min or until seared and tender.  Transfer to a plate and reserve.

Using the same wok over high heat add oil, garlic and ginger. Stir fry for 30-60 seconds, add spot prawns, cooking until just done. Use spatula to create a well in the wok, add sherry, black beans or sauce, soy and stock or water.  Stir 30 seconds, incorporate spot prawns and reserved vegetables. 

Serve immediately, garnished with chopped coriander.

Kale Winter salad

Kale winter salad


Whenever I find leftover cooked vegetables in my fridge, I like to incorporate them into a salad. Squash pairs beautifully with baby kale and apple gives this crunch. Toasting the pecans and seeds makes it even better!

6 cups baby kale
1 cup chopped apple
1 cup roast squash (acorn, butternut or kabocha), broken into bite-size pieces
¼ cup dried cranberries

Dressing
¼ cup olive oil
1 tbsp white balsamic vinegar
1 tsp honey
½ tsp lemon juice
½ tsp Dijon mustard
Salt
Freshly ground pepper

2 tbsp pecans
2 tbsp sunflower seeds
2 tbsp pumpkin seeds

In a large salad bowl, toss kale, apple, squash and dried cranberries.

In a small jar, combine dressing ingredients, close with lid, shake to emulsify and taste for seasoning.

Pour over kale and sprinkle over with pecans and seeds.

Halibut Cheek Curry made with Cow-Op Love

Every day, we count our blessings to be living here in the Cowichan Valley on Vancouver Island. This is a food zone and an agricultural oasis. Our neighbours have farm stands, cows amble in nearby pastures, tractors slow down Herd Road traffic and grapes course through vineyards framed by mountains and mist.  Bounty-filled farmers’ markets can be found all over the valley  but during these pandemic times, lines are endlessly long due to Covid protocol.

Luckily for those of little patience, we can shop online at the wondrous Cow-Op where an incredible catalogue of local items, from kale to duck liver paté to garlic seed bulbs are posted for purchase.

Due to the immediate freshness of these orders, local vendors update the site weekly with prepared, frozen or just-harvested items which go live on the site every Thursday until midnight Monday.  Orders can be picked-up in Duncan and Victoria, or delivered.

Once we’d picked up our first order, David and I were hooked. Thursday trips to Hope Farm in Duncan were a charm. The farm is littered with ramshackle chicken yards and coops, mountainous rows of kale and Brussels sprouts and a large, empty, funky old barn where we pick up our order.

In June, we walked off with a box spilling over with luscious heads of green butter and red oak lettuce from Lenora Bee Apiary and Farm, bags of freshly milled rye, Einkorn and Neepawa flours from True Grain and small bundles of chèvre and Tomme de Vallée from Haltwhistle Cheese Company.  After sourcing my order from freezers and refrigerators scattered through the cavernous barn, a Cow-Op staff pointed to a tray of heirloom tomato starts on the ground nearby.  “Take me home” said the sign and I walked away with a slightly forlorn, but not forsaken Mountain Merit  heirloom tomato seedling that is still producing on my back porch.

While Thursday afternoon Cow-Op pickups have become the highlight of this foodie’s week, I don’t always remember to put in my order by the previous Monday night deadline.

Last week I not only remembered but found food goddesses by my side as I gently defrosted a package of frozen Halibut Cheeks from Drift Meat and Seafood.

I had curry on the brain. It started with stained fingers after grating fresh turmeric then ginger. Fragrant wafts of onion and garlic filled the kitchen, heightened by whole cumin and fennel seeds thrown into the mix.  I found two ripe Mountain Merit tomatoes and another opportunity for my tomatillos that are growing like a rash through my beds right now.

Even though I’ve de-husked a hundred this fall, each and every tomatillo makes me smile.  Once their papery wrapping is off, these little green orbs have a sticky coating that adheres like glue until rinsed off. Tomatillos taste like unripe, green tomatoes with a twist of lime, perfect for these soft halibut parcels infused with the flavours of the Cowichan Valley. Thank you Cow-Op for bringing it all to the table.

Halibut Cheek Curry

Inspired by my purchase of frozen halibut cheeks at the Cowichan Green Co-op, this curry is also perfect for tilapia, sole, spot prawns, shrimp or scallops. The trick to great seafood is to cook it ever so lightly until just done.

2 tbsp coconut oil

2 tsp whole cumin seeds

2 tsp whole fennel seeds

¼ tsp cayenne

1 large onion, chopped

1 tsp ground turmeric or 2-inches fresh, finely grated

1 large garlic clove, minced

1 inch fresh ginger, finely grated

2 medium tomatoes, chopped

4 tomatillos, chopped

2 fingerling or small potatoes, chopped

1 cup water

4 halibut cheeks, aprox

1 tsp salt

Freshly ground pepper

¼-1/2 cup chopped fresh cilantro

Heat oil in a large saute pan at medium high.  Add cumin, fennel and cayenne, cook 1 min. Add onion, turmeric, garlic and ginger and continue cooking until the onions soften.  Add tomatoes, tomatillos, potatoes and 1 cup water. Bring to a boil then gently simmer, covered for 10-15 min or until potatoes are tender.  Add more water if the sauce seems dry.  Add fish and gently simmer/poach covered until just cooked, about 3-5 min. Season with salt and freshly ground pepper. Garnish with chopped, fresh cilantro.

All the babka in my life

Babka and I go way back, starting with my Jewish husband. He loved a good, dry cake. Both Don and his father Frank were of that persuasion.  Cake was best when it was dry,  crumbly like desert sands and bought at a deli bakery, of course.

The deli in West Palm Beach sold Don’s ultimate babka. We would stand in early bird lineups at 5 p.m. with my in-laws, demoralized to be part of what we jokingly referred to as “the blue rinse hour” for dinner.  

My mother-in-law Ethel wasn’t a cake eater.  Diabetic, she approached eating with cautious deliberation.  

“I like it bland,” she often said.    

Needless to say, food didn’t play a pivotal role in the Nausbaum family as it might in many other Jewish households. Celebrations were also kept minimal. Ethel used to mail Don a modest birthday check or a boxed shirt from Target.  One year she uncharacteristically asked her adult son what he would like to receive for his birthday and Don didn’t miss a beat.

“I want a babka from your deli, Ma.  It’s too good to be true.”

“What? A babka. That’s ridiculous, Don.”

“Ma, I want a babka. I want a babka from your deli. Fed Ex it to me.” 

I’m not sure what bothered Ethel more, the price of an overnight courier from West Palm Beach to Toronto or her son’s unbridled decadence. But she caved.  He was her only son (and a charmer, to boot).   

“How was the babka? Did it arrive?  Did you like it?” she asked on his birthday.  

“Did I like it?” he scoffed, “Ma, this babka is unfriggin’ believable. I’m going to get another slice right now and eat it while we talk long distance.”  

“Don’t. I can’t stand listening to you eat and talk at the same time.”

“But it’s my birthday!”

Don chuckled,  his mouth crammed full of babka. The crumbly streusel topping sprinkled all over his goatee. He’d already given up on a knife and was ripping the cinnamon-scented, cakey interior apart, moaning in appreciation and smacking his lips loudly.  

“You like it too much,” Ethel said. She was disgusted.  “I’ll never ever Fed Ex you a babka again!” 

She kept to her word and Don’s babka delivery landed squarely in my lap. But I was a Canadian goy who knew nothing about babka baking. Sure, I had done a little food research, happily trailing alongside Don to  Jewish delis in Florida, Long Island and the Lower East Side of Manhattan but not once had I set eyes on a Toronto babka until Don brought home a specimen from the Harbord Bakery. 

He ate one slice, winced, then threw the remainder out.

“It’s up to you, Mado,” he sighed.

Earlier in our marriage, I’d attempted chicken liver spread and was defeated.  Before that, it was the world’s oily-est latkes. Now I had to bake some dry, tasteless coffee cake?  I turned to one of the first cookbooks dedicated to Jewish baking and made a listless facsimile. 

“Inedible” said Don after the first bite.

So babka became a family joke.  A reverie about Ethel and  a guffaw over the Seinfelt segment where Constanza sweats bullets tugging a stolen babka into his apartment window with a rope and pulley.

Then, as beloved things often do, babka came back. Don passed away and left a big piece of babka in his son’s pulsing heart. It helped, too, that Nick’s stepsister Emma is a gourmet sleuth. She found (not a Sahara version) but a sinfully sweet and gooey chocolate babka at Toronto’s Pusateri’s bakery. Somehow she knew that Nick would want that for his birthday. In no time at all, babka was forefront on our mother-son baking list and Rosha Shanna 2020  seemed an apt moment to create Don’s cake.  

When Nick and I bake, I always learn something.  I start off as Mom Expert and he quietly models a better alternative. Like parchment paper. Babka demands it and I was eager to try cookbook author Mairlyn Smith’s technique: Cut a large swath, run it under water, scrunch it up, wring it dry and fit it into the pan. Yes, this technique moulds around the insides of a loaf pan but Nick’s idea was better – cut vertical and horizontal panels to fit the pans. Not only does  it look more professional, but if you allow for a few inches of overhang, you’ve got handles to lift out your cake effortlessly.     

A beautiful babka means whirls of marbled dough, twisting and turning before your hungry eyes. To achieve this, challah dough is rolled out into a rectangle and spread with a yummy interior of melted butter, dark chocolate and a LOT of freshly ground cinnamon. You roll it up as tightly as possible, take a deep breath and do the unthinkable: cleanly cut this pliable, warm, puffy roll of dough in half, lengthwise. I was certain a serrated knife would do the trick but no sooner did I execute this cut then it caught, pulled and messed up the chocolate spread’s definition. 

Nick used a metal bench scraper and cut it in three clean swoops. Do like Nick does and let this babka become someone you love’s birthday cake, too.

THREE CHOCOLATE CINNAMON BABKAS

A batch baker by trade, I won’t develop a recipe for less than 2 loaves. This one comes with a  bonus babka! Not dry at all, these glossy beauties are made moist by a special ending in which you lavishly baste with a sweet, wet syrup as soon as they come out of the oven — an unthinkable flourish to Don and his father Frank. Makes 3 loaves.

Challah Dough

2 1/4 cups   milk, warmed in microwave (at high, 1 min)

1 TBS   instant yeast

3   eggs

5 TBS   vegetable oil

4 TBS   honey

1 TBS   vanilla extract (we used a vanilla bean, sliced it lengthwise and scraped the seeds in)

8 cups/ 2 lbs 6 oz   organic unbleached bread flour

.6 oz   salt

Put warmed milk, yeast, eggs, oil, honey and vanilla in mixing bowl and blend with whisk attachment until frothy.

Add flour and salt into mixing bowl and knead with dough hook for 8 min. or until the dough pulls away from the bowl and creates a smooth ball. This is a sticky, enriched dough.  If it pools around the bottom of the bowl it may need extra tablespoons of flour during the last two minutes of the mix to ensure the dough pulls away from the bowl.

Place in a large plastic, oiled tub or covered bowl and let it rise until doubled at room temp, aprox 2 ½ hrs. (Or simply refrigerate immediately and leave to rise overnight or up to 48 hrs)

Babka filling

4 1/2 ounces (130 grams)     dark chocolate, Callebaut, 55%

1/2 cup (120 grams) one stick        unsalted butter, cold is fine

Put in a glass bowl and heat in microwave (1 – 1 1/2 min.)

1/2 cup (50 grams)       icing sugar

1/4 cup (30 grams)       ground cinnamon

Add to melted chocolate.

Line loaf pans with parchment, like Nick does.

Divide dough into 3 pieces.

Roll one piece out on a well-floured counter to about a 10-inch width (the side closest to you) and as long in length (away from you) as you can when rolling it thin, likely 10 to 12 inches.

Spread one-third of chocolate mixture evenly over the dough, leaving a 1/2-inch border all around. Brush the end farthest away from you with water. Roll the dough up with the filling into a long, tight cigar. Seal the dampened end onto the log.

Cut the log in half lengthwise with a metal bench scraper, like Nick does.  Lay one piece over the other, cut sides up, at the mid-line, creating an “X” then gently twist the ends. Gently place the twist into a loaf pan, doubling it over itself if necessary. Repeat 2 more times. Cover all the pans with oiled plastic or a towel. Let rise until doubled, about one hour.

Heat oven to 375°F 30 minutes before the bake. Beat an egg in a small bowl. Baste babkas with egg just before baking. Place loaves in the middle of the oven and bake 30 minutes. 

While babkas are baking, make syrup,

1/3 cup water
6 tablespoons (75 grams) granulated sugar

Heat in microwave

As soon as the babkas leave the oven, brush with syrup. Use it all up, as this creates a glossy, moist finish.  Let cool about halfway in pans, then transfer to a cooling rack.


Cardamom Buns

Cardamom Buns

Mado’s Basic Challah Dough

It’s basic because you can use it in various ways, from cardamom to cinnamon to hamburger buns to challah loaves yet it veers from the norm with the addition of whole wheat flour and the development of a sponge starter, first.

Sponge Starter

2 cups warm milk

¼ cup canola oil

¼ cup liquid honey

2 eggs

2 cups organic, unbleached all purpose flour (I like President’s Choice)

1 cup Red Fife or whole wheat flour

1 tsp instant yeast

In the bowl of a large KitchenAid mixer, using the whisk attachment, combine milk, oil, honey and eggs until smooth. Add flours and yeast and mix until combined, using the paddle attachment. Cover the bowl with plastic wrap and leave at room temperature for two hours until the mixture is bubbly and puffing up about 20 per cent. (With a little imagination, the surface should look like a sponge.) If desired, you can make the sponge ahead and store in the fridge up to one day in advance.

3-4 cups organic, unbleached all purpose flour

1 tbsp kosher salt

Remove wrap and add 3 cups of the flour to the bowl and salt. Using the dough hook, mix the flour for about 6 minutes at med-low speed, gradually adding more flour, tablespoon by tablespoon until the dough no longer pools at the bottom of the bowl and gathers around the dough hook. Transfer the dough to an oiled, large bowl or dough container, cover and let rise at room temperature for 2 hours or until doubled. IMG_8443 Make the filling

1 stick room temperature unsalted butter

½ cup packed brown sugar

2 tbsp ground cardamom

In a small bowl, mash the butter, sugar and cardamom until smooth. Once the dough has finished its first, two-hour rise, transfer to a lightly floured surface, shape into a loose ball and leave to rest 5 min.

Dust with flour and roll out to a 24 in x 24 in square. Spread the filling evenly over rolled out dough, then fold in half, pulling the far edge toward you to cover the butter mixture.

Cut two thin (1/4 in) slices of the dough, gently twist together and lengthen like a rope then knot. Place on a parchment paper-lined baking sheet and cover with a tea towel. Repeat.

Preheat oven to 400F and let rise, covered with a tea towel or oiled plastic wrap for 45 min.

Baste with egg wash and sprinkle with coarse or pearl sugar. Bake for 15-18 min, or until golden brown, turning baking sheets halfway through the bake.

© 2014 Madeleine Greey

Spicy Laotian Chicken Salad

Larb Gai (Spicy Minced Chicken Salad)

This warm Laotian salad served on a bed of cool crisp lettuce is salty, sweet, sour and hot. Ground roasted rice gives it a delectable nuttiness. 

 1 tbsp raw Thai jasmine rice

1 lb ground chicken

1/3 cup  lime juice

2 tbsp vegetable oil

1 tbsp minced shallot

2 green onions, chopped

1- 1 1/2  tsp chili flakes

2 tbsp chopped coriander

2 tbsp chopped mint

1/4 cup fish sauce

4 Romaine or leafy lettuce leaves

4 wedges cabbage

4 Yard-long beans or 12 green beans, trimmed

In a small dry frying pan on high heat, saute rice grains 2-3 minutes or until golden brown. Transfer to small bowl and cool.  Grind finely in a coffee grinder or spice mill.

In a medium bowl, combine ground chicken with 2 tbsp of the lime juice.

Heat wok on high heat.  Add oil, swirl around sides of wok.  Add chicken and stir-fry until no longer pink about 4 minutes.  Transfer to medium bowl.  Add ground roasted rice, shallots, green onion, chili flakes, coriander, mint , remaining lime juice and fish sauce.   Mix well.Arrange lettuce leaves on serving platter and place chicken mixture on top.  Arrange cabbage wedges and green beans around the chicken.

Tomatillo Salsa Verde

You’ll find fresh tomatillos at Farmers’ Market now, wrapped in their papery husks. Inherently sour, tomatillos make a piquant salsa that can still take a squeeze or two of lime juice. A wonderful item to can. Simply multiply by 6 to create a large batch that will keep your pantry full of salsa all winter long. 


2 tbsp coconut oil 

½ red onion, chopped

1 large garlic clove, chopped

12 tomatillos, quartered

½ tsp salt

¼ cup water

1-2 tsp dried chili flakes

1 tbsp sugar

2 tbsp fresh lime juice

¼ cup chopped fresh cilantro


Heat oil in a medium saucepan and saute onion and garlic until soft and fragrant. Add tomatillos, salt, water and chili flakes and simmer 10 minutes, covered until tomatillos turn light green and sauce thickens. Season with lime juice and garnish with cilantro. Makes 1 cup.

Almond Biscotti

Almond Biscotti

I really can’t live in a house without biscotti. They are my go-to cookie and a welcome gift to friends and family . Thanks to the double bake, they store for weeks, even months in a closed glass container and travel well on airplanes and road trips.

Biscotti Batter:

1 1/2 cups whole, raw almonds

1 ¼ cup organic all purpose flour

1 ¼ cup organic soft whole wheat flour or spelt

1 1/4 cups organic granulated sugar

2 tsp baking powder

1/2 tsp salt

4 large eggs

3 tsp vanilla

The Finishing Touches:

1-3 tbsp flour (for rolling out logs)

1 tbsp organic granulated sugar

Preheat oven to 350 ° F.

To toast almonds, arrange on a baking sheet and bake for 5 minutes.

In a large bowl, combine flours, sugar, baking powder, and salt. Use a whisk to mix thoroughly.

Whisk eggs and vanilla in bowl of an electric mixer until frothy. Use the paddle attachment to mix in flour and sugar mixture.  As soon as the dough clumps around the paddle, add toasted almonds and mix until just combined.

Dust countertop with flour. Line two large baking sheets with parchment paper.

Spoon out one quarter of the sticky dough, dust lightly with flour and working quickly, roll into a 8-10 inch log. Transfer log to baking sheet. Repeat 3 times.

Sprinkle sugar over logs with pinched fingers.

Bake for 30 minutes or until biscotti logs are golden and firm. Completely cool logs on a rack for at least 30 min.  Using a serrated knife, cut crosswise into 3/4 inch wide slices.  Arrange cut side down on baking sheets and return to 350 oven for 10-15 minutes or until golden-brown and crisp.

Chiang Mai Noodle soup

This is a dreamy Thai noodle-soup dish, famous in the northern city of Chiang Mai. The addition of turmeric gives it rich colour.  Delicious with chicken but also great with shrimp, or a mixture of both. Noodles can also be switched up. Fresh egg noodles found in Asian supermarkets are the classic addition, but dried thick rice noodles are perfect, too. 

Serves 6

2 tbsp vegetable oil

1 tbsp chopped garlic

1 sweet red pepper, diced

1/2 cup coconut cream 

3 tbsp red curry paste

1 tsp ground turmeric

1 3/4 cup coconut milk

3 1/2 cups chicken stock

15 basil leaves

2-3 chopped bird’s eye chillies

3 tbsp fish sauce

2 tsp sambal oelek chili sauce 

1 tsp sugar

1/4 tsp salt

2 lbs. boneless chicken breast, thinly sliced or shrimp, peeled and deveined 

3 tbsp lime juice

1/2 lb Chinese egg noodles or rice noodles

1/2 cup chopped fresh coriander

4 green onions, chopped 

In a large pot on medium-high, heat the oil.  Add garlic and stir-fry 30 seconds or until golden. Add diced red pepper and stir-fry 2-3 minutes or until tender.  

Open the can of coconut milk and gently spoon off half a cup of the thick cream on top into the pot.  Warm the coconut cream at medium-high, whisk in curry paste and turmeric and continue to whisk until coconut cream starts to separate slightly and glisten with oil.  Add remaining contents of coconut milk can, chicken stock, basil, chillies, fish sauce,  sambal oelek, sugar and salt.  Bring to a boil, then simmer.  Add chicken or shrimp and cook gently until it is just cooked through. Remove from heat and stir in lime juice.

In a large pot of boiling, salted water, boil egg or rice noodles for 2 minutes or until just tender.  Drain.  

Place one-sixth of the noodles in each bowl and ladle over with hot soup.  Garnish with coriander and green onions.


Asian bbq’ed Chicken

Asian BBQed Chicken Thighs


While chili paste is an essential ingredient of this marinade it does not produce a spicy chicken thigh.  Trust me.


¼ cup         soy sauce

½ cup         cooking sherry

1 tbsp         sesame oil

1 tsp sugar

1 tspsambal oelek * Optional but highly recommended

1 inch knob ginger, grated

2 garlic cloves, pressed or grated  

8       skin-on, bone-in chicken thighs


In a bowl, combine soy, cooking sherry, sesame oil, sugar, sambal oelek, ginger and garlic. Pour over chicken thighs (I like to marinate in a glass casserole with thighs in a single layer). Marinate for at least 30 min and up to overnight, in the fridge.


Barbecue thighs on indirect heat (as described above) for 30-40 minutes or until juices run clear and meat is thoroughly cooked.

Making Gnocchi with the boss

It’s a cold winter night in Toronto.  I’m about to  drive over to Rocca’s for dinner, but text her first.

“Get three to four medium at No Frills,” she instructs.  We need Yukon golds.     

When I arrive, their house oozes Puglian warmth.  Randy says “You don’t have to knock” and Rocca calls from upstairs, saying “Do you want some slippers?’  

She enters the kitchen and pulls out the pasta board.  It’s two feet by two feet, thick plywood with a lip that catches under the table.  Her father, or Nonno to the grandkids,  made it for her.  

Nonno will turn 95 next Sunday.  They want to celebrate at a restaurant but he asks  his daughters to make him cavatelli, his favourite pasta.

“Handmade pasta for 25 people,” says Rocca shaking her head and muttering Puglian swear words.     

But tonight, the pasta is gnocchi.

“I’ll get started while you have some wine and cheese,” says Rocca.

Randy is dangling a large breast and nipple from a string.  It’s a cheese called Caciocavallo and  the size of a small cantaloupe. 

“Our annual Father’s Day cheese,” he laughs, an impish grin spreading across his mug. I nibble on slices with baguette and knock back some Rosso while Rocca deftly peels the potatoes, cuts them into quarters and boils in salted water.

“I’ll demo the first batch, then it will be your turn,’” she announces. 

Oh boy.

She measures out two cups of organic, unbleached all-purpose flour and piles it on her papa’s pasta board. With a flick of her right hand, she swirls a hole in the middle, creating a powdery volcano waiting for liquid. I spoon chunks of hot, cooked potato into her ricer and she squeezes, mightily, creating a rainfall of potato strands. 

The essence of these gnocchi – hot steaming Yukon gold potatoes – slips and wafts through the kitchen air. We share a satisfied cooking smile.  Rocca taps a free run Omega 3 egg on a bowl’s edge and we both go “ahhh” over the yolk’s deep orange-ness. 

She sprinkles the flour and potato mound with salt.  I ask how much and she mutters “Normale”.  

She wields a bottle of olive oil and pours two large glugs into the mound, creating golden streaks and streams throughout. I ask how much and she shrugs her shoulders, too busy to fuss over measurements. 

Then she does something that makes this recipe writer crazy: she slides the beaten egg into an empty measuring cup and pours reserved (and cooled)  potato cooking water into it up to the one cup line. 

As I sigh in frustration, Rocca clutches a quarter dry measure and twice she scoops up egg and potato water mix sprinkling it over the potatoes, flour, salt and olive oil. Using her bare hands, she mushes it all together (I recommend a dough scraper). It doesn’t coalesce into a good clump so she adds another quarter cup of egg and potato water. In seconds, it transforms into a hot, soft dough, pliable and warm.  The perfect spot between sticky and dry. We cut off a half cup chunk and roll it into a snake, then cut of half-inch pieces she calls “chicklets”. 

“Do you want to cut chicklets or roll out the gnocchi?”  

While the former sounds easy, I know I need practice rolling. She has a small wooden board, the size of a large smartphone that is corduroy-ed, with narrow slits, and she demos how to roll a piece of gnocchi dough  along this surface. One deft move and “Voila!” it’s a cute little roll with ridges.

Fast forward 18 months. Rocca is at the gnocchi helm again, this time in the Cowichan Valley bossing David and me.  We stand at the counter each with a pile of PC “OO” (doppio zero)  flour before us. We blend in cooked and riced BC-grown yellow potatoes plus potato water mixed with egg. A soft, warm dough forms instantly and we knead it ever so briefly. We start to cut dough chunks, roll out dough snakes, cut into chicklets and press against the gnocchi board.  It takes a skillful hand but Rocca won’t do it.  She says “your job” and David and I steal competitive glances at each other’s work. 

We fill two baking trays with our ridged dumplings.  Rocca cooks them in hot boiling salted water, plunking them in and lifting them out with a slotted spoon, the second each gnocchi bobs to the surface indicating doneness. Cooked gnocchi slide into a bath of ice cubes and cold water in order to halt cooking. Later they are drained en masse and drizzled with lots of olive oil. Their final destination is a good sauce.

I happen to have one. Braised short ribs. 

In Duncan I am able to find huge, fat short ribs at Thrifty’s supermarket.  (In Toronto, I’d have to order them from a butcher since they never look this fat and ample in supermarket meat counters.) 

We heat up my sauce in a large deep skillet, add the gnocchi and warm everything gently while someone grates Parmigiano-Reggiano and finds our sacred, big jar of Puglian hot peppers in oil. 

Gnocchi is best served as a first course, or primi. It’s filling. Just two ladles full is ample for most. Rocca smiles in approval after she takes her first bite. The gnocchi are soft, delectable pillows bathed in an unctuous sauce, bedecked with parmesan. 

Rocca’s Gnocchi


While Rocca prefers the counter technique for creating the dough, you can also mix everything in a large bowl. If you don’t have a gnocchi board, Rocca says it’s ok to leave as half-inch chicklets simply cut from the rolled dough. 


3-4    Yukon Gold or yellow-flesh potatoes, peeled and quartered

2 cups        flour, all-purpose or “00”

1 tsp sea salt 

1       egg

2 tbsp         extra virgin olive oil


Bring a large pot of salted water to boil and cook potatoes until tender but not crumbling. Reserve a cup of cooking water before draining potatoes. Mound flour on the counter and create a well in the middle. Sprinkle over with salt.  Once the potato water has cooled enough not to cook the egg, crack the egg into a glass measuring jar and fill to one level cup with potato water.  Mix.  Place potatoes in a ricer (if you don’t have one, grate them) and drop potato shreds into the flour well. Pour over ½ cup of egg/potato water and olive oil and mix into a dough, using a scraper or a spatula. Add another ¼-1/2 cup of liquid if needed to create a soft pliable dough. Roll and form gnocchi.


Heat a large pot of salted water to boil, gently add gnocchi.  When gnocchi float to surface, remove with a slotted spoon and place directly in heated sauce or into an ice bath to cool.

in

Mado’s Short Rib Pasta Sauce


Preheat oven to 350 F


3 tbsp olive oil

2 large cooking onions, chopped

2 large ribs celery, chopped

2 tsp dried thyme

Salt


Heat oil in large Dutch oven, cook onions, celery and dried thyme with salt until soft and caramelized, about 5 minutes.  Set aside.


Use the same pan to heat another 2 tbsp olive oil on high and brown


3 lbs short ribs (3-6 pieces)   

Seasoned with salt and pepper


This takes about 3 min per side, total about 12 min. Set aside


Deglaze pan with 1 cup red wine (Shiraz/Syrah) scraping up all browned bits. Add  sautéed onion mixture and  


Add

1/2 tsp dried chili pepper flakes

½ cup dried porcini or shiitake mushrooms, finely crumbled 

1 cup passata (pureed tomatoes, favourite brand is Mutti sold in tall glass jars) 

3 crushed garlic cloves

Handful basil leaves, chopped

1-3 tsp sea salt 

Lots of freshly cracked black pepper

Fill with water to just cover the ribs


Place a sheet of parchment over the surface, cover and bake at 350F for one hour, reduce to 325F and cook 2 more hours. Meat should be falling off the bones. Allow to cool (preferably overnight in the fridge). Skim fat. Remove bones and tendons. Shred meat gently.

Continue reading “Making Gnocchi with the boss”

Sourdough Blackberry Lemon Muffins

I have a bit of a reputation. Some people call me a seed stealer.  I prefer the term  “forager”.

It all began in my tender years of five or six when I trailed alongside my Mom and brother walking along Muskoka roads lined with raspberry bushes. We held cardboard pint boxes in our little hands and were encouraged to pluck the red, ripe ones that slipped off the white core easily. There were thorns to avoid and lots of scratches to our bare legs and arms. The sun was beating down and sweat covered our brows. But boy oh boy, did those berries taste sweet. I ate nine out of every ten berries I picked, filling my box at a snail’s pace, but without a care. This was a hunt and I was hooked.  

My mom had to tear me away from the berry thicket and throw all my berry stained clothes into the wash. We never picked enough for the pies or jams we talked and dreamed of. In fact, my berries barely covered the bottom of my box but were  just enough for tomorrow’s breakfast bowl of Rice Krispies and cream. 

Decades later, I found myself walking down a road in Grass Valley, California with my sister-in-law, Nora until I stopped dead in my tracks. I was receiving heavy signals from my personal berry radar.  

“Are those blackberries?!” 

Nora couldn’t feign an ounce of interest. It was devilishly hot in the dry August sun and she was parched, needing a cool glass of water back home– which was not in the direction I was pointing. 

“You can’t do that!” she screamed as I hopped down into the ditch, climbing towards a flimsy fence separating me from my bounty.  It was easy to climb under and I did, rewarded by a thick cluster of fat, juicy berries.

“Stop Mado, it’s private property,” she yelled as I dove into her neighbour’s field. I pulled my black shirt out like a hamper and dropped the berries in by the handful. They were three times the size of an Ontario blackberry and as sweet as can be. The proliferation stunned me.  I’d never seen so many ripe, blackberries in my fruit-loving life.  

To keep the family peace, I crawled back under the fence obeying my sister-in-law’s admonishments while offering her a handful of the stolen goods. 

“Huh, what are these?” She held one berry in her fingers, brought it before her nose, inhaled,    opened her mouth, popped the berry in and started to moan, loudly. 

I’d found an accomplice. 

The following day we returned to the field armed with empty yogurt containers, filling two each in no time. That evening we dined on my first and most memorable pie. Pure blackberry pie.  I’d never made pie pastry before and somehow fashioned a semblance  with flour and shortening found in the back corners of her cupboards. I filled it with our black bounty, fresh from the pick but already leaking juice, crushing the bottom berries with its weight.  

I had set the oven at 425 F and in 10 minutes it had not only preheated but was rumbling like a coal fire.  I opened the oven door and felt a blast of heat so outrageously hot, I trembled in fear, offering my sweet berry pie to this monster. I waited five minutes and wisely turned off the oven, realizing the oven thermometer was broken, fearing my pie would explode in a ball of lava if I didn’t stop the oven’s frenzy. 

Remarkably, those free California blackberries and a broken oven thermometer was all I needed to make the most flaky, golden, berry-filled perfect pie of my life. Many have followed but none, thankfully,  with as much drama. 

I’m still a forager and a seed stealer dividing my time between downtown Toronto and rural BC. I am apt to walk down Logan Ave with a small set of scissors and surreptitiously snip off some morning glory seeds I have been watching dry throughout the fall.  Recently I filled my pockets with sweet pea pods at a Duncan community garden, knowing the owner would consider me a seed-saver, not a thief.  I expect the folks in the cars lined up at our Starbucks drive-through think the same when they see me roll down my window and pull a handful of brown and dry Cosmos flowers into the car as I wait for my latte order. 

It’s all Ling’s fault.  She asked me what those purple and white Cosmos flowers were growing in Riverdale gardens in the 1990s.  I didn’t know their name, then.  I asked her why she cared and she slipped a hand into her jeans’ pocket and revealed a mess of crumbled brown seed heads. Next, she scribbled “Purple Flowers” in Chinese on a piece of paper, put the seed heads in the middle and folded an instant, origami paper envelope. 

“I brought seeds from Shanghai,” she said proudly. I knew then that any refugee fleeing their homeland who cares enough to pack seeds for the escape was exactly the kind of garden guru I wanted to learn from.  Ling taught me not only seed saving, but how to root cuttings and separate clusters of African violets. 

So are we thieves or stewards of the earth?  I like to think the latter.

That’s why I came up with this muffin recipe.  It combines the best of The BC Forageables – blackberries —  and uses up sourdough that is normally discarded. A double save!  

Sourdough Blackberry Lemon Muffins


1 1/4 cup            all purpose, organic

½ cup                            whole spelt

1 tsp                    baking powder

1 tsp                    baking soda

1 tsp                    salt


1 stick                           unsalted butter, room temp

2/3 cup               refined sugar

2                          eggs

Zest                     of one lemon

100 gm/3.5 oz              sourdough discard


2 cups                           frozen blackberries

3/4 cup                sour cream/yogurt


Preheat oven to  400F. 


In a medium bowl combine or sift all purpose, spelt, baking powder, baking soda and  salt. 


In a mixer, cream butter with sugar until light and fluffy. Mix in eggs, one at a time. Combine lemon zest and gently fold in sourdough discard.


In medium bowl, toss frozen berries with 1 tbsp of flour mixture


Fold in half of the flour mixture and half of sour cream, then repeat.  Gently add blackberries in flour. 


Divide mixture using an ice cream scoop or 1/4 cup dry measure into 12 muffin cups.  


Bake 20-25 min or until golden and  tester comes out clean.

Savoury Beet Tartlets

Nothing like plunking a few dice of freshly cooked beets and a crumble of goat cheese into a pastry tart to watch the colour slide and ebb through an egg custard creating these beautiful little appetizers that are almost too pretty to eat.

But you will gobble them up for they pop on the palate even louder than their good looks show off on the platter. 

This is super easy to prepare if you use frozen pie tartlets.

It’s also easy to make your own dough in a food processor.  I like to keep a chunk or two of dough on standby in the freezer, ready to defrost and be at the ready.

David is our in-house pastry chef.  He has the light touch and uber patience needed to create a flaky pretty crust. He also gets the mechanics of lattice work for our Thanksgiving apple pies and stencils actual maple leaves on top.

Wrong season.  We are celebrating summer now and these tartlets require different pastry skills.  David rolled out the dough to 1/8thinch thinness, then cut circles using a small bowl. Each circle is dropped gently into the muffin cup then folded into a rustic round. No crimping. No braids. It helps if each tart has a little ledge, climbing up and over the muffin cup’s edge to hold in all the contents.  

Once you have the pastry ready to fill the tartlets, this project’s flavour is all about the beets and fresh herbs.  Beets are best if you can yank them out of your garden, clean under the garden hose then submerge in hot boiling, salted water. Unlike a stored beet, garden fresh will cook up in half the time. 

Please remember, basil is a beet’s best friend. I like to tuck a chiffonade into every beet salad I compose and was pleased with how complimentary it is as both an ingredient and garnish for these tartlets. 

Beet, Basil and Goat Cheese Tartlets

If making pastry is not your “jam”, use frozen pastry tart shells instead. These pretty little things are perfect for summer appetizers al fresco or weekend brunch.  


All Purpose Food Processor Pastry

2 cups        all purpose flour

¼ tspsalt

¾ cup         unsalted butter, cold, cut into pieces

½ cup         ice water, approx.


Filling

3 small beets, boiled until tender, cubed

150 g goat cheese, crumbled

3 eggs

1 cup homogenized milk

2 TBS chopped fresh chives

2 TBS chopped fresh basil 

Salt and pepper


Combine flour with salt in food processor and pulse to mix. Add butter and whirl on high for 15 seconds or until butter is the size of peas. Scrape down the sides of the bowl and add water. Whirl on high until dough clumps. Transfer to a large piece of waxed paper. Form the crumbly dough into a firm mound, about 8 in diameter. Wrap and refrigerate at least 4 hrs before use. 


Preheat oven 425 F


Whisk together eggs, milk, chives, basil, salt and pepper in a 4 cup liquid measure. 


Divide the chilled dough in half and return remaining half to fridge, wrapped well. 


On a lightly floured counter roll out the dough. Use an empty bowl with a 4 ½ inch diameter to cut rounds. Gently nestle each round into a muffin cup. Divide beets and goat cheese equally among the tarts. Pour in egg mixture. 


Bake in middle of the oven for 20-25 min or until interiors have puffed and pastry is lightly golden. 


Serve warm, garnished with fresh basil and edible flowers like nasturtium, chive or borage.

Lavender Plum Jelly

The first time I laid eyes on these plums, the trees were groaning with them. It was  August,  the day we took possession of our Vancouver Island  home in 2016. While David, his brother Norm and sister-in-law Cheryl stood in the courtyard surveying the exterior of the house,  I trotted down the driveway to find out what was green and growing on our 2.5 acres.

Huge rhododendron bushes and plum trees lined the driveway. Shiny red plums, no bigger than marbles, glinted in the sun. None were nearby, but all shone like Christmas ornaments far from reach in the tall,  skinny trees. 

A huge black raven flew over, each flap of its massive wings vibrating overhead. My eyes fell on saffron-painted plums poking out from leafy branches nearby. They were tiny little wonders no bigger than the cherry tomatoes growing in my downtown Toronto containers. Each orangey-yellow orb was splashed with traces of red. Warm to touch in the hot August sun, I picked one and popped it in my mouth, smiling wide.  It had a sweet, pulpy juiciness.

A search ensued! In three minutes, my makeshift t-shirt pouch bulged with a colourful, but slightly moist and sticky bounty.  Juice was trickling out from the overripe, split ones that came in every hungry handful I snatched away from the tree.

With no room for more to carry, I snacked heavily, reducing my load by half as I came closer to another variety-in-waiting. Heavy green clusters of plums weighted down the branches bringing them closer to my reach.  Alas, these golf ball-size beauties were sour and hard:  Not ready for prime-time picking.  I spat out my pit and was surprised to watch it join dozens littered in the grass below, all fallen from the mouths of marauding deer.   

On another branch —  Hope. One once green had ripened to a deep yellow, beckoning. I was perched on rocks that lined the stone walkway down to the dry pond nearby. Teetering on one foot, then the next, I managed to shake the ripe branch and gather the sweet morsels that fell to the ground, avoiding those that fell upon a mound of shiny, black pellets.  Deer scat.

I returned to the house and found the others, tracing their voices echoing through the empty halls. None seemed as eager to sample my found fruit as I, but each nodded their head politely after a taste.

This was just the beginning. What food writer in her right mind isn’t obsessed with gathering sweet, ripe FREE fruit hanging from trees? It’s like finding money dangling from the leaves.   

On superhot summer BC days, when the thermometer slips over 30 and it’s crazy to get out of the shade or up from a lounge chair, I drag my husband out on a blackberry pick.  We wear PPE: Long pants, long sleeve shirts, boots and gloves. We dig out the lawn clippers and apple crates from the garage.  Then we cruise through the windy roads of Maple Bay and environs, searching for manna from the heavens. When we spot black swaths of untouched, unblemished, fat, ripe, abundant berries overhead we no longer cry in vain, thinking they’re unreachable. We simply laugh an arrogant chuckle, deeming ourselves seasoned professionals. David clips the clusters and I catch them in a waiting  apple crate beneath his arms. Once we’ve filled the crates, we aim to stop, but never can.  There’s always another ripe berry around the corner and a few empty plastic bags to hold them.   

Pounds upon pounds of ripe, sweet fruit cannot be consumed instantly. Berries are flash frozen on trays in single layers or tucked into a rustic tart or two. But plums, especially the ones in our orchard, are more troublesome. The pulp to pit ratio is about 50:50. I have cooked them in huge pots on the stovetop or roasted them in the oven, but afterwards, there are  still all those pits to contend with. A food mill can help the process but nothing works finer than my Mehu-Liisa 111 made in Finland.

This three-tiered stovetop pot is basically a small distiller or “steam juicer”. The bottom is filled with water heated to a boil on the stovetop, while the middle portion holds the juice which falls into this catchment area from the large steamer above holding quarts of picked fresh fruit on top.  Take off the stopper and hot clear juice empties out from the fitted plastic hose attachment. Last time I used my Mehu-Liisa 111  I packed it full with 14 pounds of fruit, turned on the heat and collected five liters of juice in under an hour. 

Sadly, plum juice is not a favourite beverage, but it makes beautiful jelly that I can slip into my suitcase and gift friends and family each time I fly back home to Toronto. That way, I can bring a taste of our BC orchard across the country and share the wealth because money found on trees is simply delish.

Herd Road Lavender Plum Jelly

  • Servings: 14 250 ml jars
  • Print

The golden hue of this yellow plum jelly is painted purple with the addition of lavender and whole blackberries. After canning, check all the jars for a tight seal. Makes 14 ½ 250 ml jars of jelly.

12 cups plum juice *
4 tbsp lemon juice
6 tsp Pomona’s Universal calcium water
2 tsp unsalted butter
4 cups refined sugar
9 tsp Pomona’s Universal pectin
½ cup dried lavender or lemon thyme
1 cup frozen blackberries

Sterilize jars.

In a large wide pot heat plum juice, lemon juice, calcium water and butter and bring to a rapid boil.

Combine sugar and pectin in a bowl, then add to juice once it is rapidly boiling. Stir mixture until it comes back to a full boil then take off the heat. Carefully remove foam.

Remove hot sterilized jars and arrange on counter. Put 2-3 frozen blackberries and ½ tsp lavender in each jar before filling with plum mixture leaving ¼ inch headspace and lidding fingertip tight. Process 10 minutes in boiling water.

Remove from canner and listen for a satisfying pop as each lid seals. All the lavender and blackberries will have floated to the top. Wait a few hours for your jelly to gel and cool, then turn a jar upside down to test if the jelly has thickened enough to suspend solids in the middle of the jar. If so, leave upside down for 8 hrs or overnight.

*Substitute with apple or white grape juice

Processing…
Success! You're on the list.

Red Fife Ginger Molasses Cookies

My ode to Red Fife comes in the form of a cookie.

This recipe starts like so many of its cookie counterparts with sugar and butter. (Sorry vegans.)  Butter not only makes cookies exceptionally rich in flavour but it creates a luxurious mouthfeel, too.

Recipes ask bakers to cream these two foundational pillars of Cookiedom.  That won’t happen if your butter is cold. Pull out an unsalted stick or two at least two hours before you plan to bake.

A KitchenAid mixer is a must if you bake as regularly as I do.  Drop butter and sugar into the mixing bowl, attach the whisk, press “Go” and watch these two ingredients intermingle and transform into a light, magical creamy mass.

IMG_5049Next, crack an egg into the mix and lightly oil a measuring cup to ensure easy lift-off for the half cup of molasses needed.

That’s a little trick I share with my daughter Krystal as we bake up a batch.  She has never baked with molasses before and feels less than patient as it endlessly pours in a feathery  stream out of our almost empty Crosby’s Fancy Molasses container. Likewise, she’s wholly unimpressed with this sweetener’s slightly metallic, smoky taste.

But she complies with my teaching suggestions today, knowing I insist on constant tasting, sniffing and touching to learn baking’s alchemy.

She also knows there are white chocolate chips in the mix.

Ah, white chocolate chips. These are forefront on Krystal’s mind as we search the kitchen cupboards and drawers for this cookie’s ingredients. Unlike cloves, which we grind, sniff and sift fresh, or candied ginger, instantly proclaimed “yuck” when sampled, Krystal needs little encouragement to gobble a handful of chips after she measures a very generous half-cup.

It’s the Red Fife that excites this baker. Canada’s heirloom wheat varietal adds incredible flavour to these cookies, especially if it’s locally sourced and freshly milled.

Luckily, that’s what 1847 Stone Milled Flour is all about. They’re very busy filling orders in the midst of this pandemic, but if ever there was an essential ingredient needed for baking security, it’s flour. Check it out.IMG_5056


Red Fife Ginger Molasses Cookies

Red Fife Ginger Molasses Cookies

These are thin, saucer shaped cookies with gingery buttery goodness. Makes 30

3 cups             Red Fife

1 ½ tsp            baking soda

3/4 tsp             baking powder

½ tsp                salt

1 tbsp              ground ginger

¼ tsp                cloves (freshly ground if possible)

¾ cup              room temp butter (1½ sticks)

½ cup               brown sugar

¼  cup              organic white sugar

½ cup              molasses

1                      large egg

1 cup           white chocolate chips

Rolling Mixture

1/3 cup            granulated sugar

¼ cup               finely chopped candied ginger

Preheat oven to 350 F

In a medium bowl, whisk together flours, baking soda, salt, ginger and cloves.

In mixing bowl cream butter, brown sugar and  ¼ cup granulated organic sugar until light and fluffy. Beat in molasses and egg.

In thirds, add in flour mixture and continue mixing until just combined. Sprinkle over with white chocolate chips. It’s a heavy dough that’s not easy to mix.

Line two baking sheets with parchment paper. Scoop tablespoons of dough arranging 2 inches apart on baking sheet. Put sugar in small bowl. Form each cookie into a ball and lightly roll in sugar to coat. IMG_5046
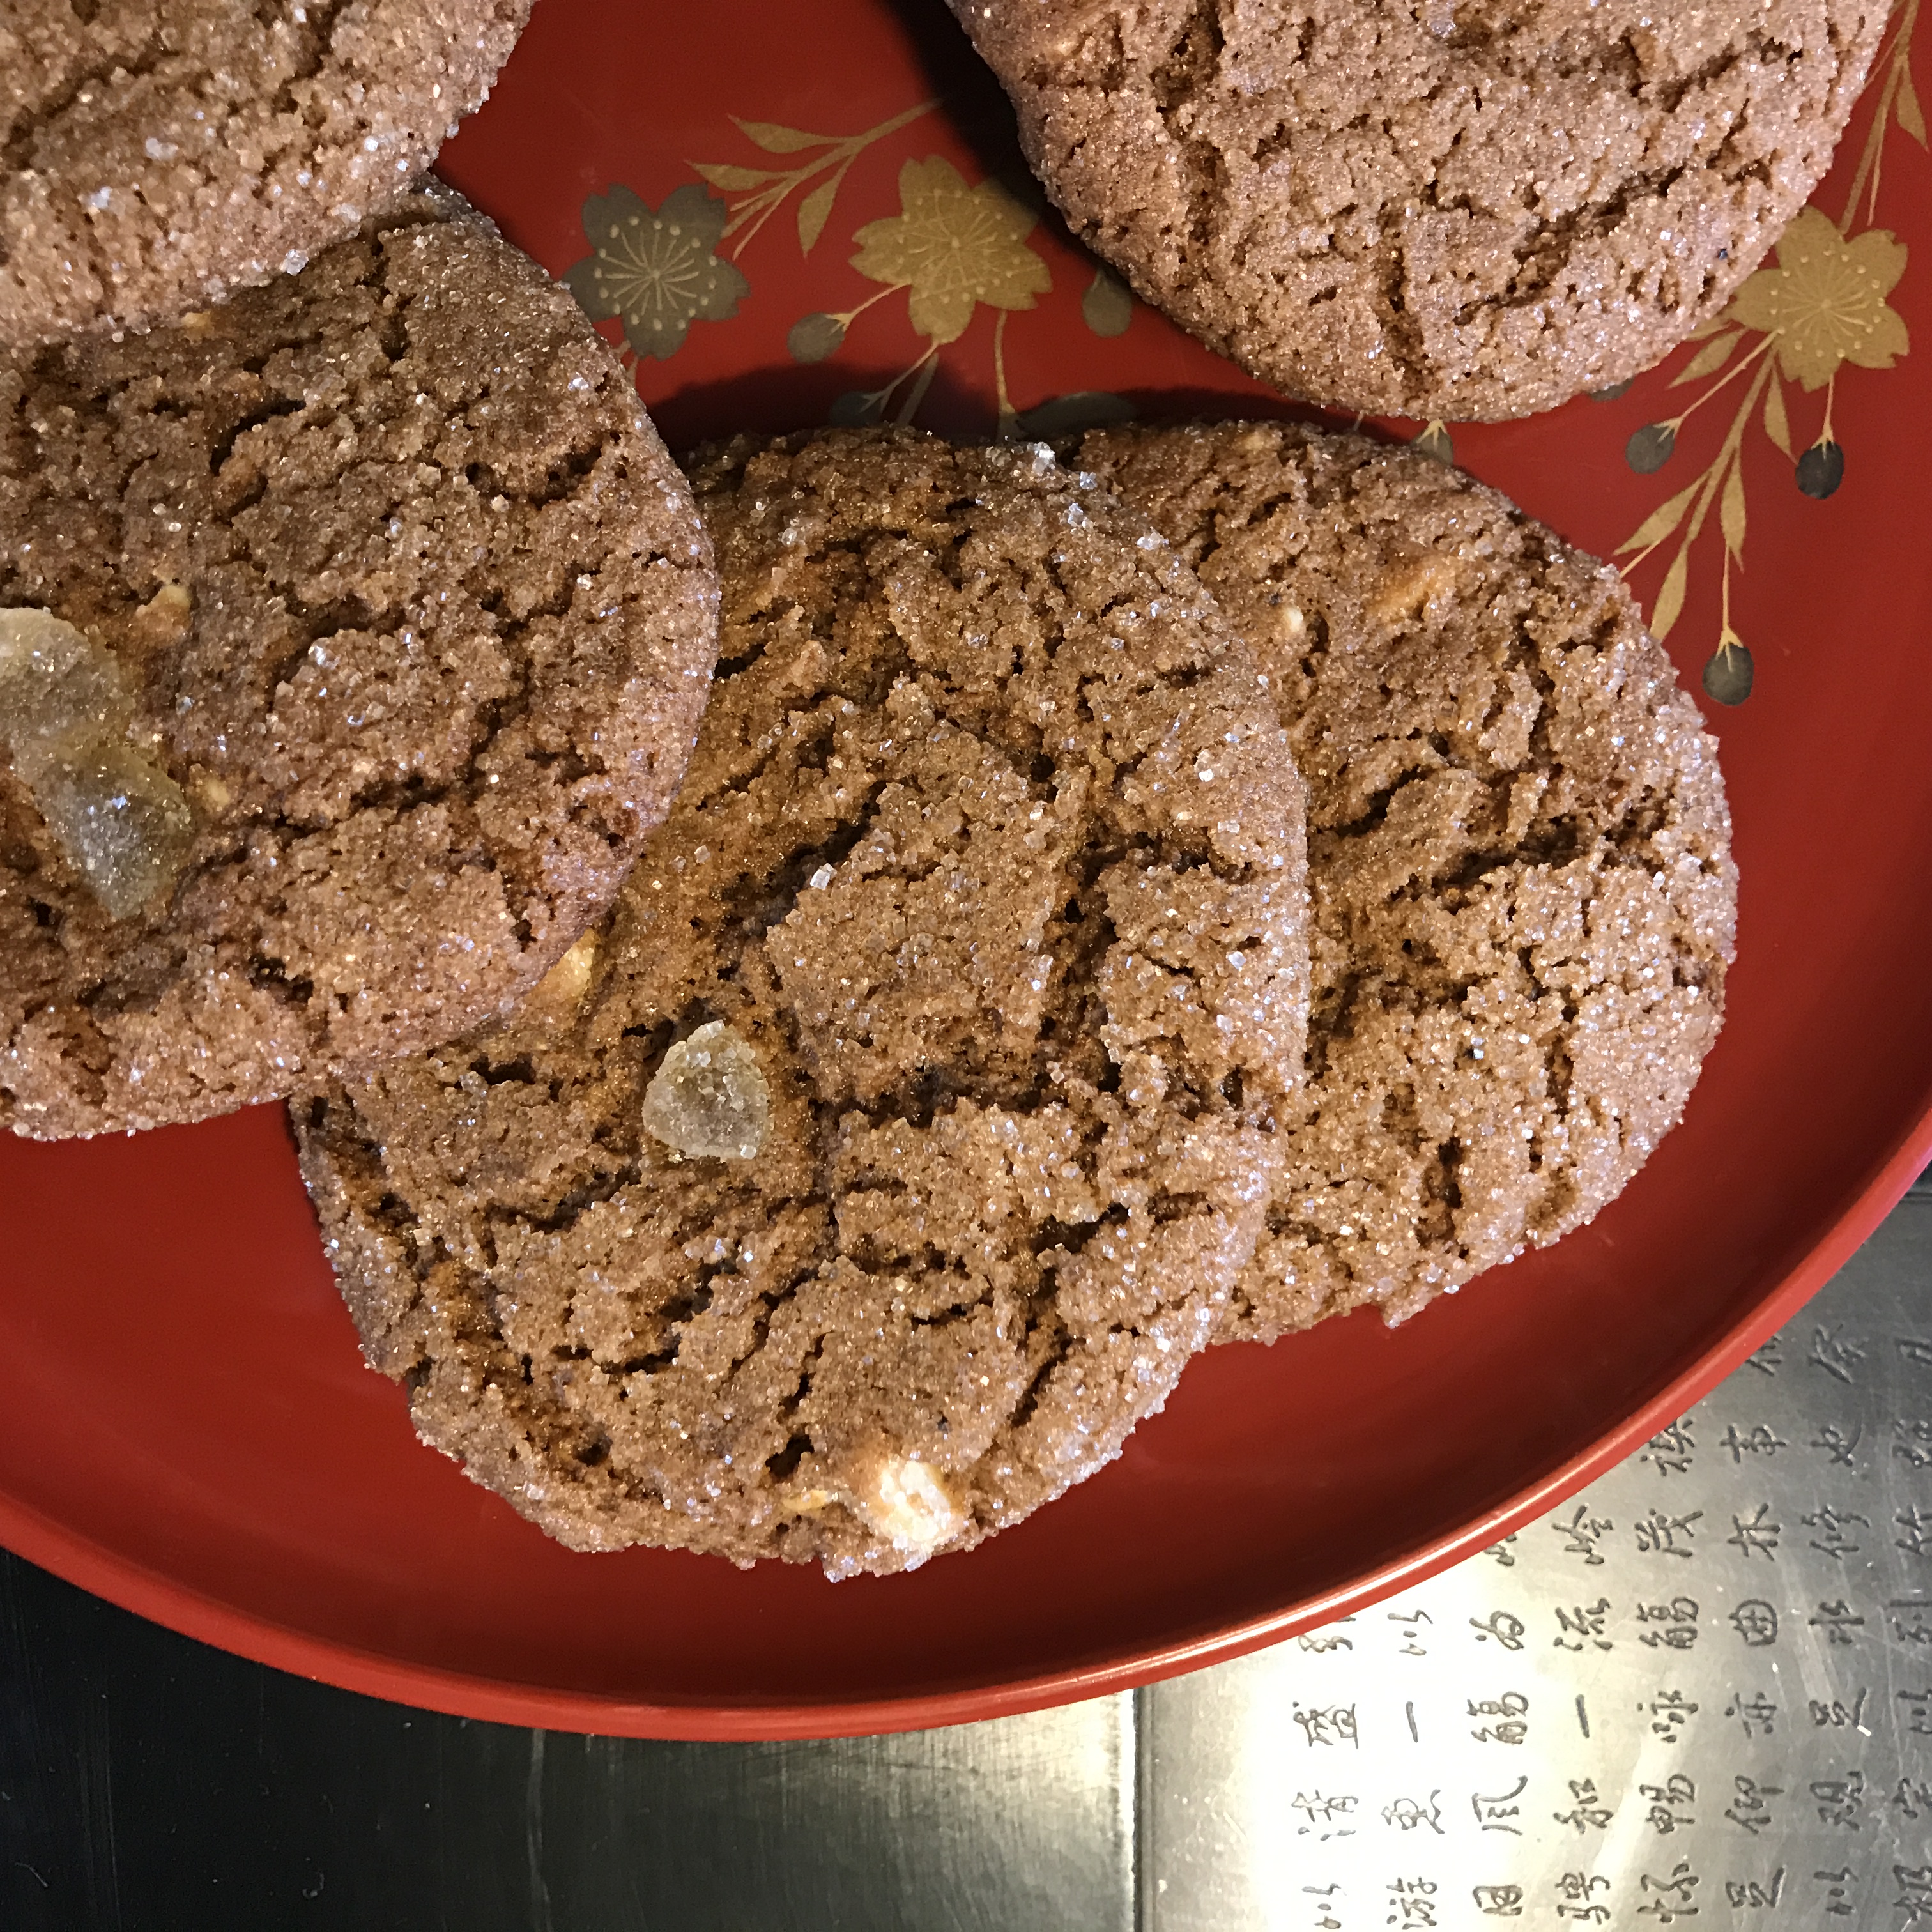
Place a chopped piece of candied ginger on each sugared ball.  Using the bottom of a glass, flatten into 3 inch rounds.

Bake until golden brown 12-14 min

Cool on a wire rack 

IMG_5048


The Power of Challah

I bake and give away a lot of freshly baked bread. I’ve been baking bread weekly, sometimes daily, for many moons and my floury perspective has offered insight on what Joe Eater likes best in the bread department. And it’s challah, hands down.

Essentially, we bread lovers eat with our eyes first. Appearances matter.  Just the sight of one of my golden, glossy braids is enough to bring most of my beneficiaries to their knees. Sprinkle on some sesame or poppy seeds (or both) and you’ve got a bagel hybrid that screams for a slathering of cream cheese,  followed by an unabashed crescendo of jam.

“What’s not to love?” my Long Island New York mother-in-law used to ask.

Ethel, of course, would only take a sliver of a slice, knowing full well that the honey, milk, butter and eggs that enrich and enliven challah were the kiss of dietary death for a diabetic like her.  But that wouldn’t stop her from kveln about my challah.

My friend Danny, on the other hand, used to scrunch and contort her mien whenever she came face to face with one of my challahs.

“No! No, you can’t do this to me!” she’d wail, tossing the gift loaf back into my hands like a hot tamale.

Turns out she was an addict.

Then there was Don. He ignited my baking passion and passed the challah gene down to our offspring.

I’d find him drooling and star struck, gazing with deep longing at my just-out-of-the-oven golden, glossy loaves.  I’d start wielding my bread knife, slashing it through the air, marking the end of each word with a vicious swipe   “Don’t you dare” Slash, slash, slash!  “devour it all!”  He’d feign to cower then leave only crumbs in his wake.    

Oh, the allure, the gloss and glimmer of a challah’s golden crust, twisting and turning seductively before our hungry eyes. Blessedly for us bakers, it is a no-brainer of a baking feat. Sure, you need to have the larder well stocked with milk, honey, eggs and butter, but you’ll find the braid an easier dough trick than your average high hydration, Tartine-style boule.

What’s more, this is a bread recipe that will make you a baking icon among friends and family. You don’t have to capture wild yeast for 10 days to make this baby rise and if you practice this just once, you’ll soon be a baking pro worthy of  Zoom coverage at the socially-distanced table.

But before you plunge into this bake, let’s talk flour:  Seriously good flour, that’s local, freshly ground and can be delivered to your door. 1847 Stone Milled Flour https://1847.ca  produces a variety of organic stone milled flours in Fergus, Ontario that bring this challah out of the land of white bread and into a world of healthy, rich flavour.

1847 Challah, Sponge Technique

Despite the name, this challah recipe doesn’t date back to 1847. I created it  recently to feature 1847’s Red Fife and Daily Grind, but both of these whole grain flours can be substituted with other brands.

Sponge

2 cups warm milk

4 eggs  lightly beaten

¼ cup   honey

9 oz/2 cups     1847 Red Fife

4.8 oz/ 1 cup   PC Organic All purpose, unbleached flour

1 tsp                instant yeast

Final Dough

¼ cup               melted unsalted butter

.6 oz/1 TBS      salt

10 oz               1847 Daily Grind (whole grain multi-purpose flour)

12 oz               PC Organic All purpose, unbleached flour

1                      egg, beaten

¼ cup               sesame seeds

Combine all the Sponge ingredients in the bowl of a KitchenAid mixer using the paddle attachment until just mixed. Cover and leave at room temperature for 2 hrs or until the surface is covered with small holes, just like a sponge.

Add butter, salt, Daily Grind and all-purpose flour to the sponge.  Using a dough hook, mix for 8 min or until the dough balls up around the hook. Add a tablespoon or two of flour during the last 2 min of the mix if the dough is not pulling away from the sides of the bowl.

Transfer to an oiled plastic bin with cover for a bulk ferment (or proof) of 2hrs. (Alternately, slow down the ferment and put it in the fridge overnight for 8-12 hrs)

Line two baking sheets with parchment. Place the room temperature or refrigerated dough on a lightly floured surface. Use a dough scraper to cut in half.  Cut each half into thirds. Roll out each piece to create six long ropes. Make two simple braids with three strands each and place on baking sheets. Cover with a clean dish towel or oiled plastic wrap and let rise for 1 hour or until doubled in size.

Bake in a preheated 350 F oven for 25-30 min or until internal temperature reaches 190 F 

Ginger Turmeric Carrot Soup


When I was a little girl, happily engrossed in a snack, chomping on a fistful of carrot sticks, grownups (especially grandparents) used to chuckle and nod in appreciation.

They were tickled pink that I loved those orange roots so much.

“Just like Bugs Bunny, Lynnie, you love them carrots.”

They’d chuckle among themselves, scratch their chins in that thoughtful, elderly way and proclaim, “Carrots, little Lynnie, are not only good for ya, but they’ll put a curl in your hair.”

Curls and carrots were a good thing. Still are. I’ve got a head full of curly strands and in my garden grows some of the least straight, most angled and wayward, thwarted and stopped-up roots ever grown in these parts.

IMG_2302
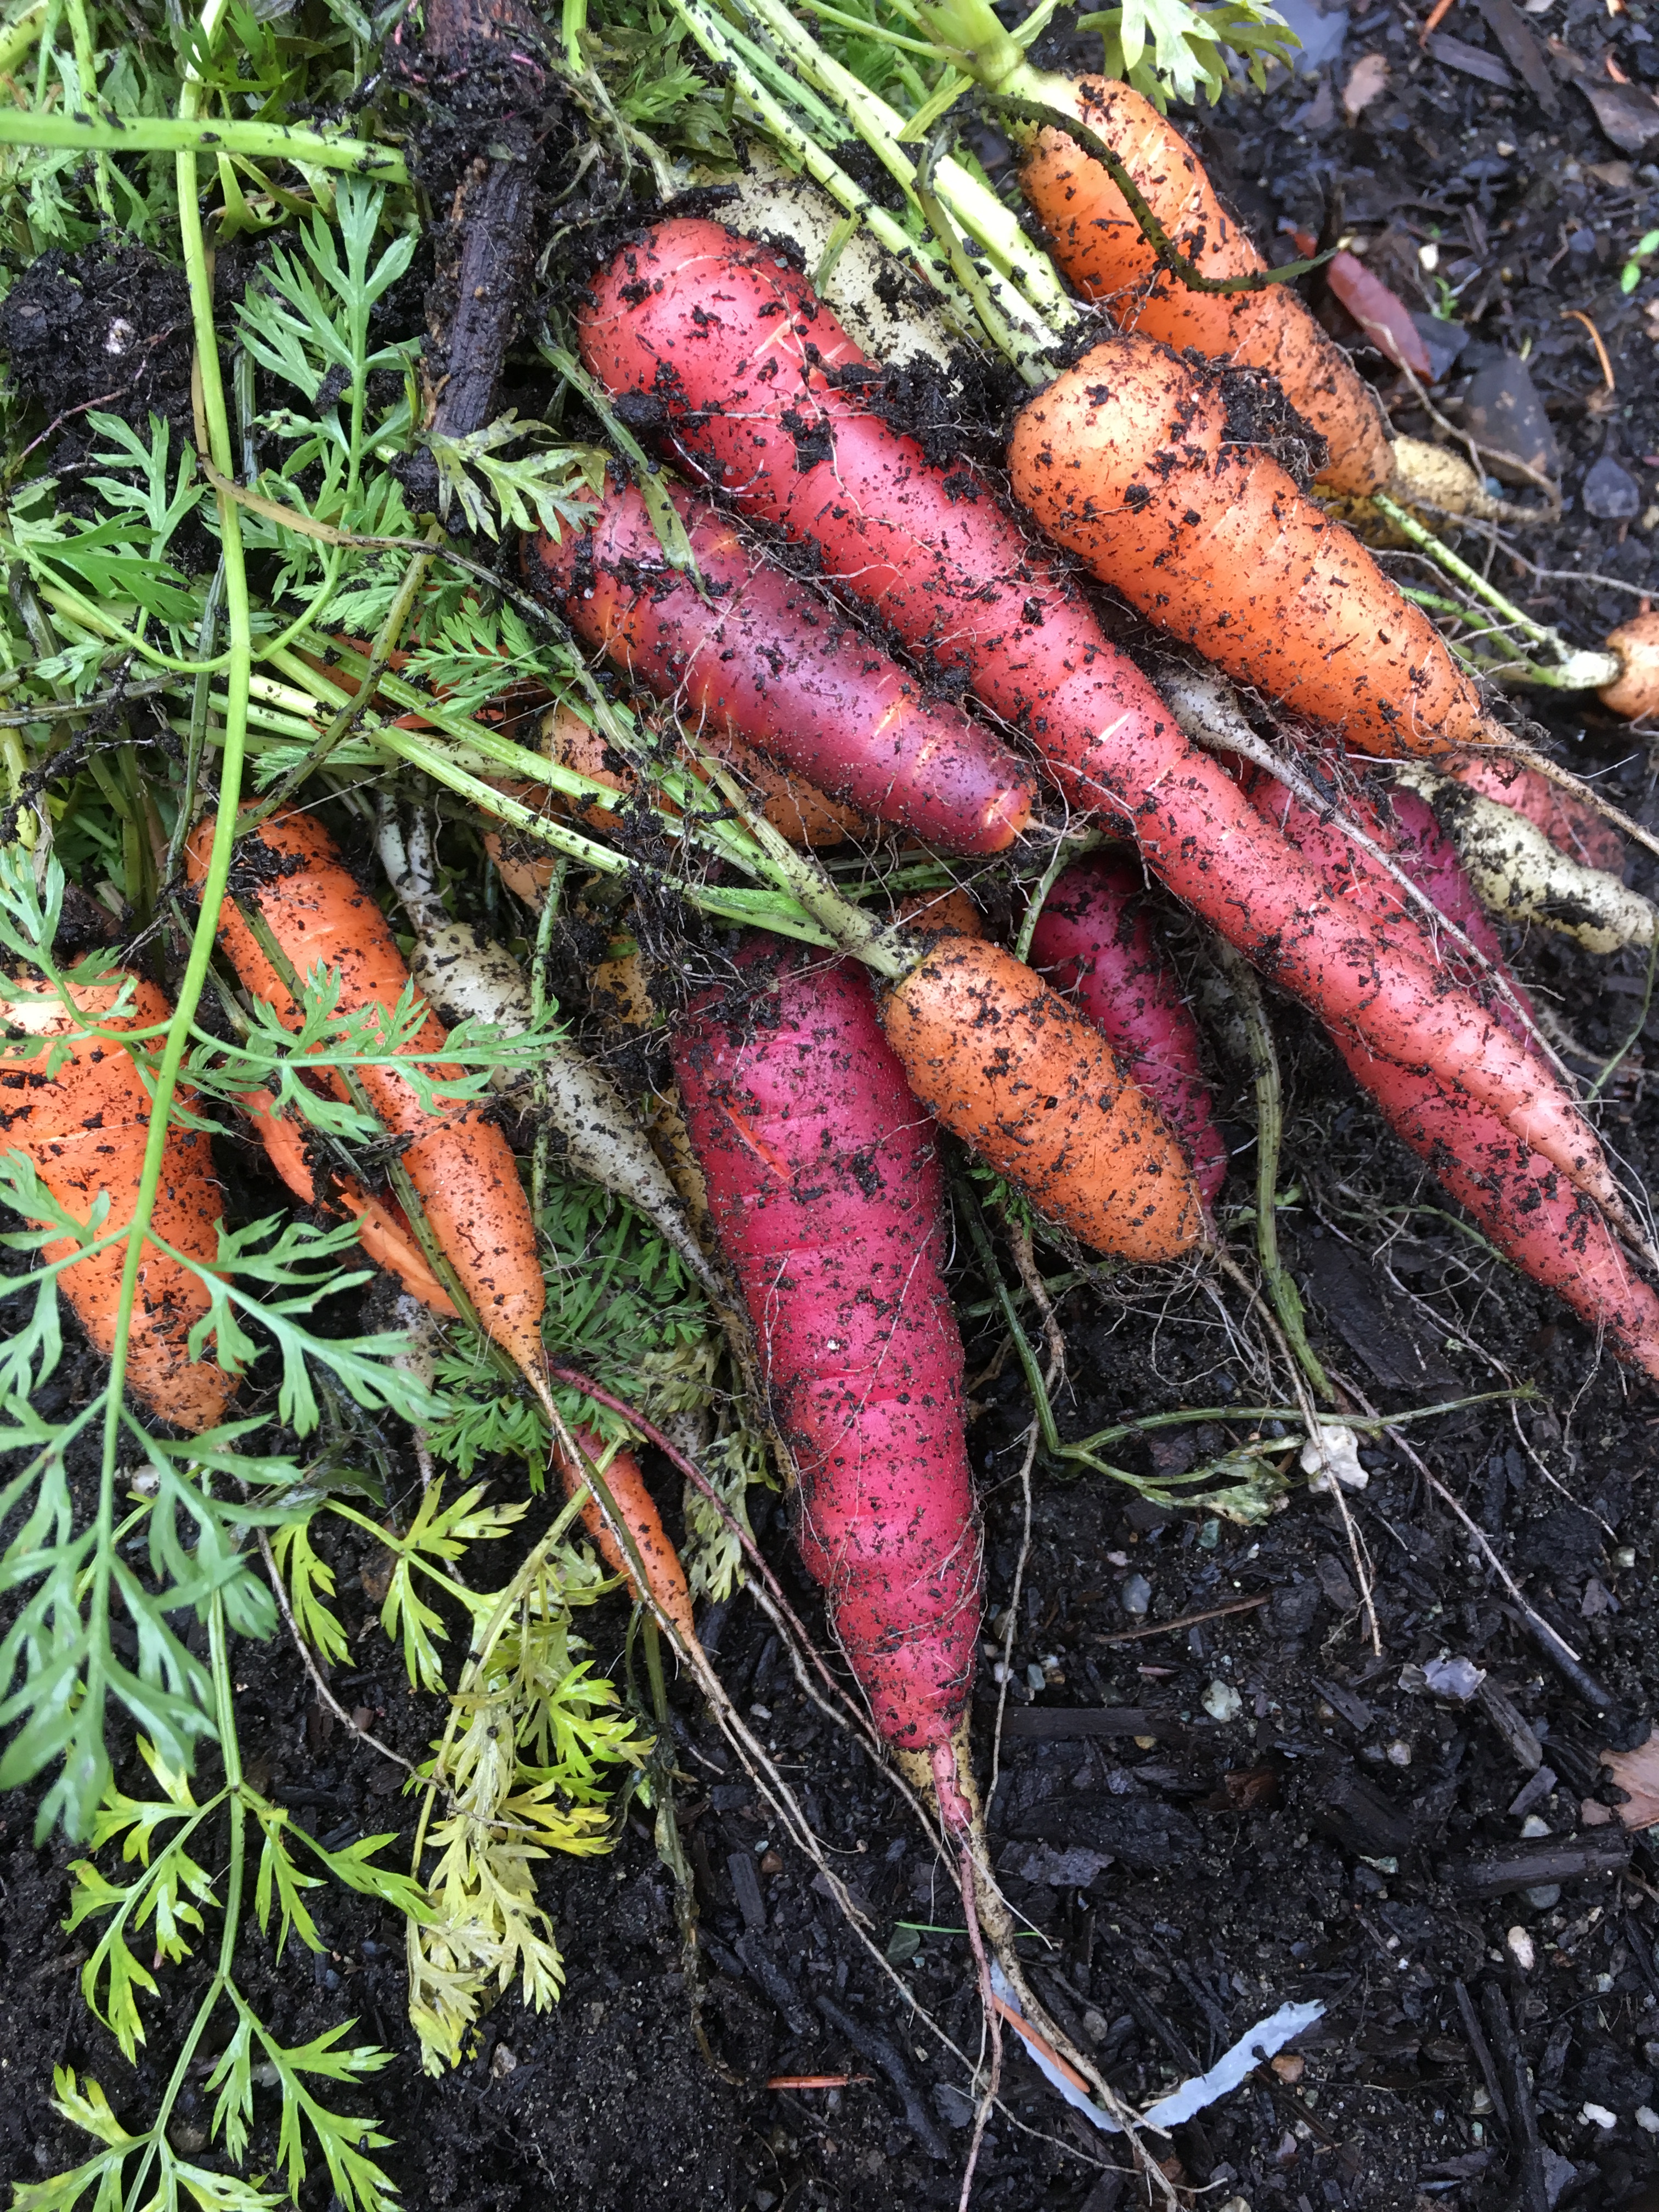
But that hasn’t stopped my love affair with this root.

They were the first veg I fed my babies.  I’d peel dozens of those orange wands, chop them into coins and toss them into a steamer basket. Once tender to the fork, I’d whirl them in my trusty food processor, adding just enough of the cooking liquid to create a fresh, real carrot puree bound for the mouths of my babes.

I remember the bright orange stains on their bibs and the way they’d open their tiny mouths like hungry baby birds.  Absolute delight welled up in this maternal heart as I fed such pure, nourishing orangeness on a little, plastic-coated baby spoon to my happy little charges.

IMG_0220
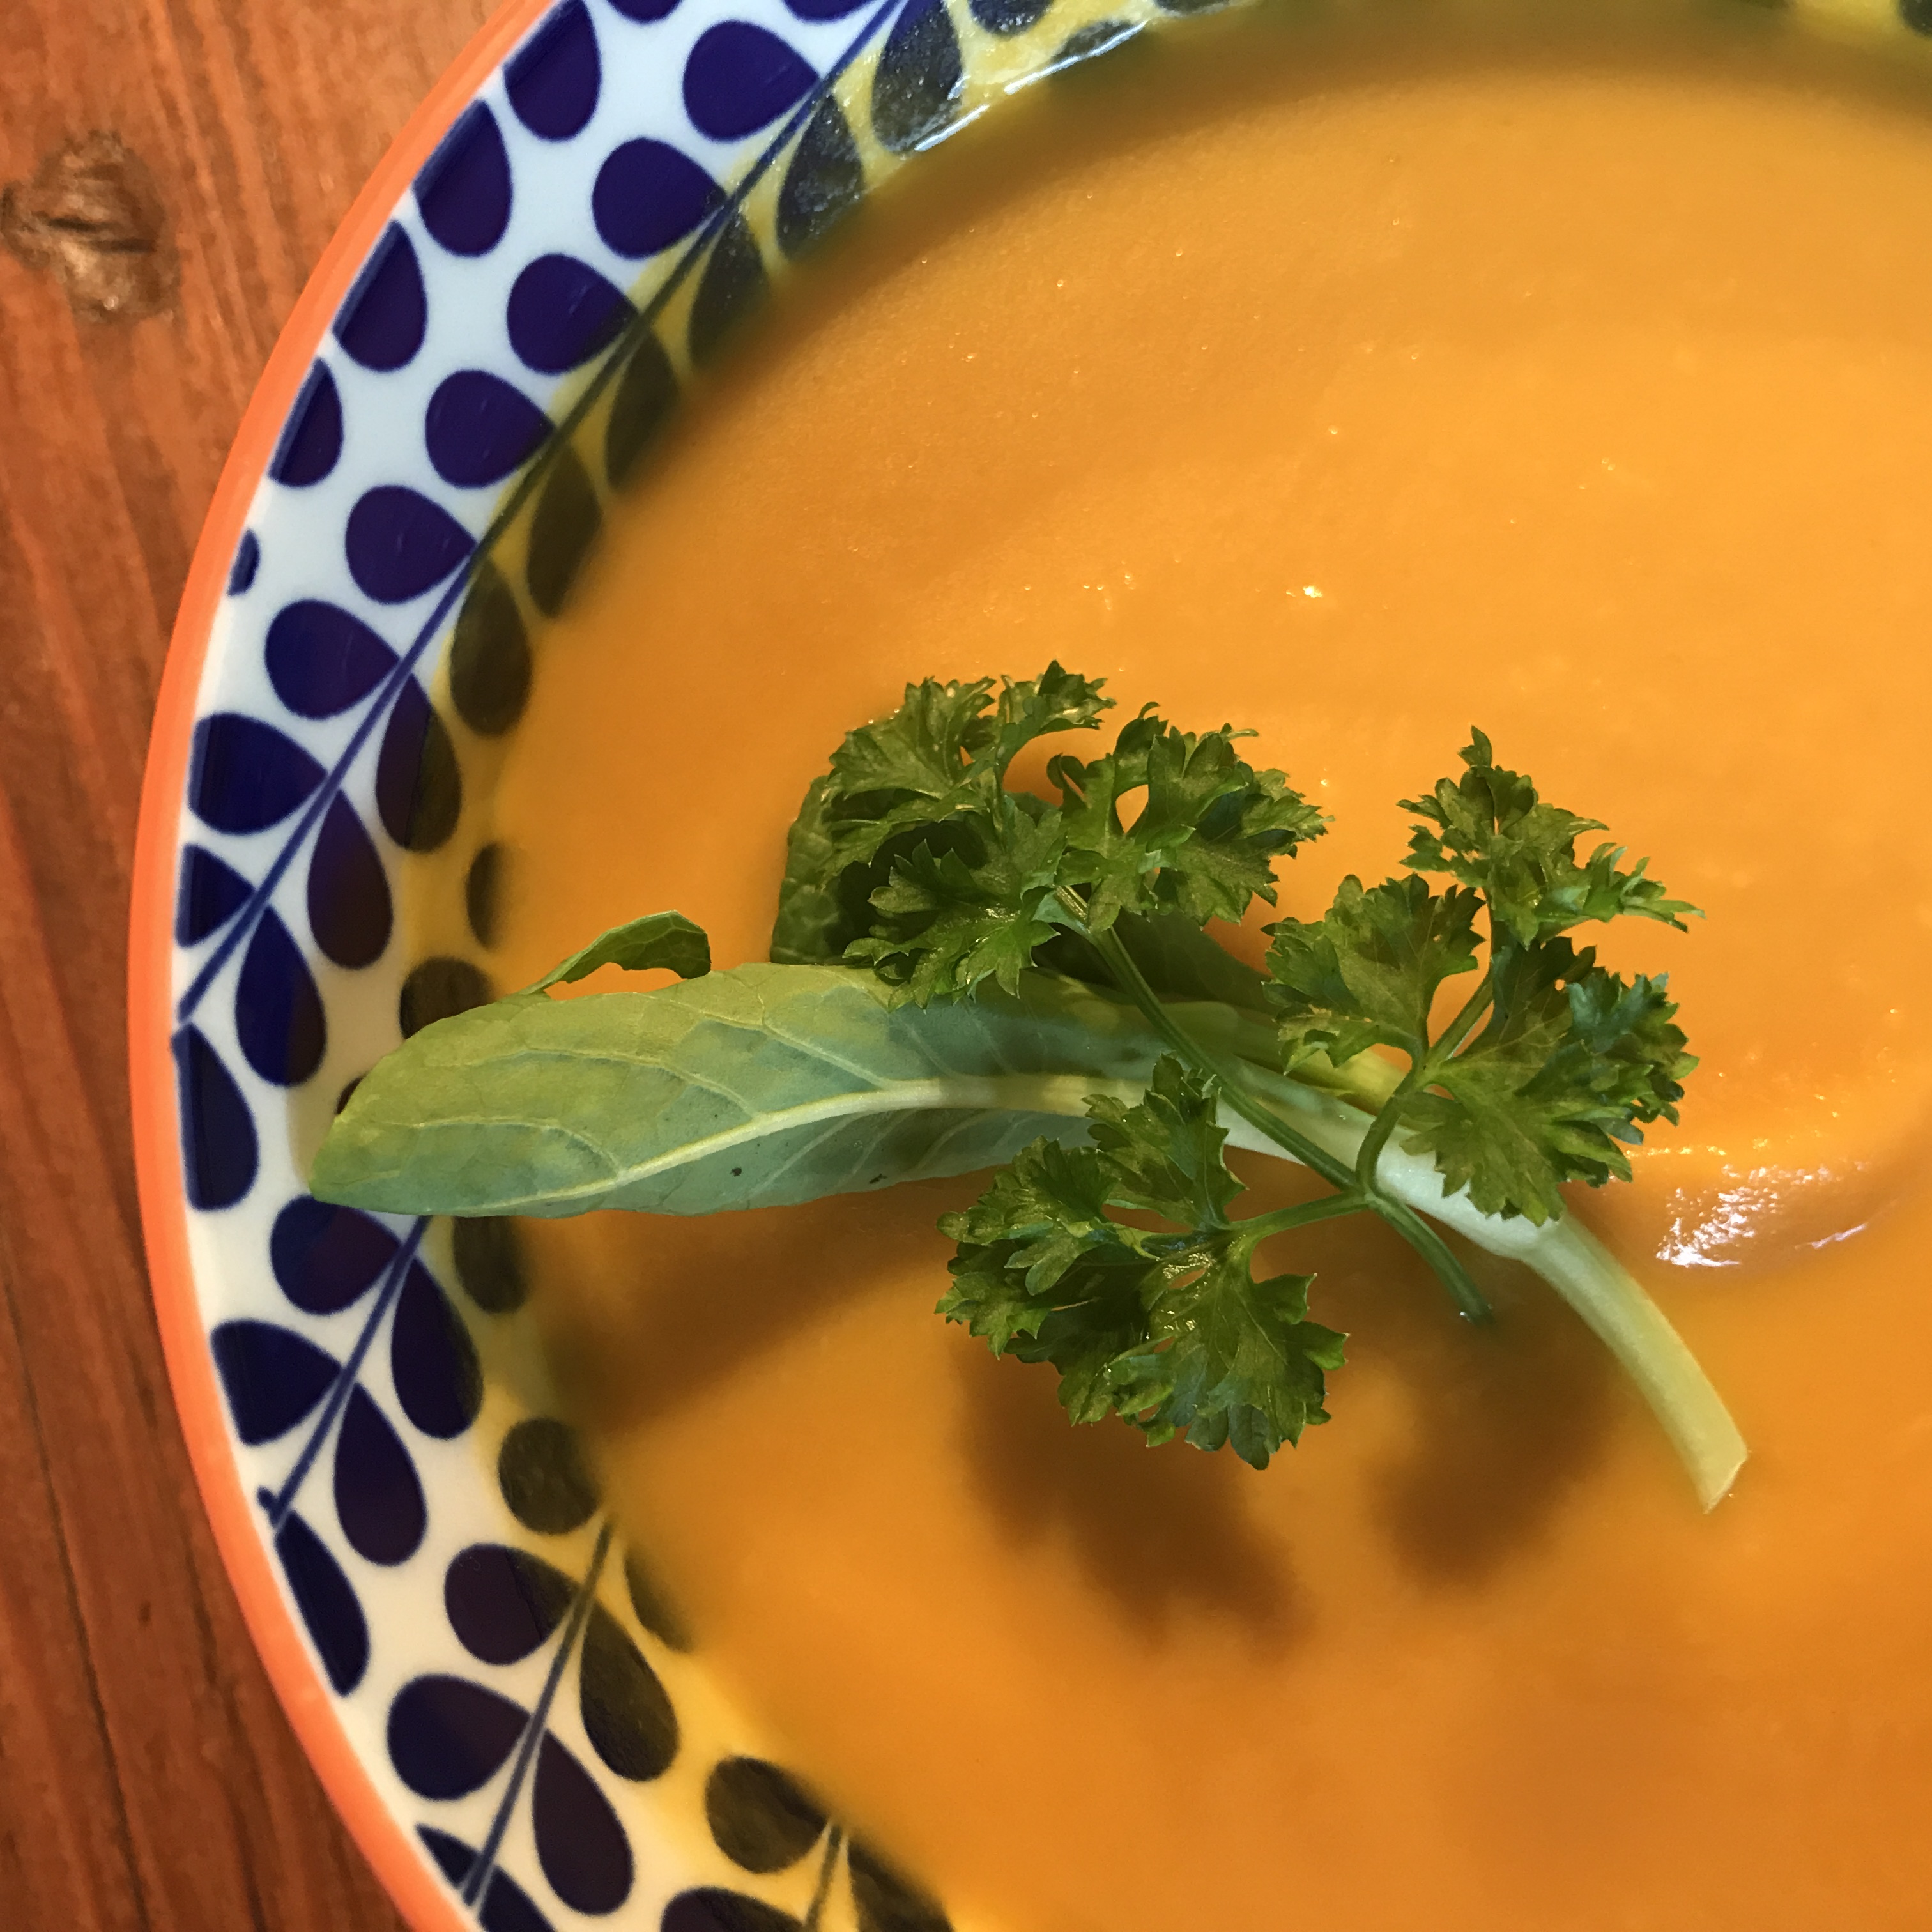
Carrot soup is not that far a leap from baby food.

It’s a pure puree meant for adult tastes including complex flavours that hop around the carrots, not unlike Bugs, but with more flavour than a cartoon can ever conjure. Ginger, a fellow root, pairs so sublimely with carrots, cutting a little of the sweetness and giving it a sideways spike. Turmeric, that currently trendy Asian rhizome that is popping up in lattes and milky teas,  deepens a carrot’s  orange into a golden crimson, while leaving yellowed tattoos on your fingers when freshly grated.

But the real kicker is in the stock — the foundational rock of any soup.  My cheat for any soup that stars vegetables-only is a super-slow-cooked chicken stock.  It adds a magical velvet to the soup’s texture while leaving a sparkling, golden sheen on the surface.

I know vegetarians and vegans will simply bypass that remark and enjoy this soup just as much, if not more, without the poultry.  I won’t even wonder what Looney Tunes could chime in with —  but I bet it would make this elder chuckle.


IMG_0217

Ginger Turmeric Carrot Soup

If your freezer isn’t full of homemade stock, bouillon cubes will suffice. Taste the results before adding salt to the soup as most cubes are sky-high in sodium.

2 tbsp coconut oil

1 red onion, chopped

2 inch piece of fresh ginger, peeled and finely grated

2-inch piece fresh turmeric, peeled and finely grated/ 1 tsp turmeric powder

5 cups (10-12 medium)  carrots, chopped

6 cups defatted, homemade chicken stock

1 cup coconut milk

4 kaffir lime leaves (or 2 bay leaves)

1 ½ tsp salt

Freshly ground pepper

Freshly ground nutmeg

Fresh lime wedges

Freshly chopped coriander and/or mint

Heat coconut oil in a large pot on medium high.  Add onion, ginger and turmeric cooking 3-5 min or until soft and fragrant.  Add carrots, stock, coconut milk, lime or bay leaves, salt and pepper. Bring to a boil then reduce to a simmer, cooking 15-20 min or until the carrots are tender soft.  Remove the lime or bay leaves and purée the hot soup with a hand-held immersion blender. Taste before seasoning with salt and pepper. Garnish with freshly ground nutmeg, lime juice, a dollop of yogurt or freshly chopped coriander and mint leaves.

Experiments in Einkorn

When the curious around me ask, “What have you been baking these days?” and I reply “Einkorn” I might as well kill that conversation. Enunciating these two simple consonants, Ein then Korn, is an instant entrée to “Huh?” and glazed-over eyes.

Perhaps the most ancient among ancient grains, Einkorn is grown here in BC and is in desperate need of a makeover. Few seem to know how tasty it is.  Or the delight a baker such as me has when poking my schnoz into a freshly milled bag and inhaling the sweet wonder that is Einkorn.

I bought my first bag from Flourist.com who shipped my flour over the Georgia Strait from their Vancouver bakery and mill. I liked buying an organic, traceable grain that is freshly milled right before packaging. I also liked seeing a line drawing of all their producers, including Einkorn grower Lorne Muller of Swan River Valley, Manitoba.

When I read the flowery descriptor under the 2 kg bag of Einkorn priced at $24.95 (compared to $15.95 for whole spelt) I was not a believer.  It said, “This flour showcases the taste of ancient Einkorn wheat, with a flavour that shines in everything from pastry crust to sourdough bread”

Them’s fighting words, I thought. How could this unknown, nobody grain be so tasty in so many baking applications?

It was time to test.


First, I made pancakes, sourdough einkorn pancakes with frozen wild blackberries. They were good but, in my mind, just ol’ pancakes.


Second try was stupendous: Einkorn Banana Bread. I found a recipe posted at The Perfect Loaf under “my top three leftover sourdough recipes”.

Like pancakes, I’ve made banana bread a million times but never has it domed so high (and not fallen) with a porous, sourdough bread texture. img_4124.jpg Einkorn offered up a nutty, sweetness. This quick bread was addictive and thanks to einkorn, high in protein, fibre and eye-healthy carotenoids and lutein.

My next try, 50% Einkorn sourdough levain (recipe below) was fated for success the moment I watched the dough twirl around my KitchenAid dough hook in a remarkable creamy softness, as if whipping cream.  Yet, this was a whole grain.

Things got einkorn crazy when my friend Wilma and I scarfed down several helpings each of my next test: Pear Tarte Tatin.  This gluttony, after a particularly filling sushi-making party, had never been witnessed before by her partner or mine.

All we girls could say is “The einkorn made me do it.”

It may not have hurt that the pears were so sexy and that this tart oozed with butter and sugar, yet never have I received such personal affirmation for a whole grain dessert.

If Einkorn could dance on the tongue for dessert, could it go solo soaked and sprouted in a jar? I measured out one quarter cup of BC-grown kernels purchased at Cowichan Bay’s True Grain bakery. After a 12 hr soak, the kernels had plumped up. Some had split. After another 24 hours, little white tails emerged on most of the kernels.  I topped that evening’s salad with a couple of spoonful’s adding a sweet, crunchy nuttiness to simple microgreens and grape tomatoes.

The finale of my Einkorn tests hit a crescendo with risotto. My top recipe taster and ardent Arborio rice fan was aghast at the suggestion.  But when faced with my creation at the dining table, he quickly returned to the pot for seconds.

I would never have tried this had I not tasted and devoured friend Randy’s superb farro risotto.  If Randy could do it, so could I, especially knowing that farro is Italian for spelt and einkorn’s Italian appellation is piccolo farro or little spelt.

Listening to my inner Marcella Hazan, I went to the stove, pulled out a medium saucepan and heated up some olive oil and a knob of butter. I tossed in sliced leeks, diced cremini mushrooms and fresh rosemary stirring and sautéing until the  juices emerged. In went a cup of einkorn kernels, which I sautéed for 2-3 minutes getting the pan adequately dry and toasty before adding sliced, reconstituted porcini mushrooms and a big splash (3/4 cup) white wine that filled the kitchen with an intoxicating aroma. Over the course of 30 minutes, I slowly added mushroom stock by the half-cup-full stirring and cooking the kernels in their uncovered pot until they were soft, tender and truly nutty.

True confessions: Einkorn kernels will not melt into the same creamy luxuriousness that an Arborio or Navarro rice can but Parmigiana Reggiano is always at the rescue.  Freshly ground black pepper is another must.

Experimenting the gamut of Einkorn, from sweet confections to healthy raw sprouts made me a believer. It turns out Flourist wasn’t being flowery in that description at all.  This grain can do it all.IMG_4144

50 Per Cent Einkorn Levain

This dough is very extensible and stretched a yard when I scraped it from the mixing bowl to a plastic bin. I got the same results during stretch and folds. It baked up high, with a dark mahogany crust with traces of raisin and cinnamon in the air.

Levain:

1.8 oz            liquid starter

5.2 oz            Spring water

8 oz               Unbleached, organic white hard/bread flour

In a medium bowl, dissolve starter in water with a fork. Add bread flour and knead into a ball.  Cover with plastic wrap.  Let stand at room temperature for 12-16 hours.

Final dough:

Levain (minus 1.5 oz)

1lb .6oz         Spring water

2tbsp             honey

1lb                 Whole Einkorn

8 oz               Unbleached, organic white hard/bread flour

Dissolve levain in spring water in stand mixer bowl. Add honey, Einkorn and bread flour. Use the paddle attachment at low speed, mixing until a shaggy mass. Cover and autolyse (let stand) for 20 min.

.6 oz                     sea salt

Sprinkle dough over with sea salt, using dough hook, mix at low for 3 min.  The dough will separate from the sides of the bowl and create a firm ball.

Transfer to a large oiled bowl or covered plastic bin.

Bulk fermentation: 1 hr. 40 min  (Stretch and fold once, after 50 min)

Shape two loaves and place in bannetons dusted with rice flour.  Cover each with a large plastic bag and refrigerate immediately, 12-16hrs

Preheat dutch ovens at 500F for at least 30 min, bake 20 min covered, reduce to 460F and bake 20 min uncovered. Transfer to wire racks to cool.

Things I learned in KAF baking school, Part Two

Side-by-side taste testing is a gift.

On the last day, we taste a flight of varietals: five whole wheat baguettes, side-by-side. Our “control” baguette contains King Arthur White Whole Wheat flour and the others contain Salish Blue (a perennial wheat in development at the Bread Lab), Sprouted Skagit 1109, Cairn Spring Espresso T-185 and Cairn Spring Edison Unsifted. 

Newbie bakers rarely know the difference between all purpose and bread flour, let alone this wide range of locally-grown wheat varietals with alluring names.  We taste them straight-up without butter, observing crumb, inhaling aroma, analyzing crust and interior, making mindful, slow chews, ruminating on each variety. We dub this our “munch and think” session. One is Mr. Moist, the other Crispy Crust, another so very sweet. None of these baguettes has the loft and rise produced by 100% white bread flour, but all five excel in delivering a unique, wheaty flavour.  

Oh, The Baguette. This long, phallic, day-only-fresh loaf is the epitome of French bread baking and never ceases to send me into performance panic. Despite suffering years of bakers’ baguette trauma (BBT), I’m actually able to follow our instructor Jen’s shaping instruction. She demos once, twice, then for the final demo, she asks us to call out command steps for her to follow: “Place the dough good side down. Deflate. Letter fold, folding top then bottom. Observe the dough lip and seam. Use left hand to turn dough from the top of the lip over your thumb and tap closed with right palm. Repeat turn, twist and tap across the length of the dough. Turn the dough 180 degrees and pull the top side of dough to the table, pulling it over your left, lightly floured thumb and close with right palm tap. Repeat. Repeat. Repeat. Time to roll. Spread your floured fingers out wide and roll from the middle to the tips of your baguette. ”

Big breath. I return to my bench and practice. Four times. 

Two out of four ain’t bad, right? I’m hesitant to attach my initialized label to the underside of these horrendous duds. 

“There is no bread shame,” Jen assures, after a thoughtful examination of the first 20 baguettes that roll out of the oven. She is about to launch into a frank discussion of the flaws and achievements before her promising not to reveal anyone’s label.  

A tiny, terrified “Eeaak” issues forth,  en masse.

“This snake swallowed a mouse,” she says pointing to my first try. “And this one, well…” She says something way less hurtful than my first baguette mentor did years ago when I was apprenticing at a downtown Toronto bakery.  

“Just stop, Madeleine,” he called out to me shaping at the bench, pointing to my disastrous results.“I can’t sell any of those!”  

Croissants are not easy.

In fact, I’d label them advanced with a capital A.

A truly delicious, flaky croissant requires three consecutive days of attention. It wants butter that contains even more fat than normal, demands lots of finicky measurements, and exponential folding. The goal is flaky, honeycomb layers totalling 54 –  if you get it right.   

I’m thrilled to find “Sprouted Wheat Croissants” in my red KAF folderbecause I came to this course hoping for whole grain solutions to old school deliciousness. To make eight of these crispy morsels, we use 130 gm of sprouted wheat flour and 130 gm of all-purpose (King Arthur’s, of course). 

Croissant Day One, we make a simple yeasted, enriched dough and whack a 100 gram piece of unsalted, 85% fat European-style butter with a rolling pin into a thin, very pummeled five-and-a-half-inch square.  Day Two, we “lock in” our little square of chilled butter, sweetly swaddling it in the dough we made the day before. Then we get violent, methodically whacking, pounding and rolling our dough-butter combo into submission. We chill it, then whack and roll again several times. On Day Three, we roll out our sixth edition of an eight-by-16-inch rectangle, slice it into four equal parts, cutting each in half on the diagonal. Who says bread isn’t a science?

Like kids cut loose in a candy store, we adult learners happily fashion four crescent shapes and four pains au chocolat.  We each sign our name in black Sharpie pen on the parchment paper that holds our creations.  I swell with pride as I watch my croissant offspring enter KAF’s industrial convection oven, so big it can accommodate a six-foot-tall rack on wheels.  Butter aroma engulfs the room and the flaking begins. 

I post my baked beauties on Instagram and a follower asks, “Are these really yours?”

Even flour temperature matters.

“When a recipe says a pinch of yeast, what’s that mean?” instructor Geoffrey asks the class on Day One eliciting a dazed response.  

“I mean, do you want to use two fingers or threeto pinch with?” 

We respond with silence.  Just moments earlier our hallowed baking leader was talking about grams and the scientific accuracy of it all. Now we are pinching, for God’s sake. 

“If your kitchen is hot and humid, you will two finger pinch. But if the room temperature is moderate, go for three. Who can tell me why?” he asks.

One of the brighter lights among us chirps out, “The hotter the room, the faster the ferment.”

“Exactly,” says Geoffrey, “Temperature and time are two big tools for fermentation. Madeleine, I’ve put a thermometer on your bench and would like you to tell me our flour and pre-ferment temperatures.” 

Hands trembling, I insert the probe into the fluffy flour bin then into a silver bowl full of bubbling biga, calling out “66 and 66.5 F” to Geoffrey, who scribbles them on the whiteboard before us.  

At this juncture, my brain fizzles right out. Overloaded with data, my memory stick cannot download another formula or fraction. My screen goes blank during the full 10 minutes we devote to final dough temperature (78F is optimum) and how it can be controlled through a 1,000 – step equation to determine the temperature of water we use to make the initial dough.

Luckily, after days of deliberation, I get it. If we bakers can understand and compute all the variables: temperature, time, flour attributes, leavening strength and the list goes on… we can bake on a timetable producing consistent quality. As a home baker, albeit a serious one, the science of bread can only bolster the magic of my art. 

IMG_3695

KAF Spelt with Honey

Here’s an easy yeasted bread perfect for beginners. This dough is more forgiving if you are just learning to shape a boule or batard. Plus, spelt is an ancient grain with a nice, sweet nuttiness.  

600 g whole spelt flour

200 g unbleached bread flour

580 g water

2 g instant yeast

16 g salt

28 g honey

Scale flours, water and yeast in a mixing bowl, mix until just combined and cover with plastic wrap. Allow to rest at room temperature for about 20 min.

Add honey and salt and mix 1-2 min or until the dough begins to develop strength. Cover and ferment for 2 hours, folding every 30 minutes.

On a lightly floured surface, shape into boules or batards an place in floured bannetons. Cover with shower caps and retard in the refrigerator overnight.

Preheat Lodgepan combo cookers in oven at 500 F for 30 min.

Flip each loaf onto a parchment paper lined baking sheet and score.

VERY carefully remove heated combo-cooker from oven, slide loaf on parchment paper into pan, close with lid and return to oven for 20 min. Reduce heat to 460 F, remove lids and bake until golden brown and crusty, 15-20 min.


Baking at King Arthur Flour, Part 1: The things I learned in baking school

A scraper is your best friend, especially if you have two

First, we bakers need a white, plastic scraper with King Arthur Flour’s logo embossed on the surface. It’s light and flexible, a strong yet perfectly calibrated plastic that bends in the grip while its curved edge scrapes clean each bowl of messy dough we mix. We find it tucked inside our red recipe folders, compliments of KAF. My bench partner leans over and whispers, “Complimentary now, huh? I think I stole one before. Can’t bake without it.”

Instructor Geoffrey intones, “Dough is always sticky” and demos a clean scrape, lifting a mass of Multigrain with Biga dough in big chunks to the bench (a.k.a. our working surface). Once this dough hits the wooden bench it does exactly as expected. It sticks.

Enter scraper number two. It’s a big piece of stainless steel with a wooden handle and a straight, six-inch edge, sharp and strong enough to cut bulk mounds of dough in clean strokes or measure rolled-out rectangles of dough to the required specs. Better still, it cleans off that ever-present mixture of flour and water that accumulates on our wooden benches incessantly.  Wet dough leaves scat. We bakers obsessively scrape it away (following the wood’s grain if your bench partner suggests). If time permits, we use it to scrape clean our white plastic scraper, too.

IMG_3535
A docker has nothing to do with boats
.

A mysterious tool is on display at the front of the classroom. We are watching Geoffrey demonstrate “Caraway Rye Crisps”. It’s our first baking venture on Day One of the KAF course and Geoffrey doesn’t touch the docker, leaving me curious. I drag this massive white roller flecked with nails across a sheet of freshly rolled-out cracker dough. Instantly, this torture device tears my carefully rolled out dough into shreds.  I opt to make lavash and use a fork to finish the work

Dough has muscle.

According to Jen, our Day Four instructor, dough muscle can vary in strength from loosey-goosey to weightlifter tight.  Day Four happened to be Halloween and Jen is dramatically dressed as a pre-Industrial baker in a floor length dress and apron, her long hair wrapped beneath a layered scarf. Jen points to her clenched fist and dabs the pad below her thumb.

“That’s firm,” she says authoritatively.

“But this,” she says pointing to her flabby underarm muscle that’s impossible to see under the billowing waves of her costume’s fabric, “is absolutely not!”

Geoffrey’s approach to dough muscle did not include his or anybody else’s body parts.

Pushing a bowl full of dough towards us, he says “touch it, feel it.”  After another mix, he beckons again “touch it, feel it.” He chants these four words like a mantra all through the course.

“Touch it, feel it,” after a proof. “Touch it, feel it,” after a pre-shape.  We dip thumbs and forefingers into every mass of gunky dough he offers, pulling messy strands, pinching and prodding, disgusted by the gummy residue that clings like glue to our nails and knuckles.

“Dry, never water-wash your gooey hands,” instructs Geoffrey as he dunks his fingers into a nearby bin of flour, a cloud of flour lifting up. He pulls them out slowly, and methodically rubs off all the gnarly bits into a waste-bin below. He waves his dry, but still visibly floury and crusty hands in our direction and chuckles.

“That’s a bakers’ patina.”

Baker's Patina

Dough texture – and dough muscle – changes all baking day long.  Once fermented or proofed, we poke it again to test strength. Geoffrey calls this “the doorbell ring.” Depending on the bread type, we see that poke spring right back up, leave a deep indent, or something in between.

A baker’s touch is as vital as a tasting spoon, worth every sticky, messy, floury imprint it makes on our minds.

Scale it and tare it.

Baking relies on precision. Flour measured by volume (with measuring spoons or cups) is not recommended. Our individual baking stations are each supplied with a big black scale. Geoffrey says he prefers metric since “the math is easier and grams are more precise.” Bakers are constantly making computations, whether it is tripling a recipe or cutting an industrial mix into one-fortieth of its original size. Those 16 Imperial ounces in a pound just add confusion to the tally.

We start every recipe by measuring out all our ingredients on the scale.KAF Day Four

“The tare button is our best friend,” instructs Geoffrey. “Or it can be the opposite.” As soon as we put an empty mixing bowl on the scale, we tare and the screen returns to zero. We spoon in all-purpose flour and tare. We add rye and tare. We rely on the tare button to refresh the screen and weigh each ingredient separately, but if you inadvertently tare mid-stream, or worse still, your scale times out and goes blank, you can find yourself looking at a huge bowlful of  ingredients containing, God forbid, an unmeasured ingredient that can ruin the whole lot.

Scaling liquids is also tricky. The numbers on a scale just can’t keep up with a fast pour. Better to measure liquids separately and slowly. Scaling gooey blobs of honey or molasses is terminally slow and messy. Handy trick? Use an oiled spoon and honey or molasses slides off effortlessly. Worse still, tiny morsels of instant yeast (living time bombs, in the world of leavening) are so light and airy our scales can’t discern their 1 gram increments. As a result, we bakers sometimes have to ditch science and use our senses instead. It’s that combination of these two forces – one scientific and the other learned by the senses—that creates the mighty and delicious alchemy of baking.

(To be continued, next week)

IMG_3545

Rye Lavash with Maldon Salt, Chili Flakes and Rosemary

Adapted from “Caraway Rye Crisps” this recipe highlights rye’s awesome flavour and is a no-brainer, requiring next to no kneading nor any yeast.  Go ahead and cut these into fussy rectangles for traditional crackers but I prefer baking this out in two large sheets and dubbing it lavash.  Once cooled,  break into long, random sticks and serve alongside dips, paté or cheese.

114g unbleached, all-purpose flour

114g  whole rye flour (we used KAF Pumpernickel)

1 tsp baking powder

¾ tsp salt

25g diced, cold unsalted butter

118g water

20g dark molasses

Maldon salt

Chili Flakes

Dried Rosemary

Preheat oven to 400 F. Line two baking sheets with parchment paper.

In a large bowl, combine all purpose, rye, baking powder and salt. Using a pastry blender, cut in butter until it resembles coarse meal. Scale water in a bowl, tare, and scale in molasses by drizzling from an oiled spoon.  Add liquids to dry and combine with a curved edge plastic scraper kneading into a rough dough. Wrap in plastic, flatten into a disc and refrigerate for at least 15 min.

Place the disc on a lightly floured surface, cut in half and roll out each to 1/16thinch thickness.

Transfer to parchment lined baking sheets. Sprinkle with salt, chili flakes and rosemary and use the rolling pin to press in gently.

Bake 9-12 min or until golden brown.  Transfer to a rack to cool.  Break into pieces, if desired.

KAF Day One

Got juice

Three years ago, David and I became the proud owners of an apple orchard on Vancouver Island. It was August and ten, old trees stood before us in three, neat rows above a carpet of burnt, golden grass.  The hot, Cowichan Valley sun beat down on our Torontonian brows as we gazed up, knowing nothing, surveying our orchard’s branches.  

I pulled the closest apple off a tree and opened my mouth.

“What are you doing?” David asked, incredulous.

I bit off a big chunk and chewed, holding his gaze. I continued to chew, hoping that somehow the taste and texture would improve. 

But it didn’t.  

I spat it out and recognized the first unripe flavour of my new occupation.  Apple Orchard Aug 2016

Beside the orchard was a long, gravel driveway up to the house, guest house and barn. It was lined with plum trees, all of them heavy with yellow, orange and red plums each no bigger than a cherry tomato.  They hung like grape clusters and beckoned sampling. I started with a demure, meek sampling that turned into rapid gobbling followed by voracious hoarding. 

David’s watching eyes bugged. 

Each plum was sweet, juicy and too plentiful for the pouch I’d fashioned in my t-shirt, now fully stained and attracting a buzz of nearby wasps.   

David picking High Russets
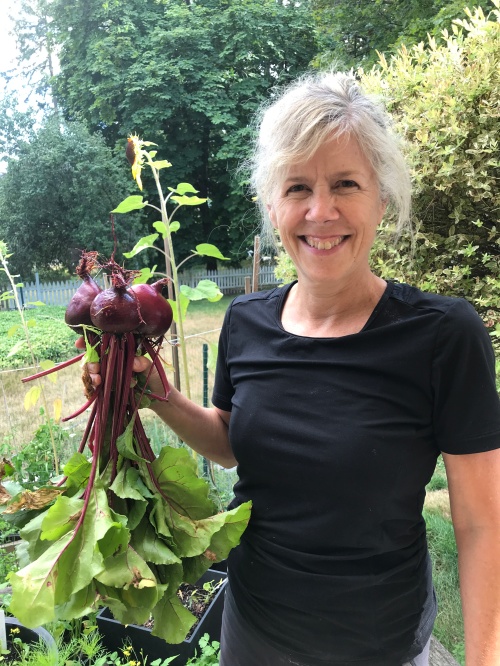
David, my apple farming husband, is still incredulous three years later as he lugs 15 boxes full of apples into the back of the SUV. It’s our third annual harvest and the first to go to McBarley’s juice and fermentation facility in Duncan. It’s not even the fall and we have harvested and boxed all of Number Two and Three trees. (These round, red and green apples the size of a fist resemble McIntosh apples – but doesn’t every Ontarian call apples that?)   Classic Red No 2

Never before have we nabbed the apples from Two and Three before the ravens execute their robbery. But here on the West Coast, David and I often wait for the wildlife to inform us. Their radar goes off like a living, breathing Brix meter. This year, all it took was a murder in the orchard for me to get out there and taste our wares. 

“It’s really good,” I say to David, mouth full of apple. “Try it.”

“Sweet!” is his reply.

We’re both incredulous. 

The brown, dry grass below the trees is littered with scat. We argue over their provenance. Is it bear, deer, rabbit or the neighbor’s lab? We know elk don’t venture in these parts, but then again, we never know what can happen here.  Just a few months ago, six gargantuan black steer (set loose from a neighbouring field) sauntered past our windows at dawn, way before our caffeine had kicked in and we had the wherewithal to run outside and follow them.

But I digress.  The apple harvest.  With tall, old trees like ours, it has to happen with ladders, a tool David was thrilled to purchase at Adam’s Tool and Tarp in Duncan and load into his brother’s pickup.  He bought an eight and 10-foot pair, neither which is easy to lug across the orchard let alone manoeuvre around our tall, leafy apples trees with their outstretched, unruly boughs.  

“It must be stable,” said our arborist Gordon McKay in his thick Scottish brogue, as I climbed up the rungs one wet, bone-chilling March morning several years ago. It was the only piece of instruction he’d given me in the past half hour that had made total sense. 

Number 7 beauty shot
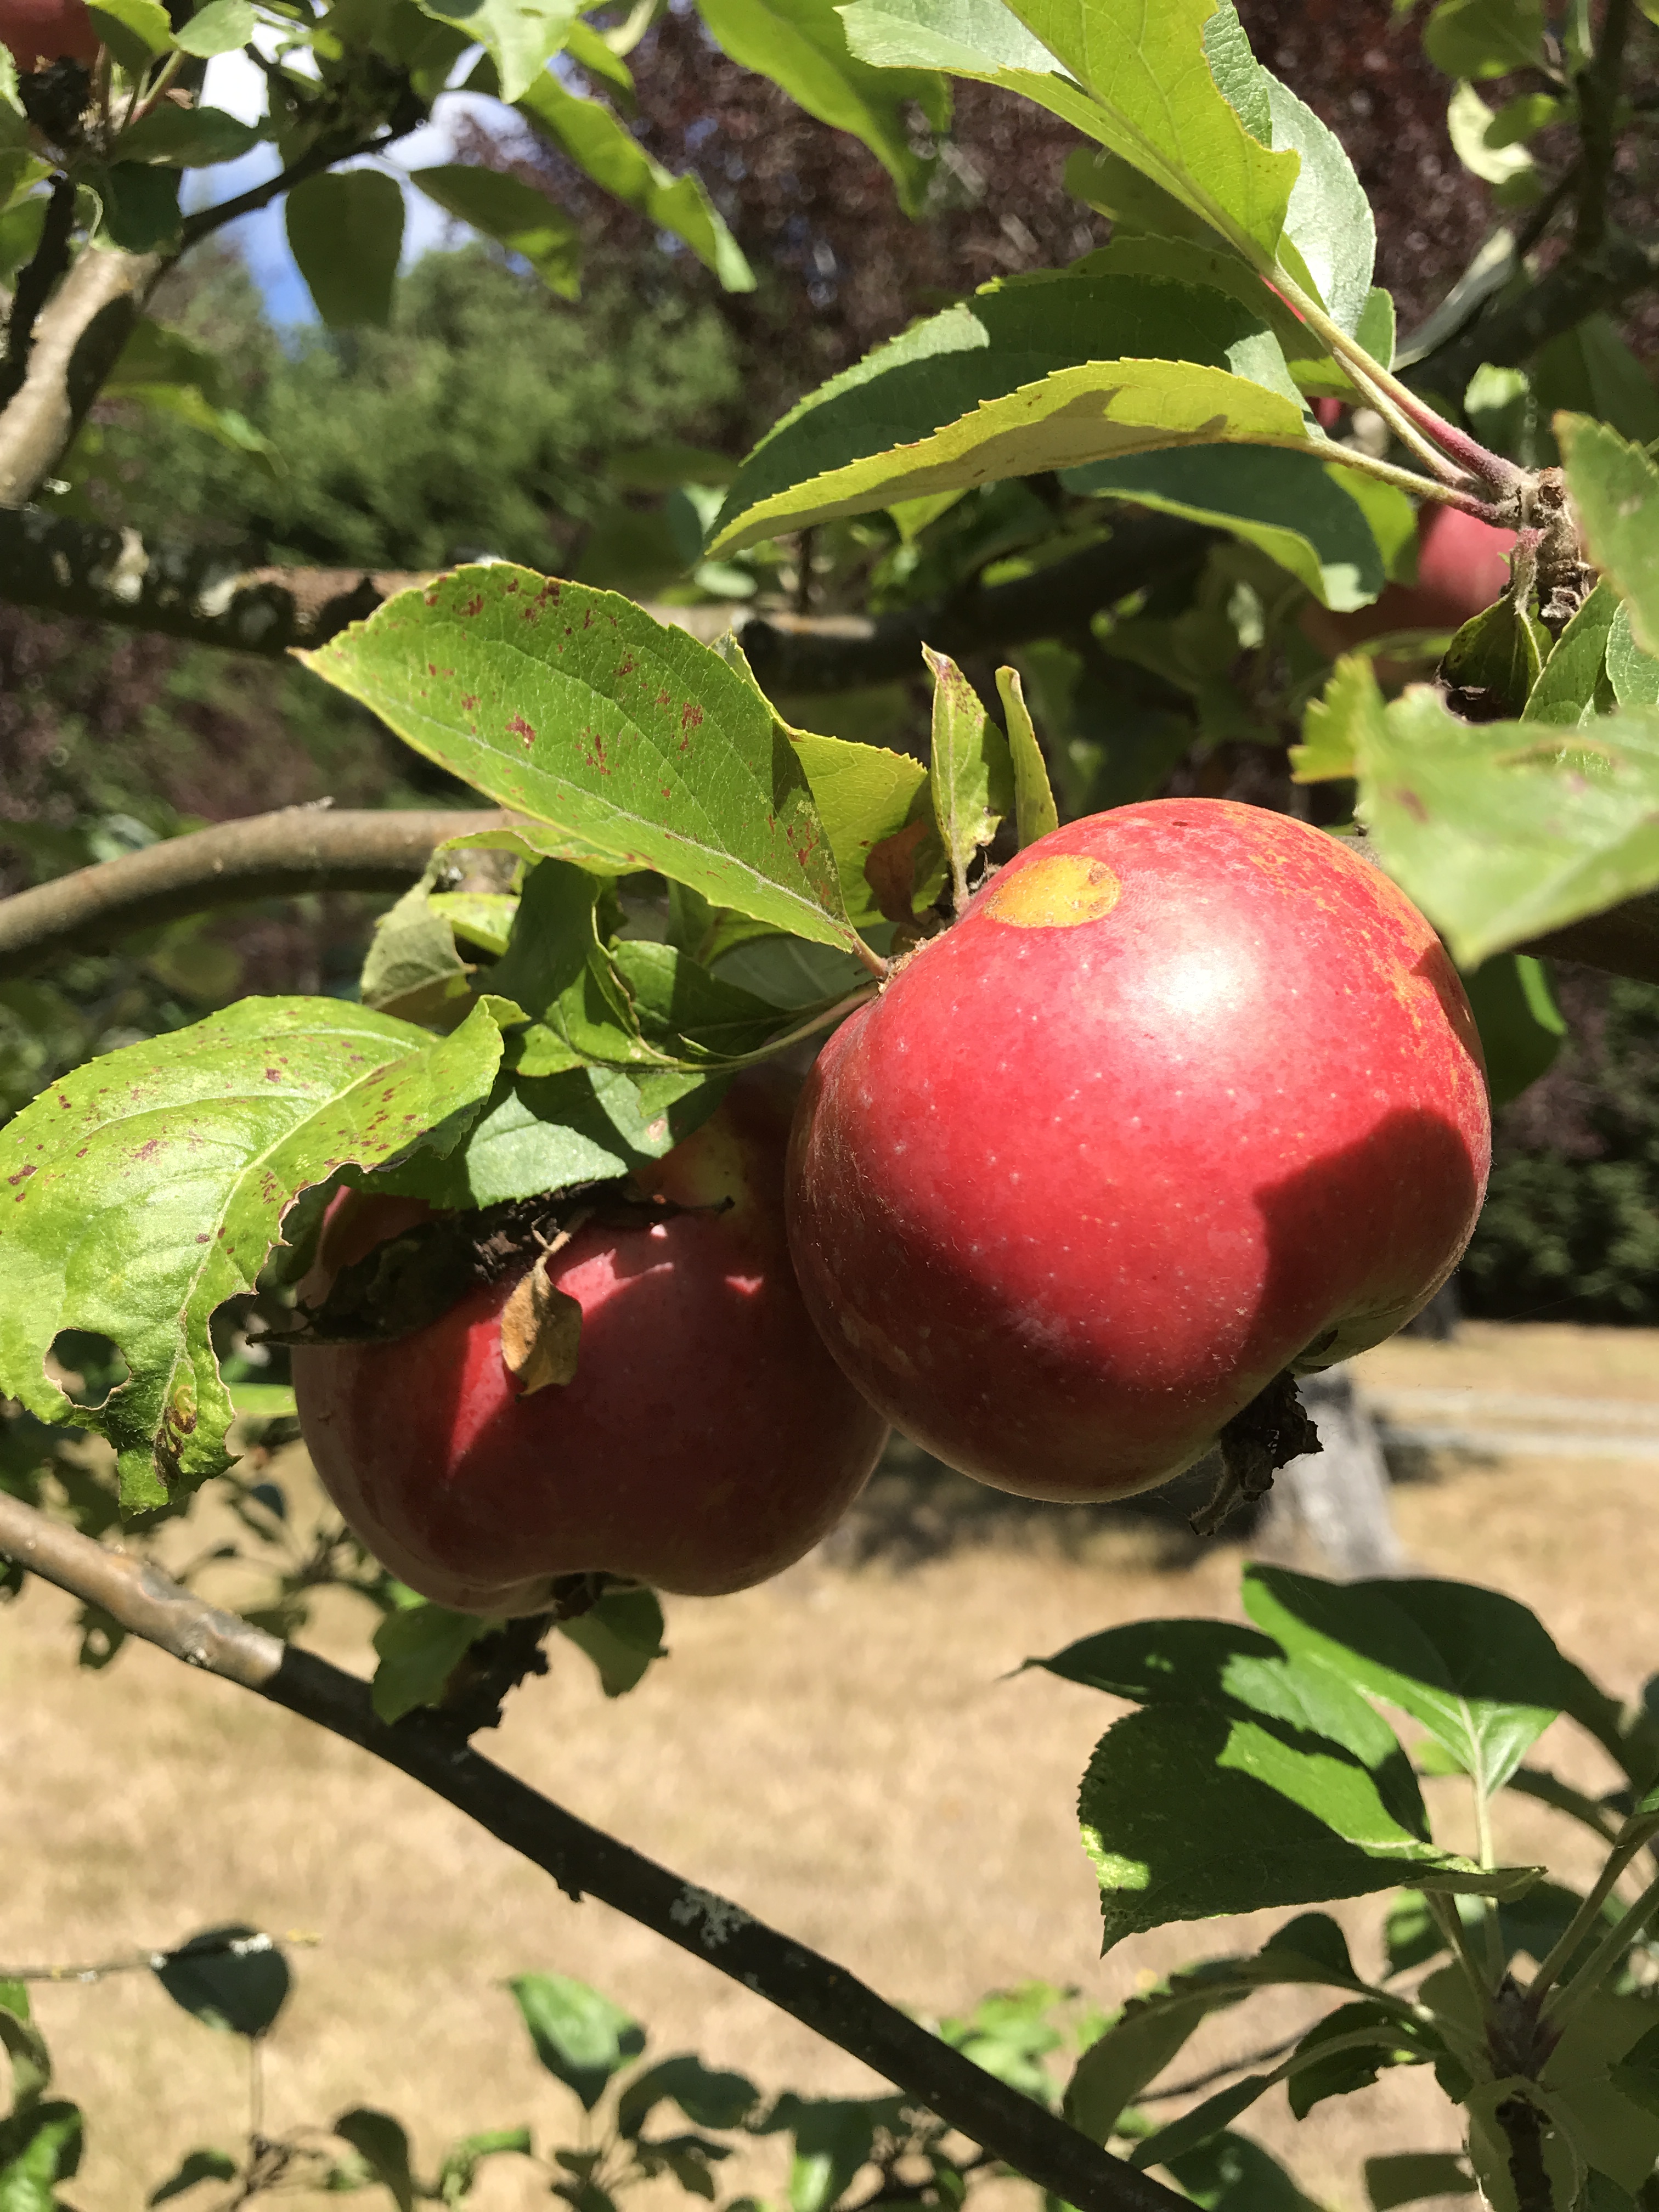
McKay had started with the buds, pointing out their difference, which I could not discern. 

Then he spoke about cutting angles, which I quickly confused.  

Finally, he spoke about “last year, this year and next year’s growth”, at which point I was terminally lost, yet climbing up an eight-foot ladder. 

Just clip and hope for the best, I told my shivering self, dressed in two layers of long underwear and holding Japanese cutting shears in my right hand. My tree mentor’s instructions had floated right over my baseball cap into that gleeful empty field I call my memory. Luckily, the arborist was nearby on the other ladder, up another tree, clipping away expertly at breakneck speed. I faked a good hour of pruning until I snuck away, sighting urgent bathroom needs. Both McKay and I knew – there and then – that I didn’t have what it took to prune, but I might have some talent in the harvesting department.

Fast forward to August 2019.  My baseball cap and pony tail are stuck in a branch and I can’t move my head. An inch. I’m up on the top rung of an eight-foot ladder.  All I can see is apple leaves, spider webs, branches and one fat, out-of-reach 2-pound honker of an apple. But if I move too far to the right or left, it will be suicide, by hanging. A professional (i.e. Lee Valley) apple harvester’s bag is slung across my chest. It probably weighs 15 lbs and despite weight-lifting at my Mill Bay Pilates classes, I know I’m a goner. So I do something unusual for me: I wait. I breath. I listen to the jungle call of a nearby Pileated Woodpecker and thank my lucky stars that I get to be an apple farmer stuck in a tree overlooking Herd Road lake.  

Harvest box 2&3
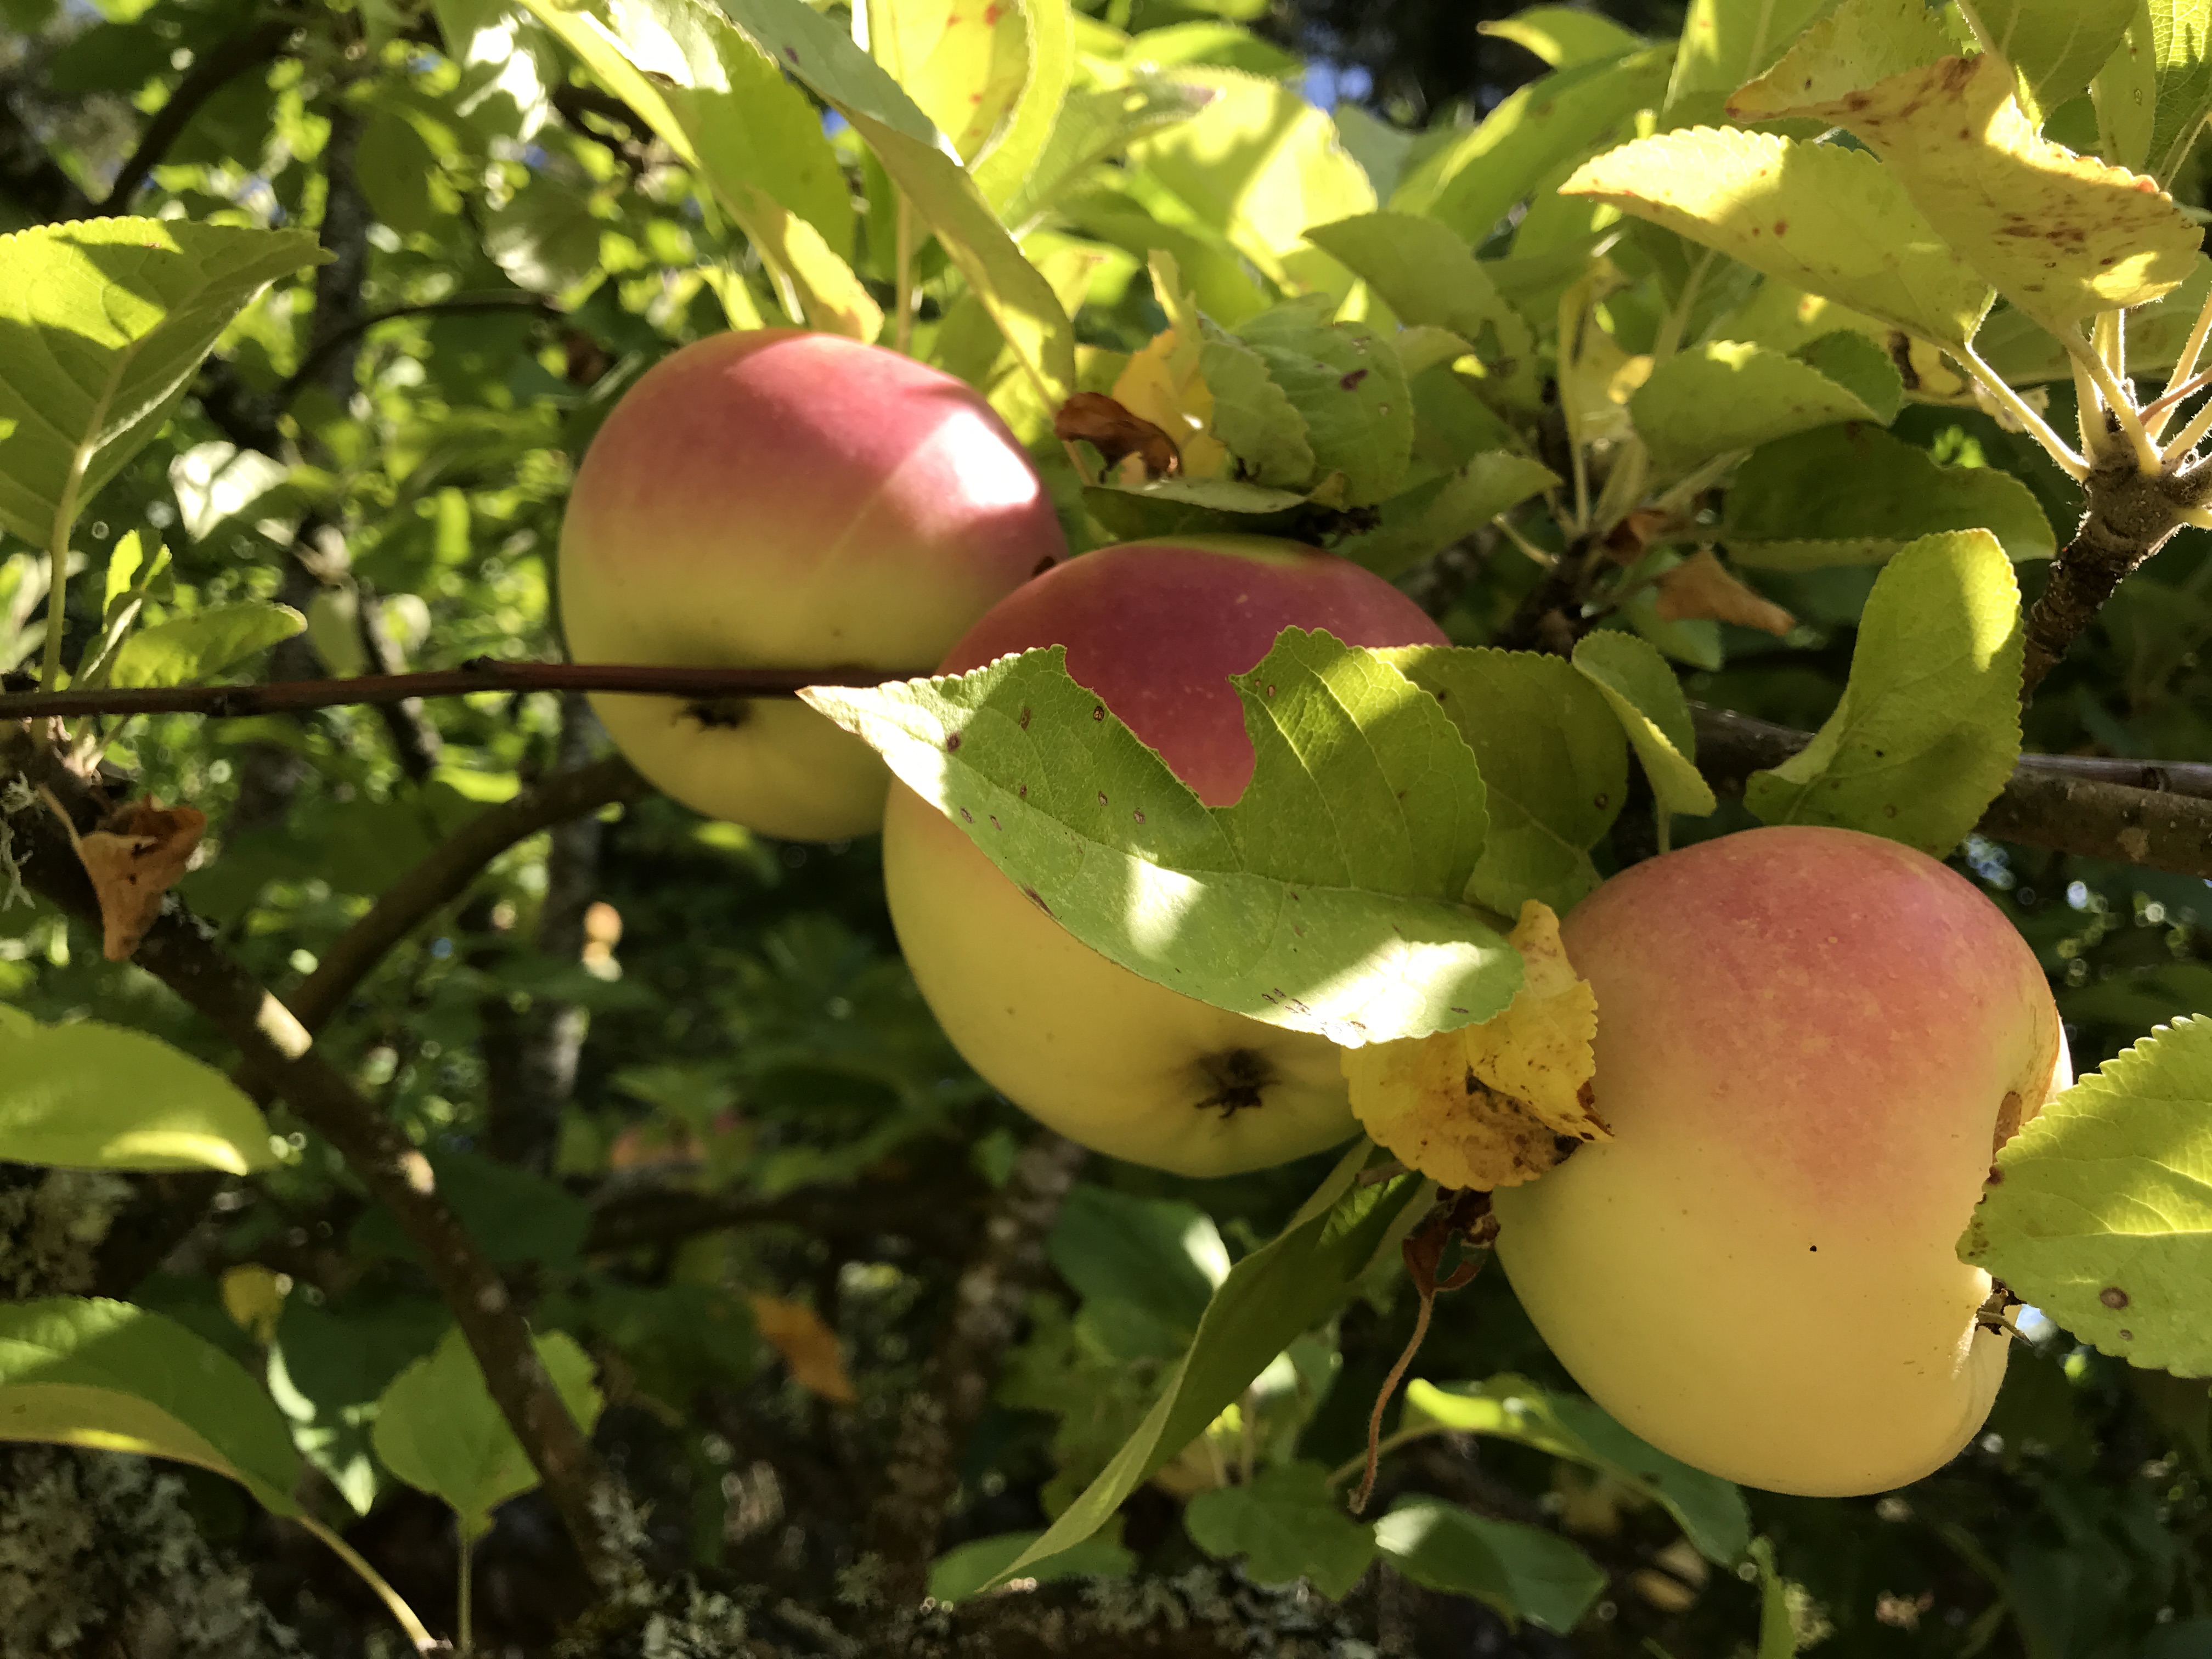
David and I are killing this year’s harvest.  Four or five full apple boxes are at the base of Number 8, the only tree we sort of know the varietal name for, due to its rusty, russet skin. Because we’re professionals, we don’t pretend to know the true varietal names of any of our ten trees but we are carefully recording their appearance, taste and botanical behaviour like the untrained scientists that we are.   

One summer, we took samples from each of our ten trees to the BC Tree Testers at the Cobble Hill Fair. Despite the combined  wisdom of three experts riffling through onsite reference books, slicing, tasting and considering… they came up empty, sighting the more than 10,000 different apple varieties and their unfamiliarity with our mysterious ten. Thus, we can only be certain all ten trees are different varieties, likely planted around the time David and I were born. We fondly refer to our apple family as Tree One through Ten, a habit that seems scientific but at the same time, really appeals to my Chinese sensibilities.  

A perennial Food Mama, I cannot let the offspring of my offspring go to waste. Thus the harvest, the ladders, the collapsible boxes, the shears and bags all spring into action once the ravens descend on the orchard. They huddle like dark shadows at the base of our trees and diffuse in a tactical squad when we walk or drive by. Once I’ve pulled all the easy to reach apples from the low hanging branches and dump that first bag of hard red orbs into a box, the ravens have returned to the perimeters, invisible in the high branches of our pines and firs emitting an intermittent  “scaaaw”, a staccato, almost digital “blonk” or my favourite, a continuous stream of gurgling water. 

Timing is tricky. Really tricky.  Mother nature doesn’t give a hoot about any of the dates I’ve put into GoogleCal but booking an apple squeeze is imperative. We know our trees don’t all ripen at the same time. Rather, they ripen up the line from Number One (ready in mid-August) to Ten (done in early October). 

But it took us three years to learn to stagger one year’s harvest into three drop-offs at McBarley’s. 

Our newbie harvest of  ‘16 was crushed in Courtney, a 3-hour drive away. Pressing Matters have a $300,000 German-made mobile apple juice maker that travels across the island and even ferries to many of the Gulf Island apple farms during the season. Yet this year, it was grounded. 

“Why?” I asked, making my first apple farmer business call.

“Cause nobody has apples this year,” laughed the gruff farmer on the other end of the line. “You bring ‘em here and wait for us to juice them.”  

David and I were the fourth truck full of apples to pass through Pressing Matters farm gate early one October morning.  We unloaded, adding our harvest to a ramshackle sea of cardboard boxes filled with pockmarked apples of every size and variety. Apple Juice Boxes in SubaruMany hours later, we left with 5L boxes full of hot pasteurized juice packaged into vacuumed plastic bags. Just like boxed wine, this juice comes out of a tap and is shelf-stable for 6 months without refrigeration.   

Next year, Pressing Matters went mobile and we found them at a small farm in Cedar, an easier 45-minute drive away. The truck in the lineup ahead of us had three times as many apples as we did. 

A mobile pressing machine like this requires four or five to operate and at McBarley’s they run the unit outside in their parking lot. Customers like us just drop off our apples, watch them get weighed and sign up for pasteurized juice, hard cider, or both. 

It sounds simple but the rub is in the timing. Ask any farmer and she’ll tell you to check that almanac, or your horoscope or better still, the waxing moon to know best harvest times. Yet to run a facility like McBarley’s, it’s all about scheduled dropoffs and pickups  for hundreds of folks like us avec les pommes. We opted for a three-stage harvest this year hoping 2019 will translate into the sweetest juice and  best bubbly vintage, ever. 

I know Number One through Ten will drink to that. 

Ground lamb curry & FOO Asian Street Food

There’s nothing like the thrill of an Asian food find for an eater like me. Especially when the food is found in Victoria.  In the rain.  On Yelp. When we least expected it.

FOO Asian Street Food (769 Yates Street) is not a fancy place. Like many of its Vancouver Island brethren, this funky hole-in-the-wall demands lining up before you can order and snag a seat. At FOO the seating is slim:  no more than a dozen stools line the perimeter of the order/waiting area.

Emma and I dashed in from out of the rain and were instantly slammed (in a pleasant, food-lover’s-way) by the smell of the place. The air was thick with stir-fried oil, Thai basil, chillies, toasted seaweed and Jasmine rice. FOO’S menu, along with daily specials, were in big print on the blackboard. Reading it was veritable candy to my Asian-cuisine-starved eyes:  curries, noodles, stir-fries, dahls, sweet and sour soups,  and crazy specials like poutine with Szechuan peppercorn gravy or fries done up Togarishi-style with spicy house furikake and fermented chili mayo.

Better still, the woman at the cash taking our order was mean. She had an edgy, crowded city attitude that delights masochistic and hungry metropolitans like me.

We ordered hot fried bread and chutney to whet our appetites along with two local brews: a can of Fat Tug (Driftwood IPA) and a tall bottle of Hoyt Pilsner. IMG_1897

Because our stools were squished near the cash counter, I leaned over, smiled senior-sweetly and asked the Cash Lady if the fried bread contained chickpea flour.

She could barely contain her disgust.

“Chickpea flour?!” she scoffed.  “We’d never do that, ever.” Then she guffawed.

Okay, maybe I should have guessed turmeric.  I know they secretly tuck something into these professionally deep-fried triangles of golden-hued, super moist bread.  Each bite took the edge off our hunger.

Next up, seared morsels of rare, albacore tuna were spread out like a deck of cards over a tangle of cold soba noodles and cucumber ribbons bathed in a sesame-miso vinaigrette.  Pad Thai was ratcheted up a notch with charred scallions instead of plain old green onions.  But it was the Curried Noodle Stir-Fry that stole my foodie heart, with morsels of cha siu bbq pork, succulent shrimp and truly al dente Shanghai noodles. IMG_1900

I lied. It was the Sweet and Sour Pork Belly with tamarind glaze served with spicy green beans that stole all our hearts. Each one of these pork mouthfuls had us groaning, its flavourful fat such a yummy counterpoint to the salty pork.img_1895.jpg

Just below the blackboards manning the open kitchen, two young chefs in black T-shirts slammed, shook, tossed and sautéed non-stop. Working eight unrelenting gas burners on super high, each like a blow-torch, these guys have no time for comments or questions from Plebeians like sweet, little old me. I watched them ladle in sauces, drop in handfuls of noodles, sprinkle fistfuls of shrimp, pork or tofu and slide steaming contents into one big white bowl after another.  It was an endless stream of expert deliciousness overseen by the Cash Lady managing both the line-up and take-out call ins.

“You can pick up in an hour,” she told one caller, “Want it sooner? Try McDonalds.”

Luckily, we experienced no wait. We were at the front of the line both visits and food arrived swiftly.  After the first FOO visit, we started plotting our return, despite the more than hour drive into Victoria over a mountain pass, no less.

It was the Ground Lamb Curry’s fault. I didn’t tell you, dear reader, about its rich and layered meat sauce, redolent with a dozen spices and so superbly satisfying. The blackboard advertised it as “Indian spiced lamb” but it was so much more than those three words.  I swear those line cooks had pulled every flavour out of their toolboxes to create this glistening, gravy infused lamb creation, sweetly offset with green peas, lying on a soft white bed of basmati.IMG_1904

There were four of us all fighting over the Ground Lamb Curry on our second visit. It was a magical flavour equation that I had to recreate in my kitchen.

As every cook will attest, ingredients are 90 per cent of a recipe’s success. I jumped on two packages of frozen, farm-raised ground lamb from the Yesteryear stall at the Duncan Farmers’ Market.  Later, I pounced on fresh, very unwrinkled turmeric root at The Community Farm Store, also in Duncan. My spice drawer had recently been supplemented by a happy, inaugural stroll through Sabzi Mandi Supermarket in Nanaimo. The finishing green garnish would be a handful of mint from the burgeoning mass under our willow tree and another, from a clump of cilantro in the raised beds. (Miraculously, cilantro (fresh coriander) self-seeds here on the island.)

And because I am so humble, I attest that the only difference between my Ground Lamb Curry and Foo’s is me.  I am the final 10 per cent of this recipe’s success.

IMG_1929

Herd Road Ground Lamb Curry with Peas and Mint

This is the same and different from Foo Asian Street Food’s ground lamb curry.

2 cooking onions, quartered

6 garlic cloves

2 inches ginger

2 inches turmeric

Peel and chop onion, garlic, ginger and turmeric.  Whirl into a paste in a food processor, adding ¼ – ½  cup water.

In large frying pan, heat  two tablespoons oil and saute onion paste until golden, about 3 minutes.

In a small mortar and pestle, crush:

1 hot dried pepper

1 tsp cumin seeds

1 tsp coriander seeds

½ tsp fennel seeds

½ tsp black peppercorns

1 ½ tsp coarse sea salt

Add to onion mixture and saute 1-2 minutes.

Add:

4 tbsp tomato paste

½ cup coconut milk

Bring to a boil and simmer gently for a few minutes.

Add

2 lbs ground lamb

3 tsp garam masala

Cook on medium heat until lamb is brown.  Add 1 1/2 cups water.  Cover and simmer on extreme low for 20 minutes

Add:

1 ½ cups frozen peas

2-4 small fresh green hot peppers

2 tsp anardhana (dried pomegranate) * optional

1 tbsp lemon juice

¼ cup chopped fresh mint leaves

¼ cup chopped fresh coriander

Simmer until peas are tender.  Serve on steamed basmati rice.

IMG_1928


Sourdough baking with Sarah Owens

It’s because of cookbook author Sarah Owens that this baker has started to travel with her dough. I put it in a big plastic tub in the trunk of my car or strap it into my bike carrier, ready to drive off to meetings or Pilates classes with living, bubbling yeast. I pack water and a cloth so I can stretch and fold the dough with wet hands every half hour and clean up my doughy fingertips afterwards.

IMG_6038
Pulling beet levain dough in the car during a tennis game

My life goes on and so does the ferment. It’s got to! Sarah’s technique requires half a day of fermentation.

If you think that’s crazy, you’re unlikely to want to bake from SOURDOUGH: Recipes for rustic fermented breads, sweets, savories, and more.

But then again, you’d never have the pleasure of taking the lid off a Lodgepan combo cooker in a 500F oven and seeing cheddar cheese ooze out of a hot, chili-spiked bread. Your palate would never notice the delightful zing and bite of both fresh and candied ginger folded into a sweet, buttery cake or enjoy the crunch of poppy seeds in a turmeric-tinged artisanal levain loaded with leeks.

Turmeric scallion leek levain
Seeded Turmeric and Leek Levain

This cookbook has opened a new world of baking for me. Never before had I used sourdough starter to make anything other than bread, but now I’ve tried it in cakes, cookies, popovers, even crackers. The wild yeast adds a depth of flavour to these baked goods and a bubbly crumb. (Besides, I refresh my sourdough starter weekly, if not every few days, and I’d much rather add it to an innovative recipe than throw it away.)

Sourdough bakers believe that good bread needs a very slow rise.  Often, that’s a three-day process that requires more waiting than action. Sarah’s bread recipes are no-knead and include a range of flours, from buckwheat to kamut to emmer.

Beet Bread (found on my copy’s stained page 55) asks you to plunge into a slurry of roasted beet puree, levain and three different flours and “mix with your hands until completely hydrated and no lumps remain.” IMG_6053

I was game. My fingers emerged a bright, gooey pink and my banneton might be stained for life but every cakey, sweet bite of this levain was worth it.  Think velvet cake without the sugar.

IMG_6059
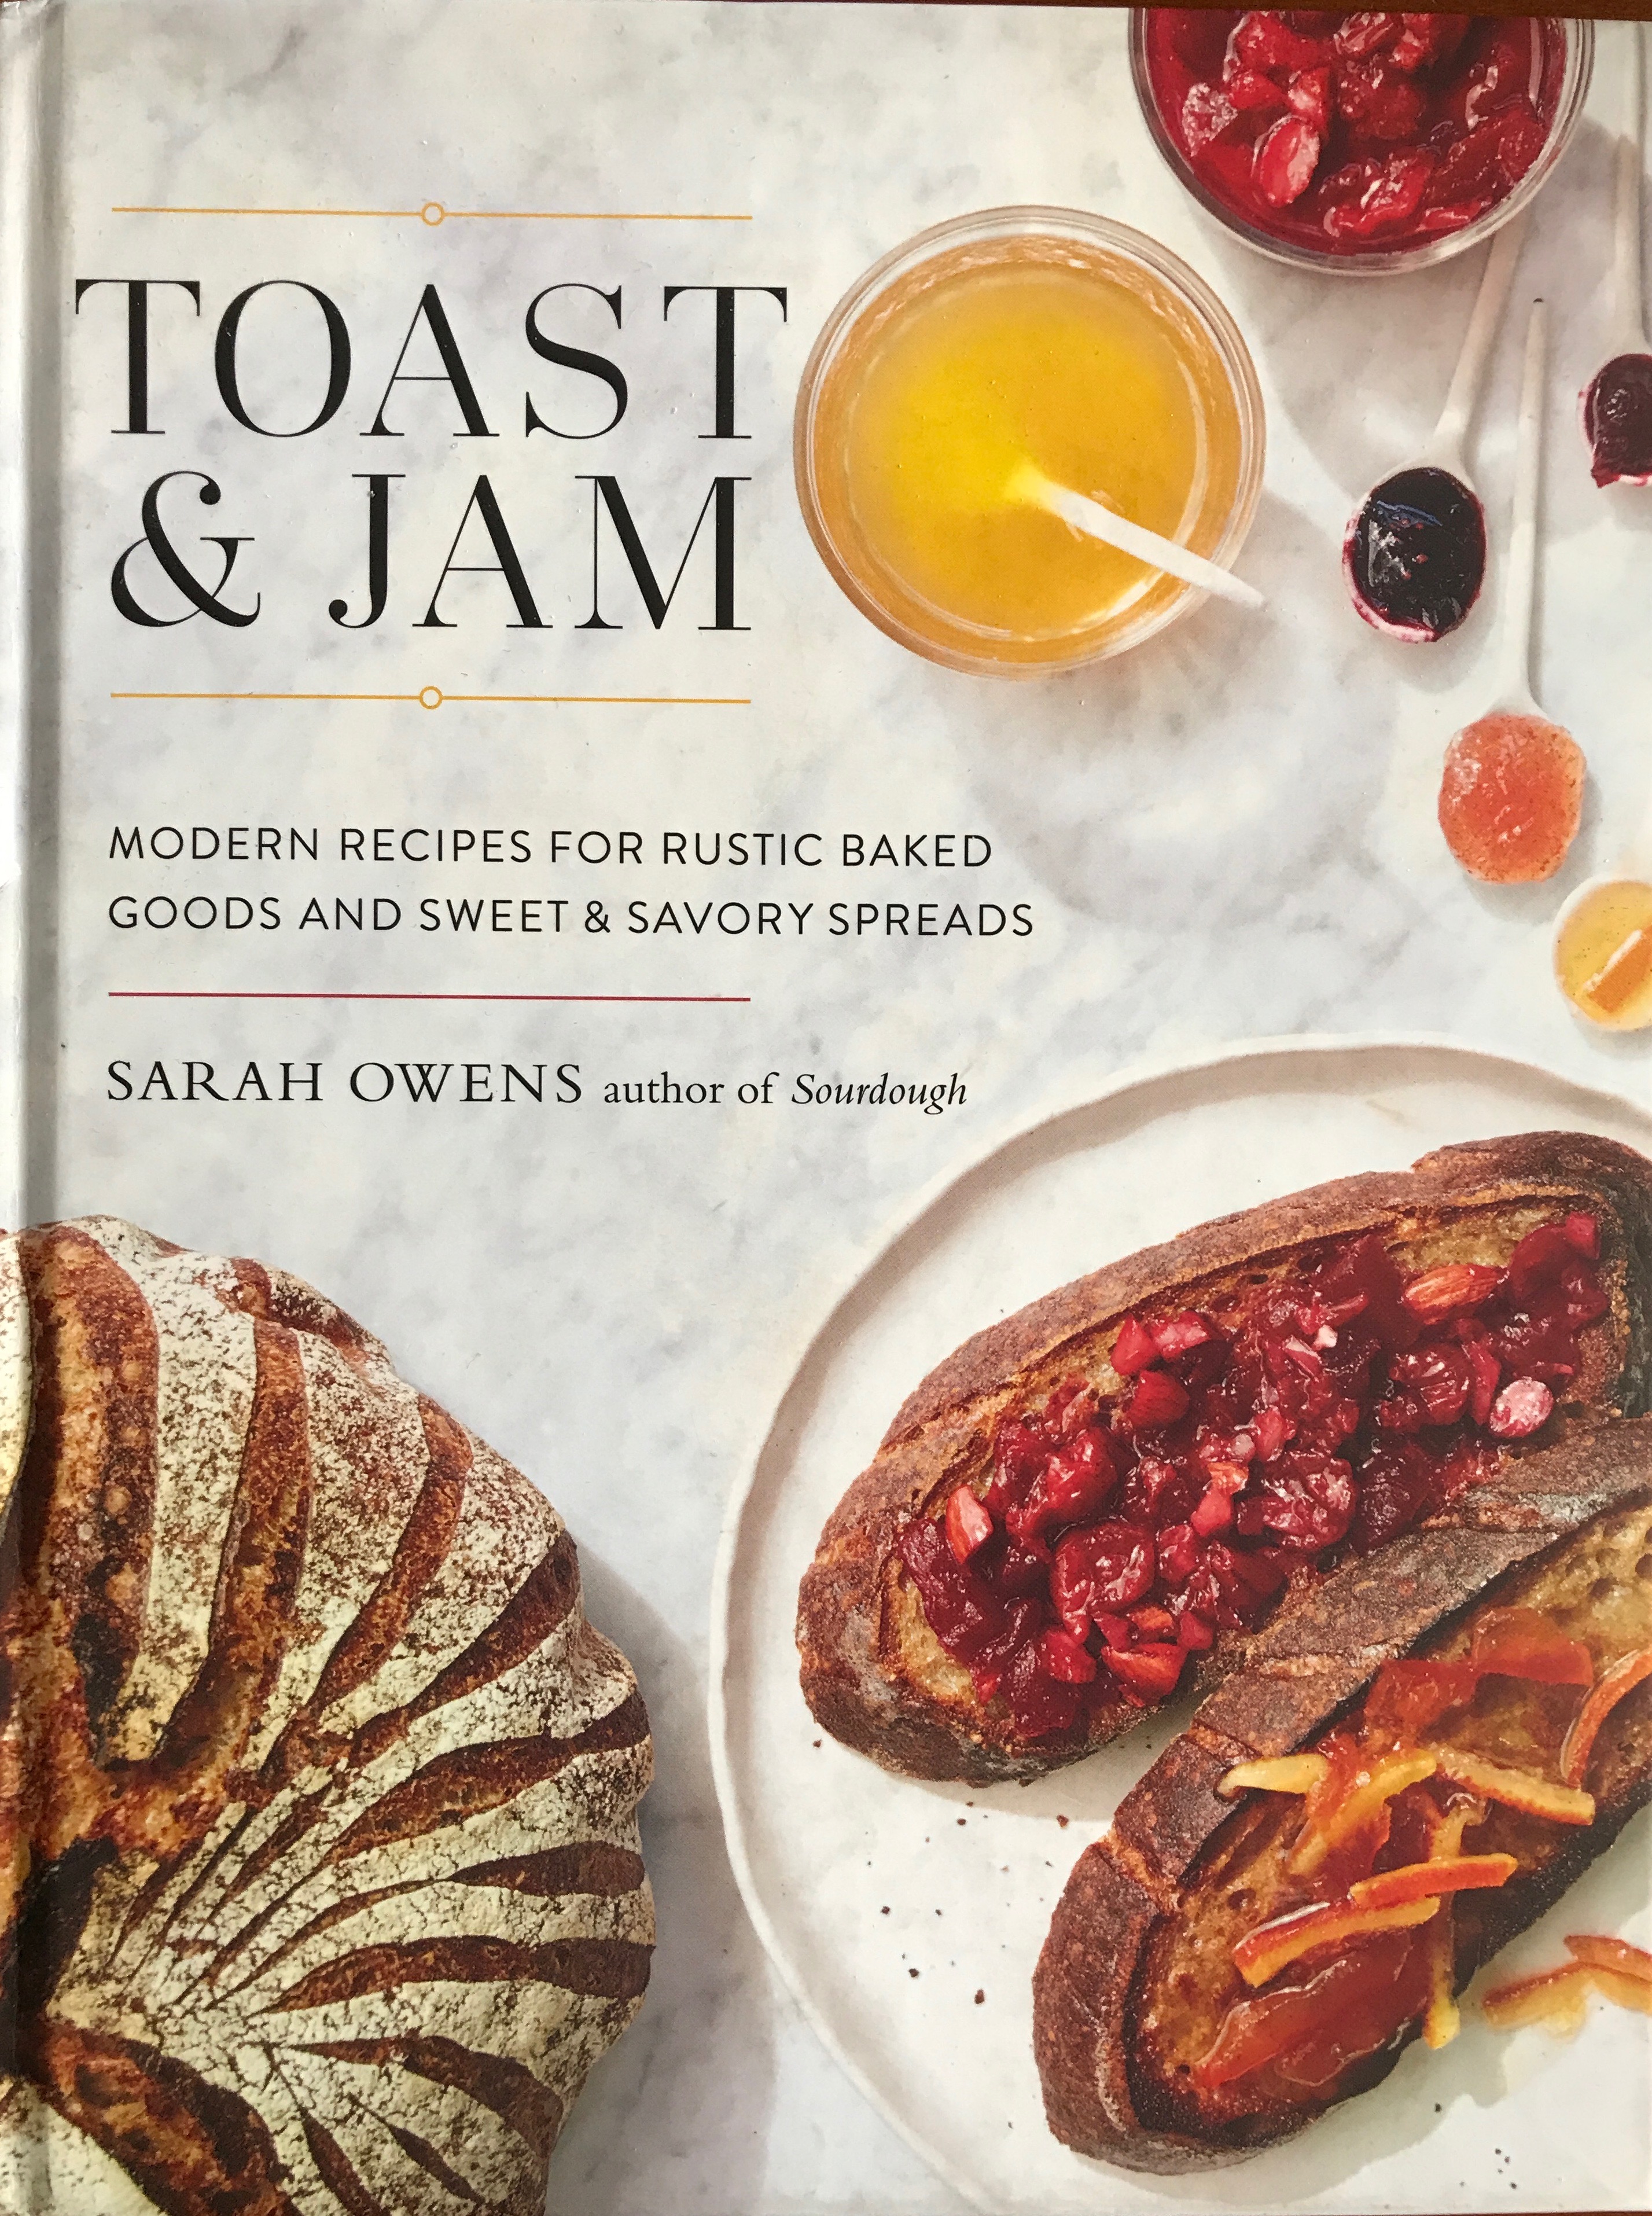
Sarah really understands flavours and how to pair them.  A former rose horticulturist with the Brooklyn Botanic Garden, this woman knows and loves blossoms, buds, roots, seeds and fruits. She bakes like a true artist and luckily for us, she’s written down all of her highly novel, well-tested creations. Who would have thought to make popovers with spring chives and dandelions? Or pair cocoa-spiced pork with rhubarb in a pot pie?

Admittedly, I have had a little trouble with a couple of her recipes. Brooklyn Sourdough is minimalist in terms of ingredients but calls for a five to six minute “slap and fold” method that I was unable to master.  My boule-shaped loaves looked like pancakes when I pulled them out of the oven. Ditto for the Friendship Loaf.

IMG_6074
Honeyed Spelt and Oat Levain

But neither of these disappointments will stop me from raving about the feathery-light, wide open crumb of Honeyed Spelt and Oat Levain.  Or from trying more of Sarah’s out-there ideas.

Sourdough was her first cookbook yet it won la crème de la crème of cookbook awards in 2016: the James Beard. No wonder she has 26,000 people following her on Instagram.

Last Christmas, my son gave me Sarah’s second cookbook Toast and Jam: Modern recipes for rustic baked goods and sweet and savoury spreads. This beauty of a book contains as equally a novel approach to preserves, as it does to sourdough baking.  I’ve got a sumac tree outside my window that I’ve been eying for her jelly recipe not to mention some gnarly organic carrots from my garden, bound to dazzle in her Spiced Carrot Levain.

If it weren’t for this cookbook author’s mighty contribution to baking, neither me nor my dough would be travelling together in such a delicious way.

IMG_1006

Cardamom Biscotti

Sometimes it just has to go cardamom in my kitchen.  I start dreaming about flavour swaps and find my hands magically clutching a baggie of army-green pods from that crazy mishmash called my spice drawer. I hold the bag and … sigh.

No, I start cussing, wondering aloud if I have the cooking mojo in me to ferret out their cache.  Will my cold, stiff fingers find the fortitude to single out each and every one of these tiny seeds that bear an uncanny resemblance to mouse turds?

Cardamom pods aren’t like those happy, smiling pistachio nuts, each cracked and cooperative. These babies are sealed shut like an exotic, perfumed temptress.

Thus, they bring out the pounder in me.

I’ve tried crushing them under my chef’s knife like garlic cloves –  but lo, they slide and slither.  I’ve grabbed a sheet of wax paper and hammered a rolling pin over them a few times, to absolutely no avail, except for a heap of shredded wax paper.

Luckily, an adorable silver mortar and pestle comes to my rescue.

I throw a handful of pods in the bowl and happily clunk the silver pestle down until I hear crunch after satisfying crunch, splitting and cracking, dispersing their wealth.

The very first pod reaps a clump of tar-black seeds.  I can hear my East Indian cooking teacher intoning “Only the black ones are good” as I crack open pod after pod that she’d obviously throw out.  A sliver fuzzy membrane is scattered among my largely brown, verging on beige collection. I drop it all into my spice grinder and grimace, again, because fifteen minutes of finicky fine motor work hasn’t even covered my spice grinder’s blade!

Despite this ominous beginning, the seeds whirl into a satisfying silvery and soft powder that trails up into my waiting nostrils with an explosion of menthol and sweet, peppery perfume that is unmistakably cardamom.

Why don’t I just throw up a white flag and buy it ground?

Because I want flavour. Whole spices that are crushed or ground right before use, release essential oils full of oomph.  And oomph is what I have planned for this special little biscotti  packed with toasted almonds and pumpkin seeds, filled with organic flours, eggs, sugar and vanilla then made perfect thanks to cardamom in the batter. I finish each and every log of biscotti dough with a sparkle of cardamom sugar.

Just a pinch will do it.


Cardamom Biscotti

I really can’t live in a house without biscotti. They are my go-to cookie and a welcome gift to friends and family . Thanks to the double bake, they store for weeks, even months in a closed glass container and travel well on airplanes and road trips.

Biscotti Batter:

1 cup whole, raw almonds

½ cup pumpkin seeds

1 ¼ cup organic all purpose flour

1 ¼ cup organic soft whole wheat flour

1 1/4 cups organic granulated sugar

2 tsp baking powder

1 tsp ground cardamom

1/2 tsp salt

4 large eggs

3 tsp vanilla

The Finishing Touches:

1-3 tbsp flour (for rolling out logs)

½ tsp ground cardamom

1 tbsp organic granulated

Preheat oven to 350 ° F.

To toast almonds, arrange on a baking sheet and bake for 5 minutes. Add pumpkin seeds to the sheet and bake another 5 minutes. Allow nuts and seeds to cool completely.

In a large bowl, combine flours, sugar, baking powder, cardamom and salt. Use a whisk to mix thoroughly.

Whisk eggs and vanilla in bowl of an electric mixer until frothy. Use the paddle attachment to mix in flour and sugar mixture.  As soon as the dough clumps around the paddle, add toasted almonds and pumpkin seeds and mix until just combined.

Dust countertop with flour. Line two large baking sheets with parchment paper.

Spoon out one quarter of the sticky dough, dust lightly with flour and working quickly, roll into a 8-10 inch log. Transfer log to baking sheet. Repeat 3 times.

In a small bowl, mix sugar and cardamom.  Sprinkle over logs with pinched fingers.

Bake for 30 minutes or until biscotti logs are golden and firm. Completely cool logs on a rack for at least 30 min.  Using a serrated knife, cut crosswise into 3/4 inch wide slices.  Arrange cut side down on baking sheets and return to 350 oven for 10-15 minutes or until golden-brown and crisp.

Lucy’s Amaretti

My friend Rocca likes to bake cookies. Because she’s Italian and the women in her family have  taught her well, she will stare at you something evil if you decline any of her food offerings. Most don’t dare say no. Those who oblige are always glad they did.

Rocca understands flavor and the dynamics at play when you combine lots of sugar, butter and chocolate. She’ll practice a recipe with the tenacity of a terrier until she gets it just right. Rocca’s chocolate almond biscotti and her sea salt, chocolate and pistachio sablés are unparalleled, in both taste and appearance.

Maybe she was Japanese in a past life, for Rocca cares about good packaging, nesting her deep brown cookies into turquoise tin boxes that show off these treats in signature fashion. Just a glimpse of a turquoise box starts most of us Rocca-cookie-lovers salivating. We’re the same ones who hasten to return her tins the moment they are empty, ever hopeful for a refill.

My late husband Don – not a baker – always said, “Food tastes better when someone else makes it.” He was a consummate sweet talker, a salesman even, and he inspired the bread baker in me. Don’s sage words were ringing in my ears today as I tested Rocca’s amaretti recipe.

It just didn’t taste as good as when Rocca made it.

IMG_3290
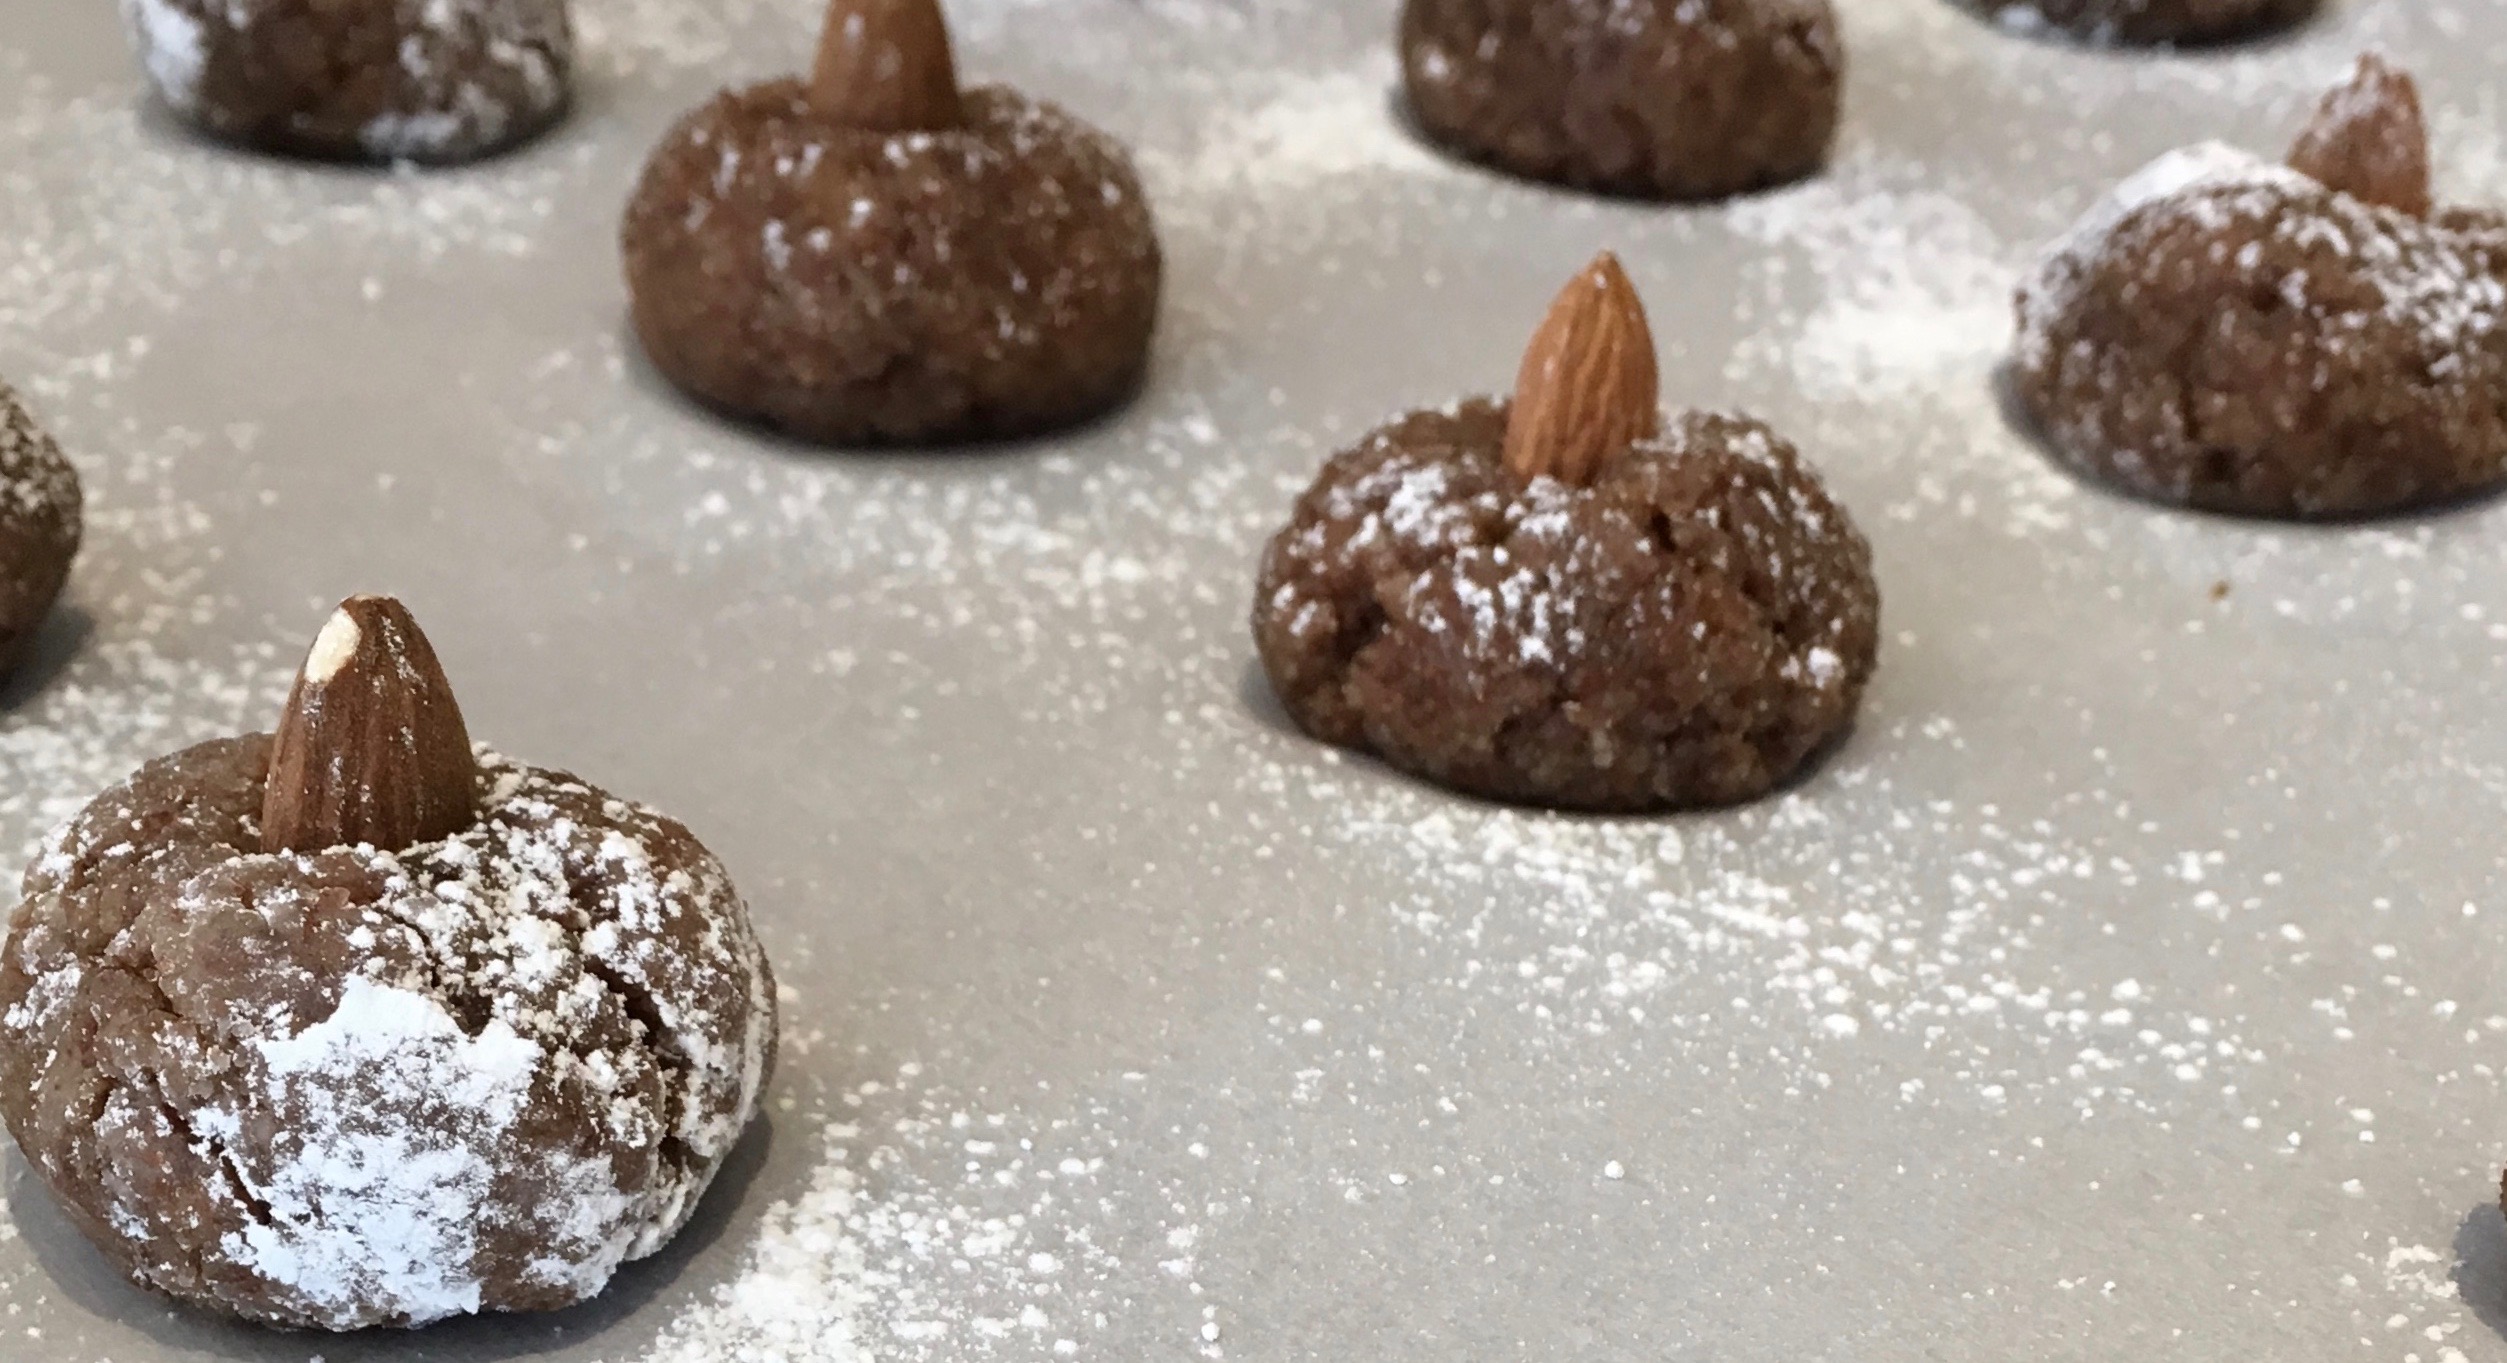
Full disclosure: I have a thing for amaretti. They are classic among Italian sweets and like most classic things, vary wildly from cook to cook, region to region. I’d made it my calling to sample them all, be it fresh from a bakery or ripped out of a  supermarket package. Yet all the recipes I’d baked were abysmal. I was resigned to never finding my dream amaretti recipe until that fateful day in Rocca’s kitchen.

“What? You’ve been hiding these?” I sputtered on a mouthful of hot espresso and frothy milk combined with crunchy-almond-amazingness.  Seconds earlier, Rocca had pushed a plate of amaretti in my direction.  This cookie was consummate:  awash in almondy, chewy goodness here was a pudgy, crackled morsel crowned with a whole almond dimple.

“Aren’t these great? They’re my sister Lucy’s.”

“She made them?”

“Nope, it’s her recipe and I made them.”

I had to have The Recipe.

Amaretti recipeRocca delivered it the next day in a text, taking a photo of Lucy’s typewritten recipe.  It was short and sweet.  Only five lines of ingredients and a very brief sentence of instruction below. The title read “Almond Cookies.”

But to this tried-and-true recipe tester and developer, it looked deceptively simple.

“Four eggs. No flour.  And a whole lot of ground almonds. That’s it?” I asked. “No leavener?’

IMG_3285“Oh, throw in a teaspoon of baking powder,” said Rocca flippantly. Were these Puglian sisters in collusion?! What other ingredients were somehow missing in this recipe meant for mangiacake me?

IMG_3283
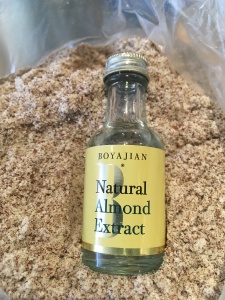
“Be careful,” said Rocca, relieving my paranoia slightly. “The almond flour is not cheap.  I was so shocked the first time I bought it: Fourteen dollars! And don’t buy blanched flour.  Whole almond flour tastes best.”

Two more ingredients needed examination: cocoa powder and that entire bottle of almond extract. Suddenly it became apparent why Rocca’s father likes to carry a little snort of Grappa in a recycled extract bottle. Lucy must use dozens of these in the course of a baking year and rather than toss them into the garbage, they went the way of her father who likes to tuck one of these discreet yet convenient mickeys into his Speedo bathing suit when strolling the beach in Mexico.

IMG_3751As to the cocoa powder, the taste is negligible.  The cookie batter is dark but bakes out into a light brown cookie.  This single teaspoon seems to counter that entire bottle of extract.

But taste is a mysterious thing and a cookie infatuation can derange even the most reasonable of people. Like my friend Ling.

“I like them too much,” she admitted recently after I gave her a gift package of Lucy’s amaretti.  “So I hid them.”

“Huh?” I wondered how that worked.

“My memory so bad,” she laughed, “Now I only eat five a day. When I can find them.”

Amaretti

Lucy’s Amaretti

I’ve cut Lucy’s recipe in half to reduce the sticker shock on the pricy almond flour. Plus, you’ll have some almond extract leftover for your next batch.  This makes plenty!

3                          large eggs, beaten

3/4 lb/ 12 oz      almond flour, whole not blanched

2 tbsp                 almond extract

2/3 cup               granulated sugar

1  tsp                   cocoa powder

1  tsp                   baking powder

Raw almonds

Icing sugar

Combine eggs, almond flour, almond extract, sugar, cocoa powder and baking powder into a batter. Scoop two teaspoons, dredge in a little icing sugar and roll into a small ball, place on a parchment paper lined cookie sheet and top with a whole, raw almond. Bake at 350 F for 8-10 min.

amaretti

Chinese Braised Pork Belly

It was a cold, rainy day at the Duncan Farmers’ Market but luckily, no lineup at Yesteryear Meats. I waited hopefully as the owner riffled through all of his four freezers searching for my request.

“Here it is,” he said, passing me a two pound chunk of Berkshire pork belly. “All that fat is good for you, full of CLAs” he said in his gruff, Aussie accent. “But not everyone appreciates it.”

He kept staring at me, looking long and hard, trying to cess out my pork-belly-loving-nature, before he passed the treasure to my outstretched hands.

“What will you do with it?”

“I’ll cook it real slow, Chinese-style,” I replied.  “I’ll braise it so that the fat stays in big fat, snowy chunks.”

I knew by the way he cocked his head and narrowed his eyes he hadn’t tasted this before.

But I had.

In China – pork belly capital of the world – they kowtow to pork fat and praise its culinary worth. They’re simply astounded that so many Western diners carve away fat and push it to the side of their plates.  My uncle, Hsiung Shu Shu adored the stuff and was faster with his  kuaizi (chopsticks) than myself or Auntie Di.  He’d spear the largest, fattiest morsel  and wail “Ai yo!” before the pork met his mouth, his eyes rolling in ecstasy.

Standing in the misty rain at the outdoor market, I held my two-pound frozen parcel close to my chest, regretting that I hadn’t spent more time in Auntie Di’s Yong He kitchen decades ago. I could see her smiling and braising her pork belly long and slow in a covered clay pot, nestled inside a bamboo steamer basket.  She’d calibrate a braising liquid of soy, stock, ginger, star anise and Shaoxing wine… but how many tablespoons, how many cups, I never bothered to learn the specifics.

My aunt made everything, except bao.  All the steamed buns we ate came out of a cart pushed through the Yong He alleyways by an old woman who wailed out “maaaaaaaaaaaaaan tou!”  plying her yeasty morsels day and night. Besides, Taipei in the 80s didn’t serve pork belly in a bun, the way David Chang at Momofuku has made famous.

Instead, Auntie Di would bring the clay pot to the table, along with four or five other dishes and politely say to our little family of three, “Mei you cai” which literally means “There’s no food”.

Ironic and understated, that was the cultural norm. Auntie Di spent most of every day cooking and preparing a generous buffet of foods for Hsiung Shu Shu and me to feast on.

Oh, how I wish I’d just stood there in her kitchen, observing and learning by osmosis. I have never mastered the cleaver like she who sliced a myriad different shapes, chopping ceaselessly upon a six-inch thick board, cut from a tree trunk. Why hadn’t I watched her prepare the wok, heat the bamboo steamers, clean the fish or stir up the scallion pancake batter?

Now, almost 40 years later, I must rely on the hundreds of taste memories stored in my palate to retrieve and recreate this braise. I know this belly is 90 per cent fat and needs to be browned at high heat to create a beckoning, caramelized surface.  After that, my instinct is to allow the simple passage of time and slow, low-heat cooking. Many classic Chinese braising sauces are too heavy-handed with soy, so I add only enough. I snap a cinnamon bark in half, toss in little stars of anise, pour over the golden elixir that is homemade chicken stock.  Instead of a clay pot and steamer, I turn to my enamelled cast iron Cuisinart and a 275 F oven.  Just before I cover it, I press down a big sheet of parchment paper over the surface to prevent evaporation. Every single drop of this unctuous braise is precious.

I won’t serve it with rice or bring it to the table and pronounce I have nothing to show. My husband David is already salivating in the kitchen, lurking over the turquoise Cuisinart, offering to pull the belly’s buttery strands apart.  While he prepares the meat, I take off the steamer’s lid and a cloud of sweet steam kisses my face.  I can’t stop smiling at these fluffy white buns which open up easily without complaint, ready to receive snowy chunks of fat and tender juicy pork.

At the table, we dig in, our lips and cheeks smattered with the salty-sweet hoisin slipped around the meat, slipped around the spongy bun.  Chef Chang will be proud of me.  I have recreated his pork belly bao all the while remembering the premier Chinese chef in my life: Auntie Di.

Plus, I just heard someone call out  “Ai yo”!

David is guaranteed seconds.

IMG_6581

Chinese Braised Pork Belly

The most difficult part about this recipe is sourcing some quality pork –  I recommend Berkshire pork raised naturally so that you are dining on healthy, fine fat.

2 tbsp              organic canola oil

2 lbs                pork belly

4 cups             chicken stock

2 tbsp              soy sauce

2 tbsp             Shaoxing wine or cooking Sherry

2 tbsp             granulated sugar

1                      stick cinnamon, broken in half

2                      whole star anise

3                      garlic cloves, smashed

2                      green onions, cut into 2-inch lengths

2                      dried red chillies, chopped

1 tsp                ground Sichuan peppercorn

Preheat oven to 275 F. Heat oil at medium-high in enamelled cast iron pot and brown pork belly on all sides. Add stock, soy sauce, Shaoxing wine, sugar, cinnamon, star anise, garlic, green onion, chillies and Sichuan peppercorn. Bring to a boil.  Cover with parchment paper and lid and place in the middle of the oven.  Cook for 2 hours or until meltingly tender.

To serve on steamed bao, place a chunk or shredded mound of pork belly inside, drizzle with hoisin sauce and garnish with freshly chopped coriander and peanuts.

IMG_6583

Steamed Bao Buns

This is a simple dough that’s easy to make.  You’ll be thrilled with the sight of these soft and fluffy bao once they are steamed. (T&T or any large Asian supermarket will have plenty in the frozen section if you aren’t up for the task.)

1 tsp          instant yeast

2 tbsp                 granulated sugar

Pinch                  salt

1/4 tsp                 baking powder

1/4 tsp                 baking soda

1 cup                  warm water

2 1/3 cups   all-purpose flour

Canola oil

In mixing bowl, combine yeast, sugar, salt, baking powder, baking soda, flour and water and mix with dough hook for 3-4 min.  Let dough rest at room temperature in the bowl, covered with plastic wrap, for 1 hour or until it has doubled in size.

Turn dough out on to a lightly floured surface and divide into 12 pieces, shaping each into a ball. Roll a ball into a 6 inch x 2 inch piece, baste lightly with oil, lay a chopstick vertically in the middle and gently lift the top of the dough over the bottom, pulling out the chopstick to leave a small tunnel. Arrange on a parchment paper covered baking sheet and cover with a clean tea towel.  Repeat with remaining balls. Let dough rest 30 min to double in size.

Cut the parchment paper around each bun and place into a hot, covered steamer for 12 minutes. (Buns can be frozen once cooled and steamed to defrost).

All about eggs

It wasn’t until I was 18 and had declared myself a vegetarian that I learned to love eggs. They were cheap and they were easy. Besides, my mother had gifted me a handy little omelette pan with a Teflon surface and a hinge down the middle. With a little butter, a bowlful of beaten eggs and some grated cheddar, I became a master omelette maker.  You couldn’t really screw up.  I’d cook both sides of the pan until the eggs set, grab the handle and flip right over left to create a covered semi-circle pan with a perfect omelette hidden inside. Voila!

Once I moved to a real omelette pan, without the help of my hinged pan crutch, I discovered the complexity of omelette making. It was the fillings and my overwhelming greed for them, that was my ruin. The more onions, bacon, sausage, veggies and cheese I piled inside, the harder it became to make The Flip.

IMG_2092
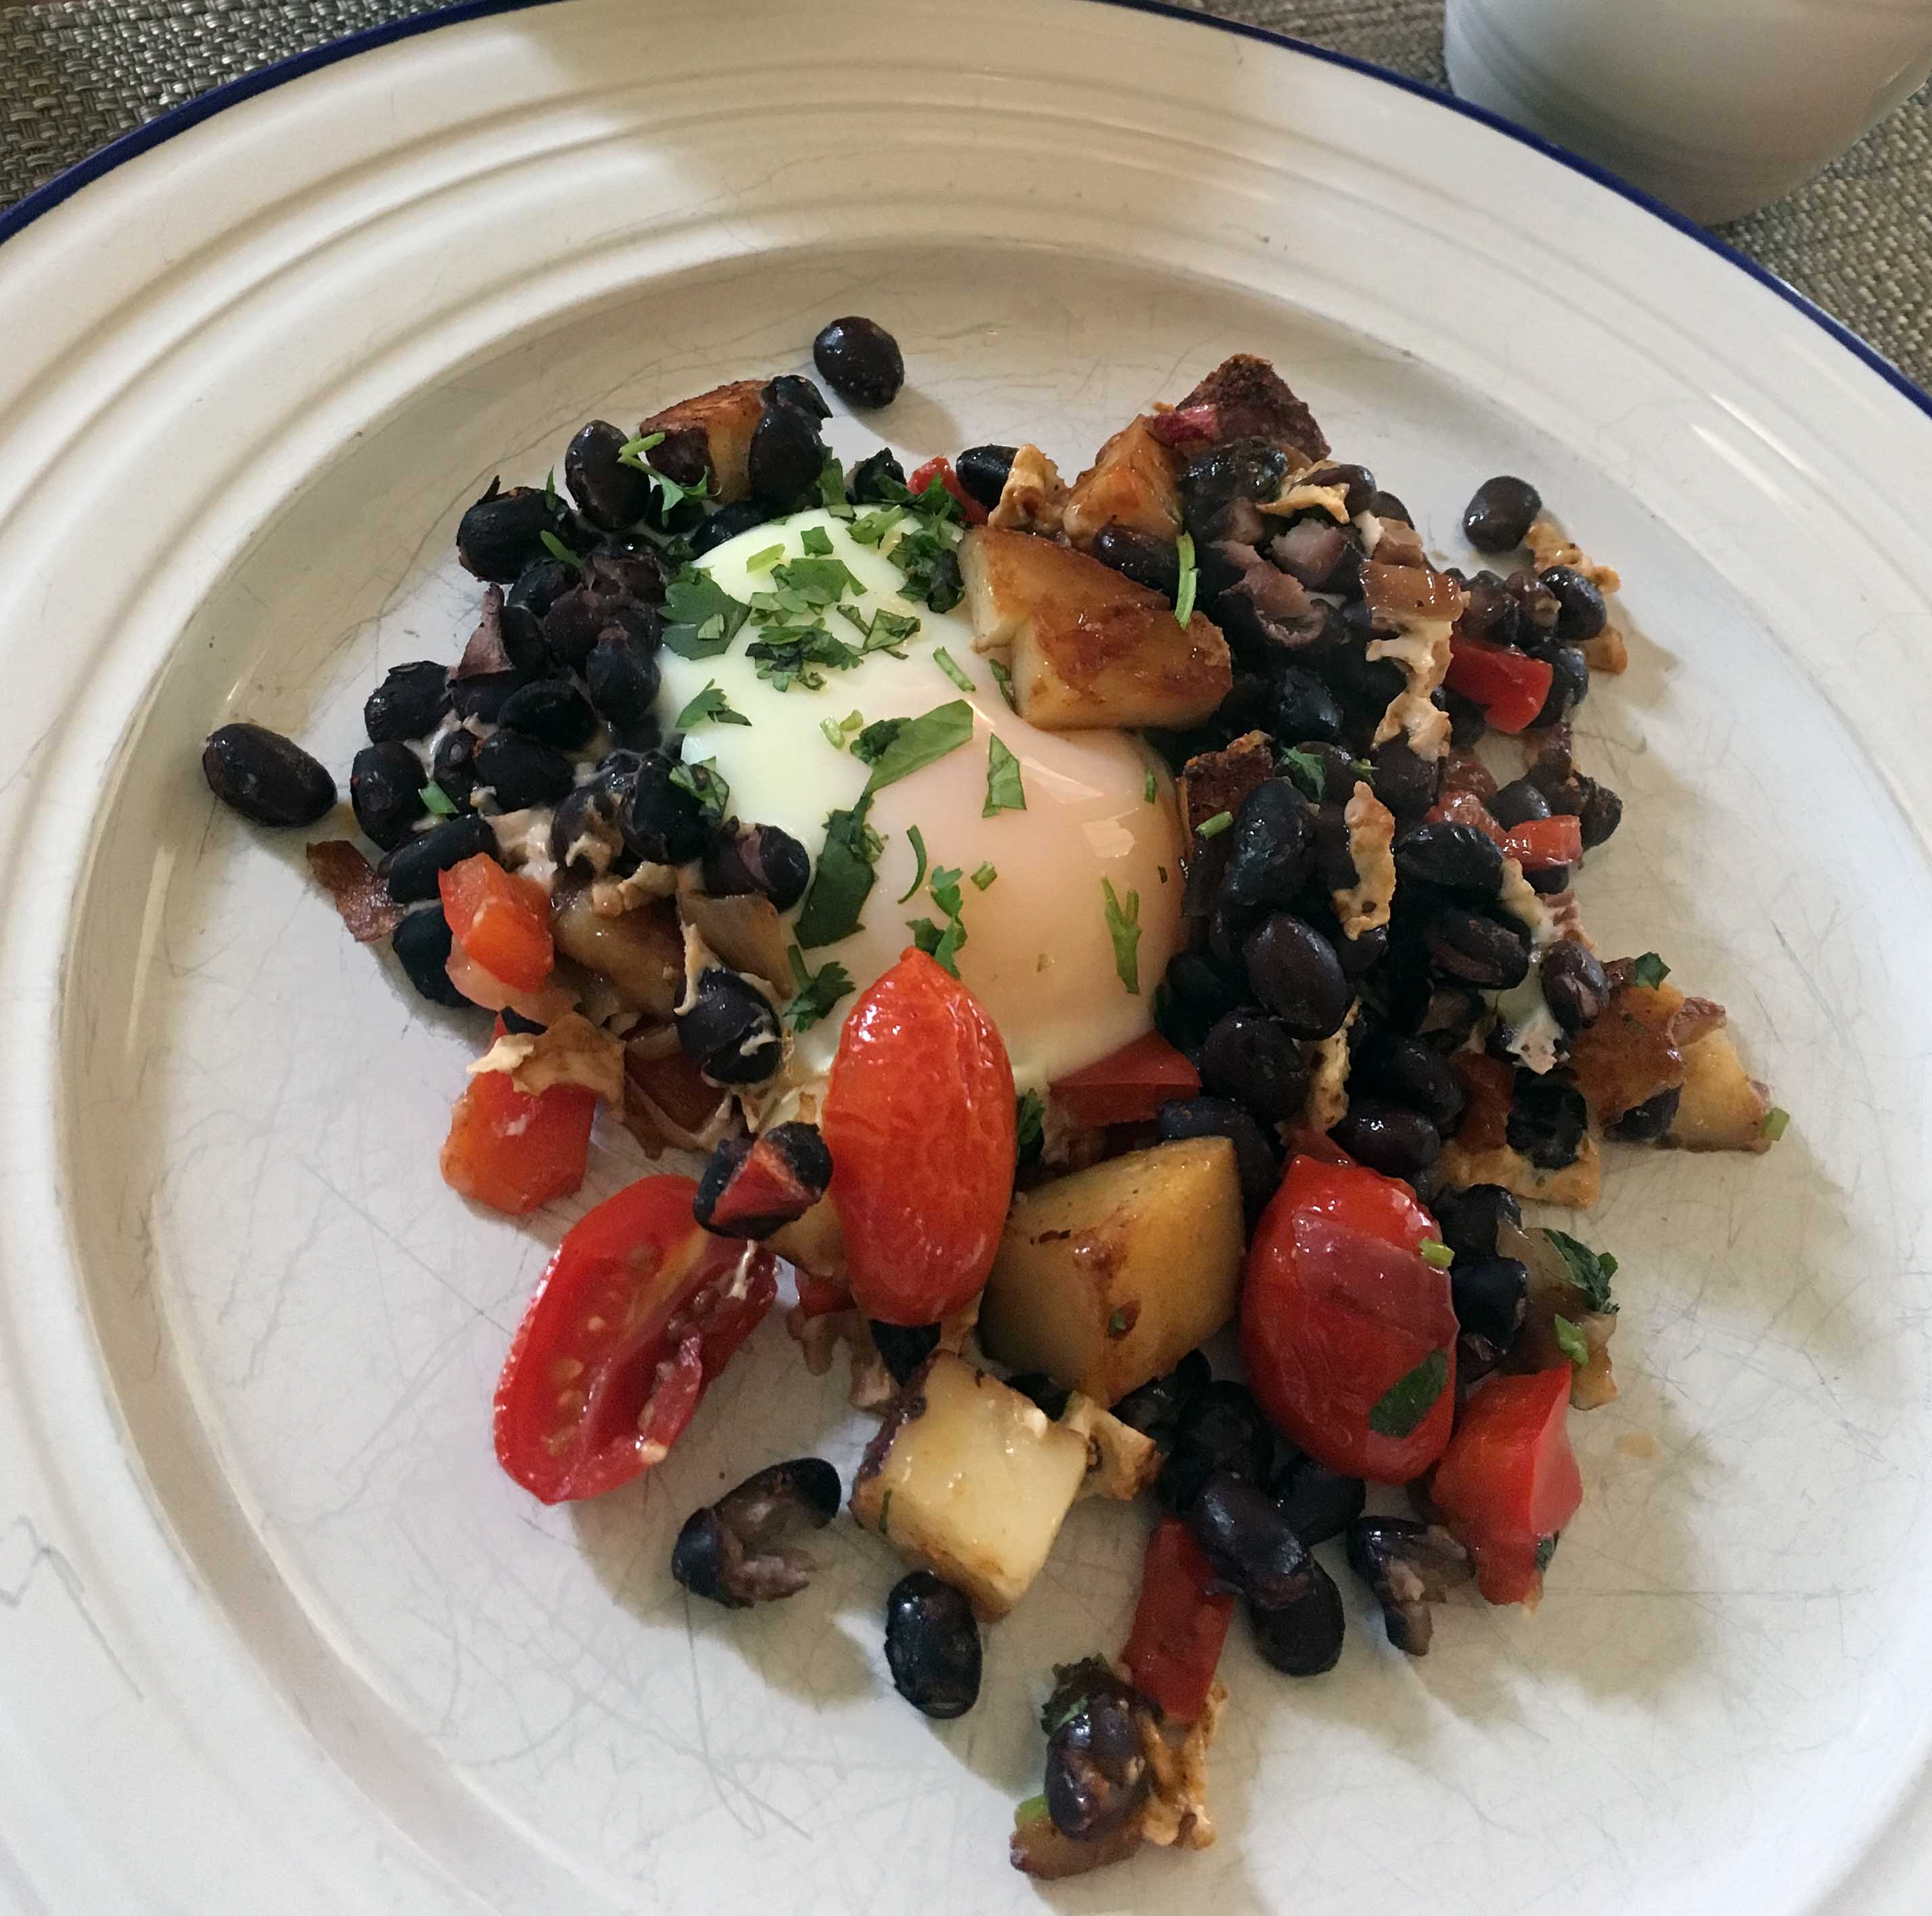
Truth be told, my problem was the eggs.  I really didn’t like them plain. If I’d practiced with a bowlful of very frothy, very beaten eggs, and had let them slide into a buttery, perfectly heated cast iron pan, they might have had a chance. They just needed time and singularity, so their eggy selves could focus on setting rather than accommodating all those interlopers.

But no.  I wasn’t liking that.

So I moved on to the frittata, which requires no flip and invites a lot of flavour pairings. Tomatoes, basil and goat cheese. Onions, potatoes and gruyere.  Spinach and feta.  Chorizo, sage and fingerling potatoes. The list is endless.  But still, we’re talking eggs which are either perfectly cooked or instantly ruined. The time between the two is a millisecond. I’ve made many a loaded frittata enwrapped in dry, rubbery, unappealing eggs. Ick.

IMG_2088
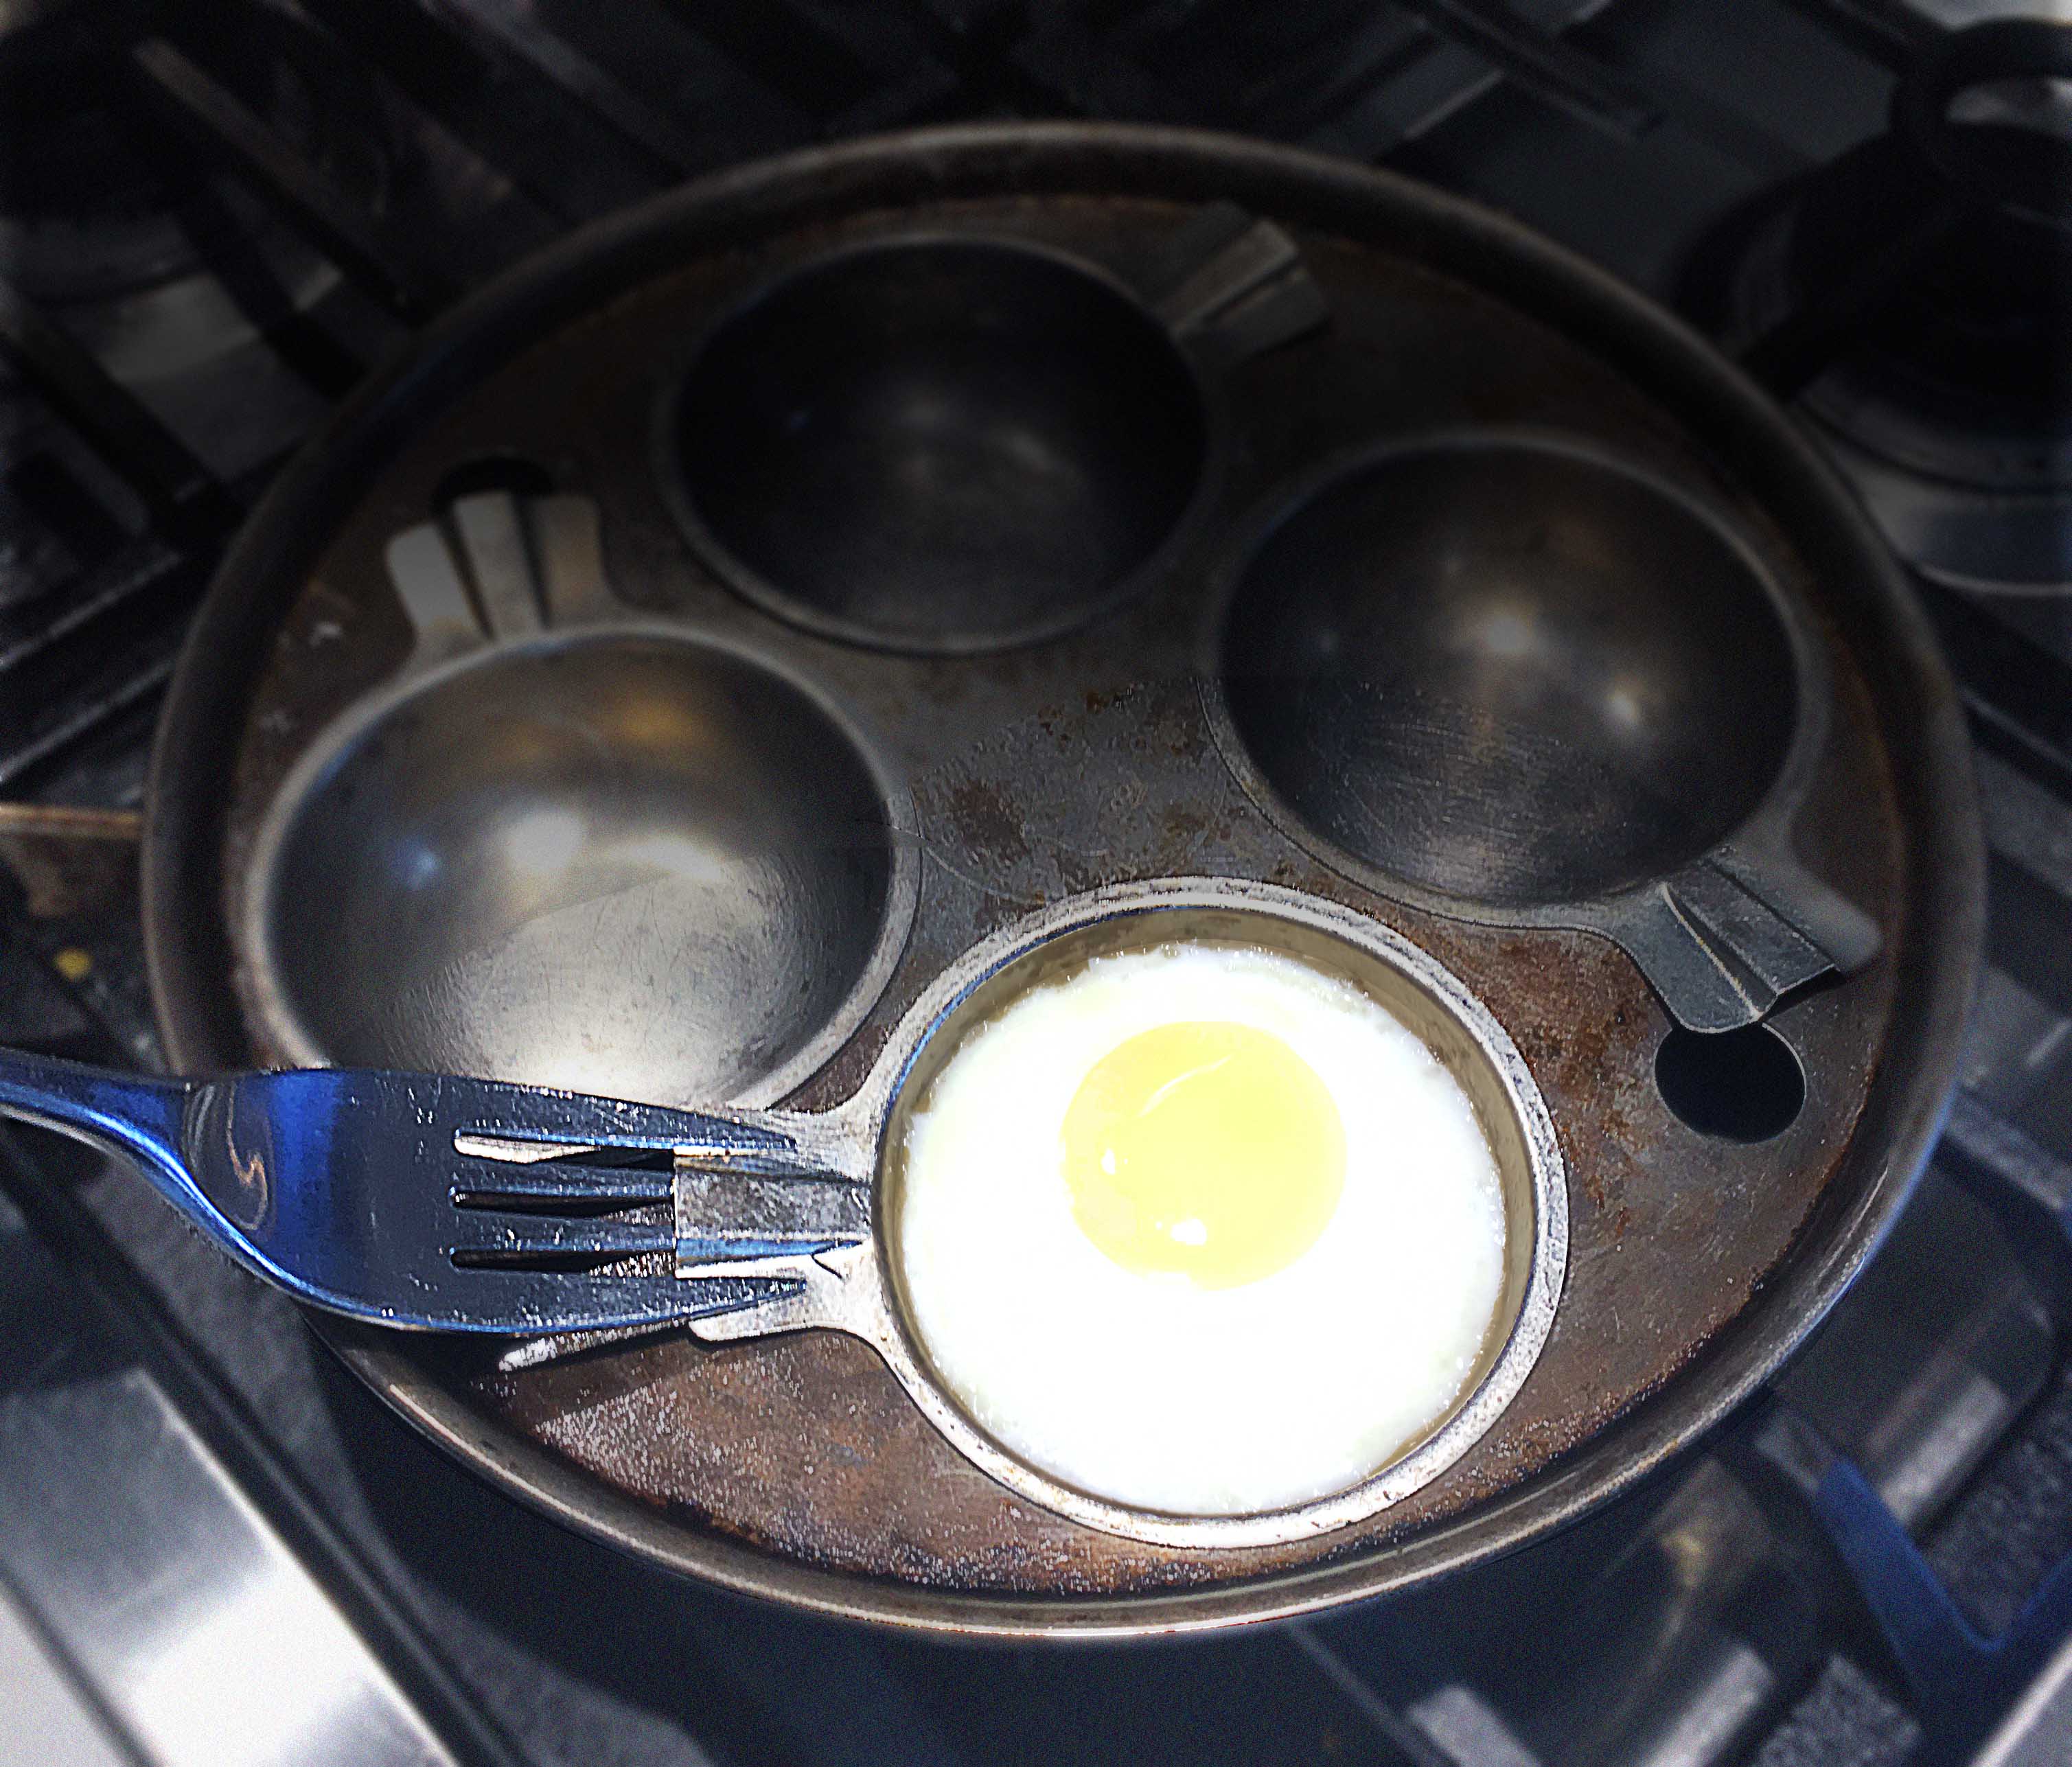
So I moved over to poaching. Again, I was saved by a gizmo.  This time it was my grandmother Nonnie’s poaching pan, a lovely deep, copper bottom saucepan fitted with a rack in which four egg saucers nestle inside.  One fills the pan with water, covers with the egg rack and follows with a lid. Once the water comes to a boil, the hot little saucers are ready to be buttered and loaded with a freshly cracked egg.

Sensible cooks turn off the heat to manage this feat, but I preferred to dab a bit of butter inside each poaching, steaming cup, pick it up and swirl. I’d burnt my fingers doing this for serial years, swearing profuse profanities, believing all short order cookers made similar sacrifices.

egg shot_1_EDIT
Credit: Nick Nausbaum

Then a plumber set me straight.

He had just repaired a toilet upstairs and was passing through my kitchen during a particularly raucous swearing and poaching event. He shook his head and asked,  “You don’t like to use a fork, huh?”

I shot him such a mean look of incomprehension, I’m not sure why he bothered… but he did.

“Here’s how ya do it,” he said, taking a fork and placing the middle two tines into the slot above each flat lifting surface. Woa, the fork became a handle. This mechanical feature had eluded me my entire poaching career with this pan!

egg shot_3_EDIT!!!!
Credit: Nick Nausbaum

“I like my  yolks well done,” he said as he waved the hot poaching cup perilously close   to my face.

I, too, used to like my yolks dry and thoroughly cooked, encased by a jiggly, gelatinous white. But real egg lovers like their yolks runny, seduced by that golden, buttery elixir as it spreads over toast, rice or potatoes.

Thus, the hash.  Nick told me about his recipe the other day. It’s a hearty start to the day and makes great leftovers.  Besides, the pan is loaded with everything but eggs until the last five minutes.  Nick’s Hash needs a big, oven-safe skillet to take on all the ingredients. It must include potatoes to get dubbed a hash and doesn’t have to rely on sausage, bacon or ham. Plus, it stars black beans which call out for other southwest flavours like hot peppers, cilantro and even avocado.

Best of all, the egg cooking portion is a no-brainer. Make room in this hash for eggs by making little wells that can contain their roundness but are forgiving if it’s a bad break.  The eggs will commence cooking the minute they nestle into their wells but they will all come to the finish line at the same time thanks to your preheated oven. Just three to five minutes at 400 F promotes even egg cooking as the cheese bubbles up and turns golden brown.  Because it’s not all about the eggs, is it?

hash tag_EDIT

Nick's Hash

It’s always a challenge to cook eggs for a crowd. Here’s a filling take on brunch that’s easy to assemble and finish in the oven. Sliced avocados are nice on the side.

2 tbsp olive oil

1 red onion, chopped

1 red bell pepper, chopped

2 roasted Yukon gold organic potatoes, skins on, chopped

1 jalapeno, chopped

10 grape tomatoes, quartered

½ tsp each ground roasted cumin, smoked paprika

1 cup grated Monterey Jack or Cheddar

2 cups black beans

4-6 eggs

Salt

Freshly ground black pepper

Fresh coriander, finely chopped

Avocado, sliced or cubed

Preheat oven 400 F.

In a cast iron or oven-safe skillet heat oil, sauté onions, bell pepper, potatoes, jalapeno, cumin and smoked paprika for 5 min. or until potatoes are browned. Add tomatoes and sauté until the tomato juices release. Turn off heat. Distribute  cheese and black beans evenly over the surface. With a spoon, create a well for eggs and crack them in. Bake in oven for 5 minutes or until eggs have set.  Season with salt and pepper.  Serve garnished with fresh coriander and sliced avocado.

Heavenly Thai lamb curry

There are certain foods that just have to be cooked in coconut milk and spiked with chillies.  Lamb is one of them.  It’s a meat that not every carnivore adores, but those who do, wax rhapsodic when imagining lamb braised slowly alongside coconut milk infused with Thai curry paste.  I choose a yellow oneIMG_6523 
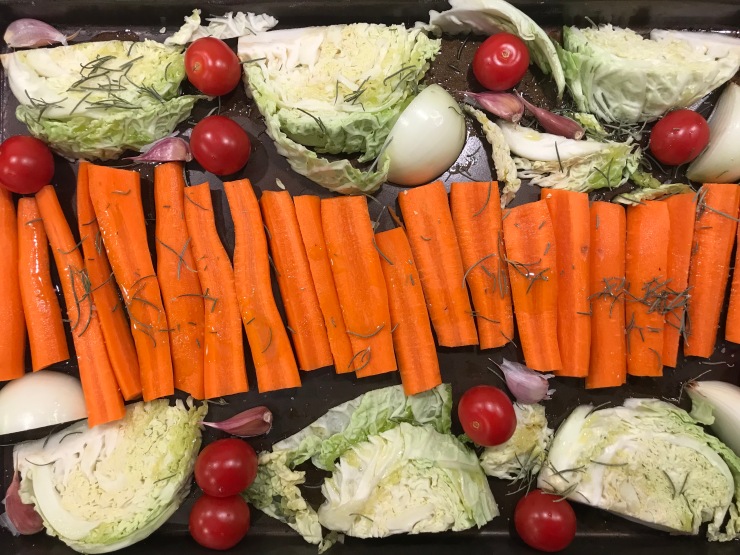
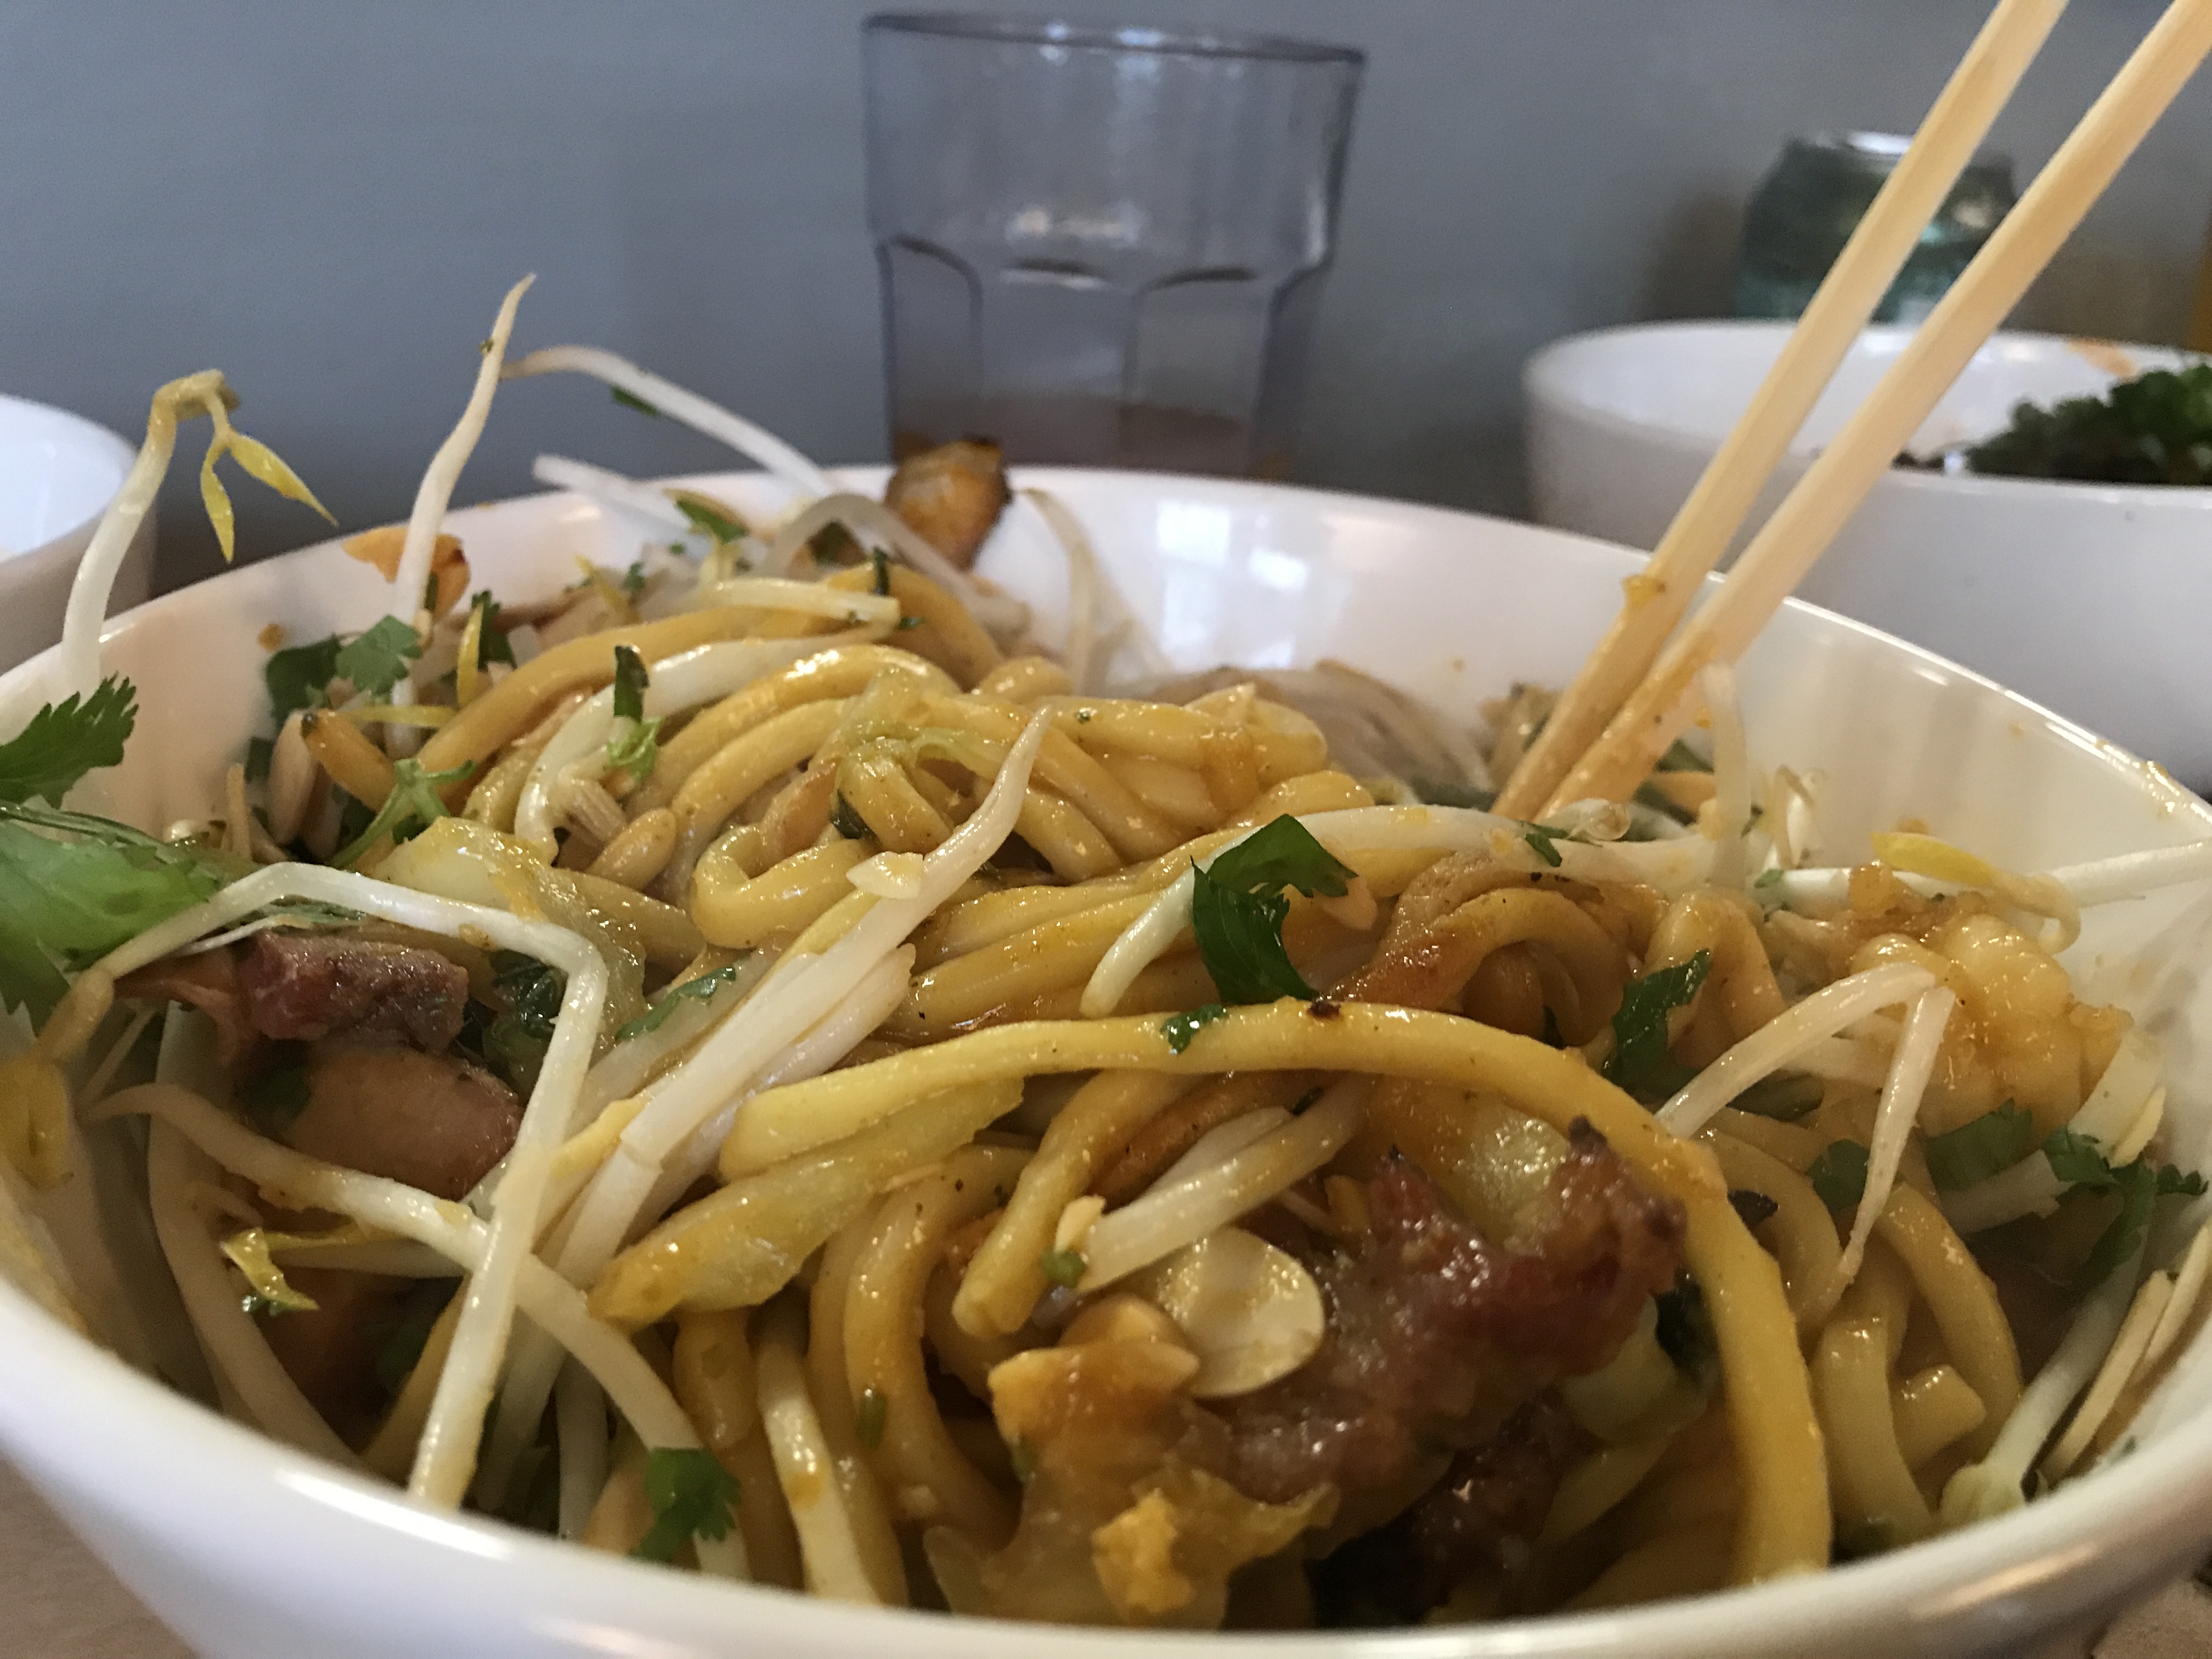
for this because it contains lamb-loving turmeric and other warm spices like cinnamon and cloves.  This is a curry that must include potatoes and I was happy to toss in three different organic varieties, starring a dark, red-skinned beauty with deep purple flesh. Lots of green herbs should swim through every Thai curry.  I always keep a stash of lime leaves in my freezer and wished I had fresh Thai basil to toss in, too.  I improvised with half a frozen cube of homemade basil pesto and was happy with the results.

I like to braise this curry slowly in my enamelled, cast iron Cuisinart Dutch oven with a IMG_6522layer of parchment paper tucked over the curry before it is lidded.  The parchment paper layer prevents any drop of fragrant moisture from leaving this slow-cooked beauty. Just before serving, I brighten these heavy flavours  with tamarind paste, fresh mint and coriander.  Cooking time varies depending on the cut of lamb and whether it contains bones or not. Don’t stop braising until the meat is fork tender.  Enjoy!


IMG_6547


Thai Lamb and Potato Yellow Curry

This is a rich and unctuous curry with lamb swimming in a turmeric-tinged sea of coconut milk and potato chunks.

2 tbsp canola oil

5 cloves garlic, chopped

1 red onion, chopped

1/4 cup Thai yellow curry paste

2 jalapeno peppers (seeds included) , chopped

2 lbs boneless lamb shoulder

1 can coconut milk

1 sprig fresh basil or 1 tbsp basil pesto, frozen

3 tbsp fish sauce

6 kaffir lime leaves

5-6 medium organic potatoes, red, yellow and purple, sliced in half, skin on

2 red bell peppers, sliced

¼ cup tamarind paste

¼ cup chopped mint

¼ cup chopped coriander

In a large dutch oven  heat oil on high. Cook garlic and onion 2-3 minutes or until softened, add curry paste and stir fry until oil starts to exude from the paste.  Add jalapenos and lamb and stir-fry until browned, add coconut milk, basil/pesto, fish sauce, and 6 kaffir lime leaves.  Bring to simmer.  Cover with parchment and lid and braise in 300 F oven for 1 hr, add potatoes and red bell peppers, cook another hour with parchment and lid or until meat is tender and juicy. Finish with tamarind, mint and coriander.


Bakers, get equipped!

Like any profession, bakers rely on good tools to get the job done right.

Oven: Choose electric over gas for reliable heat with less temperature fluctuation.

56002807935__20AF0A01-FB77-4879-BA5B-3C96AC0E91F6
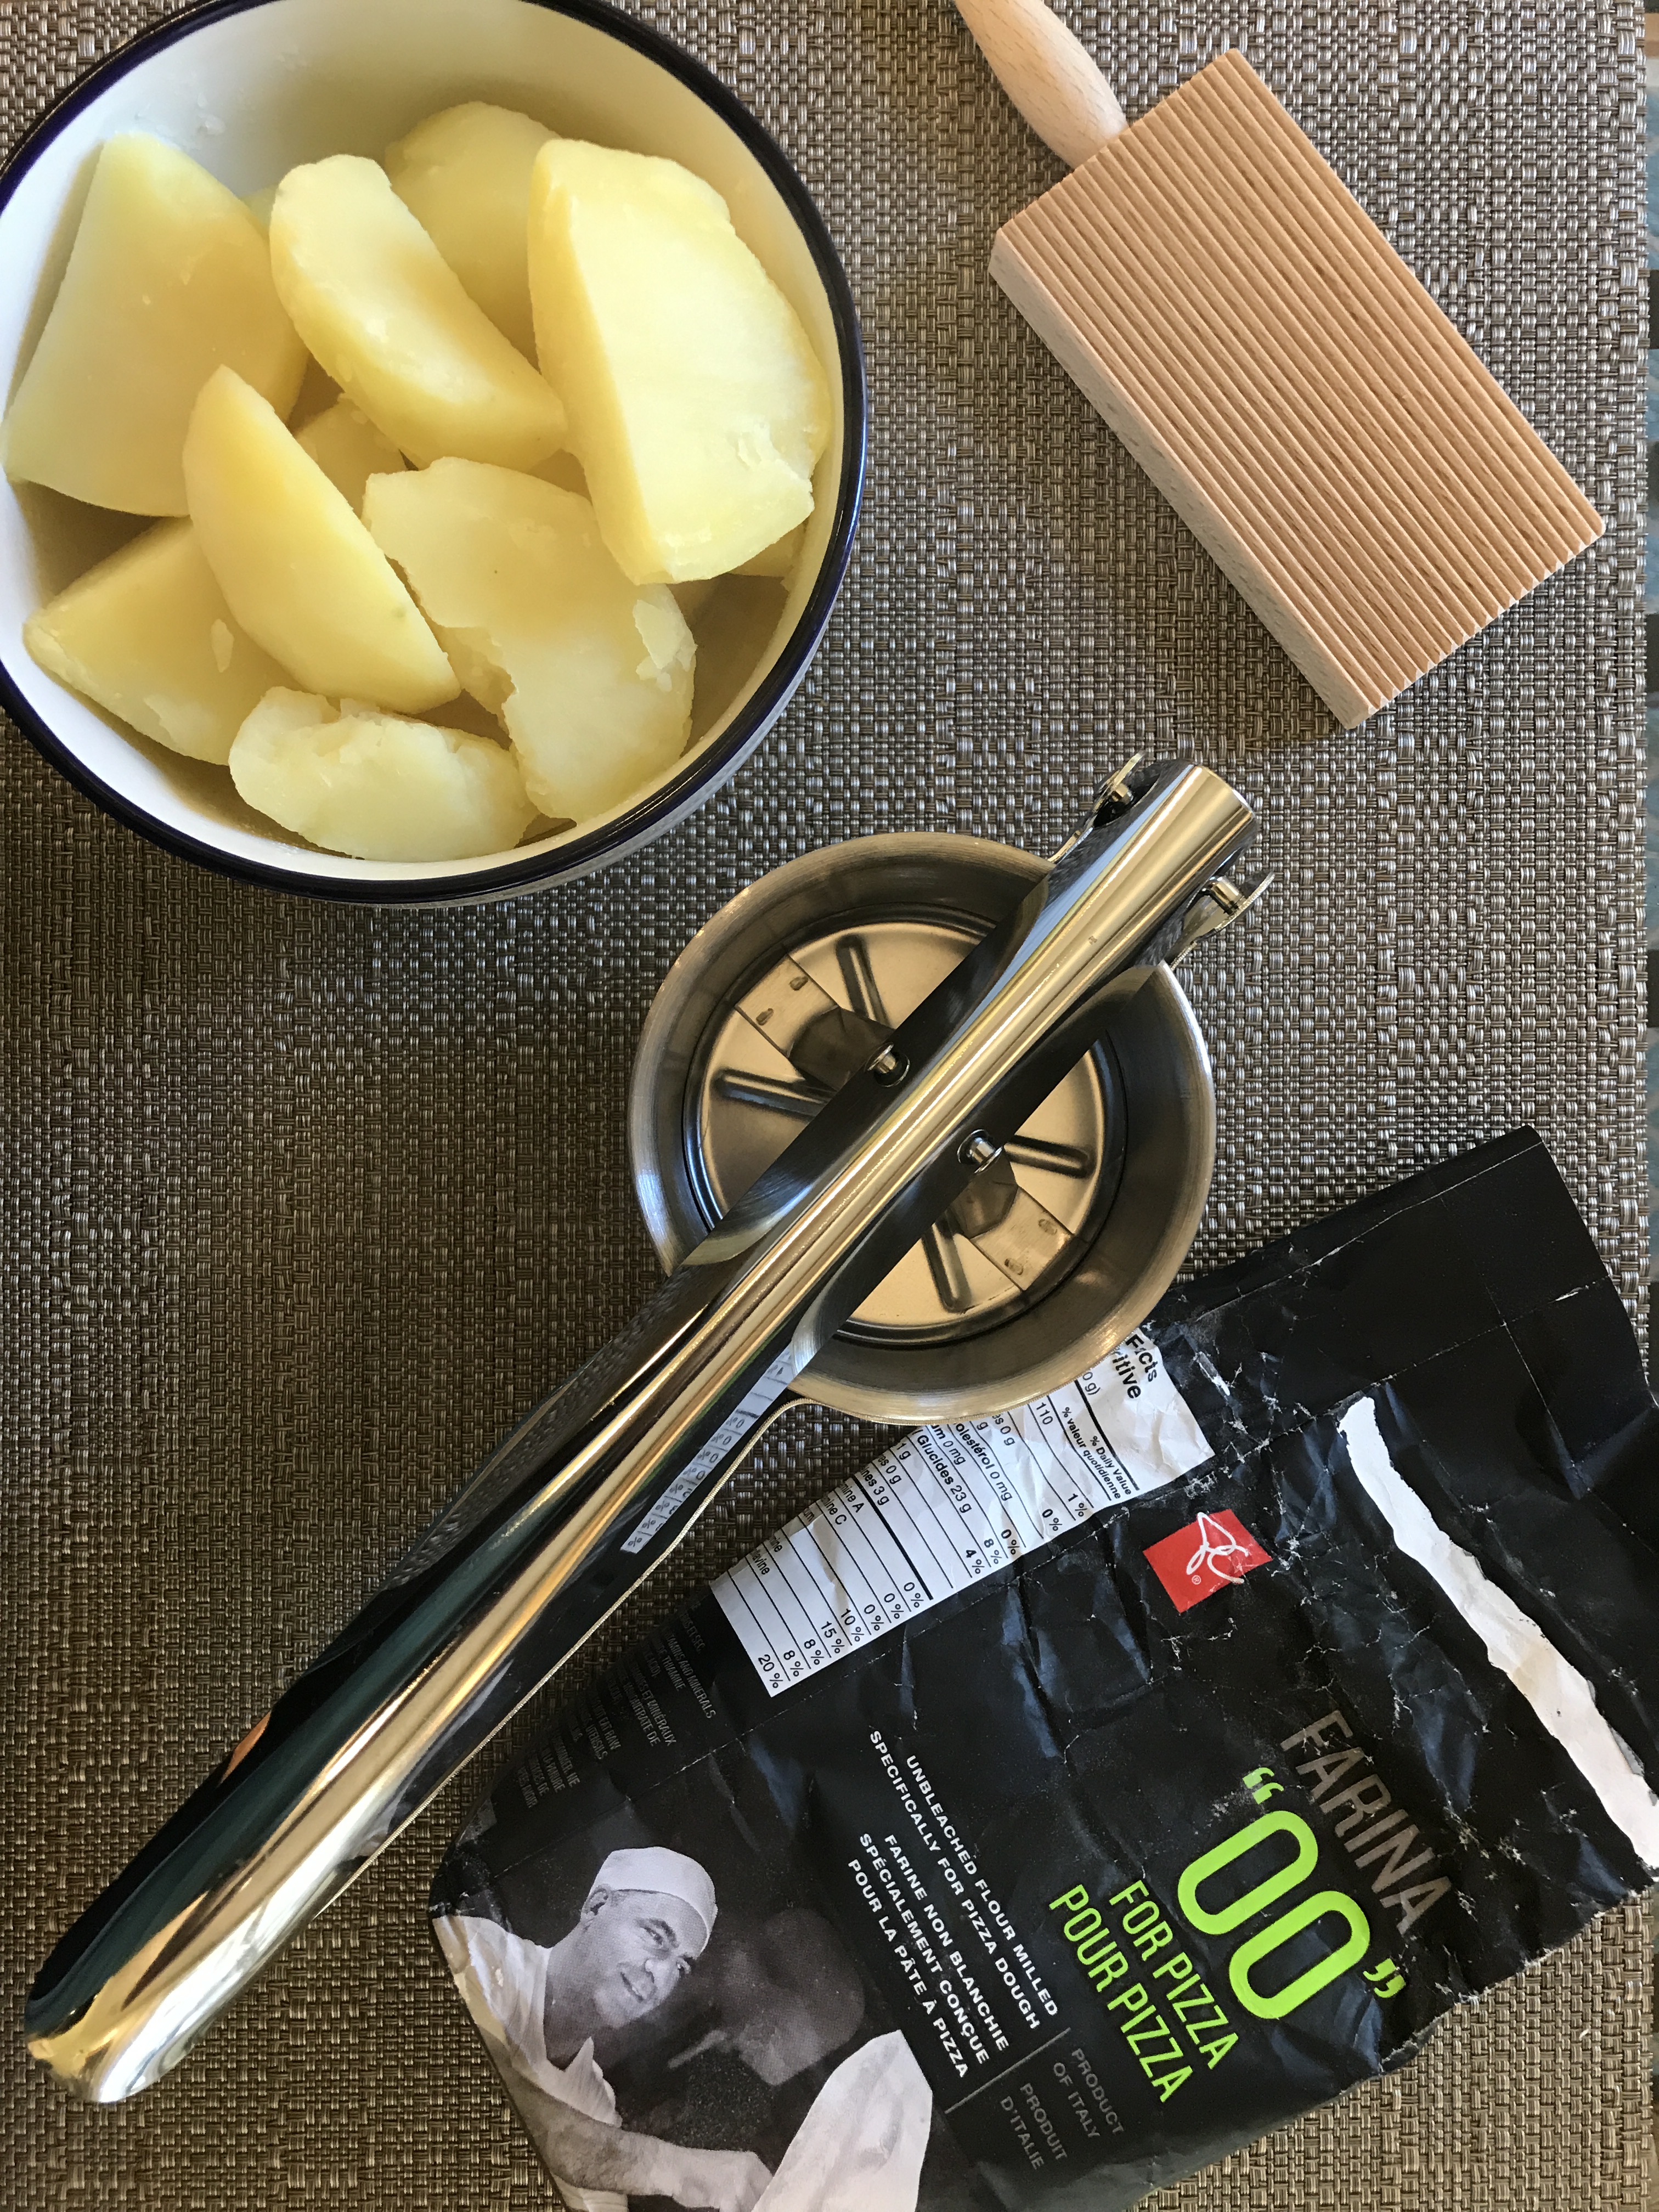
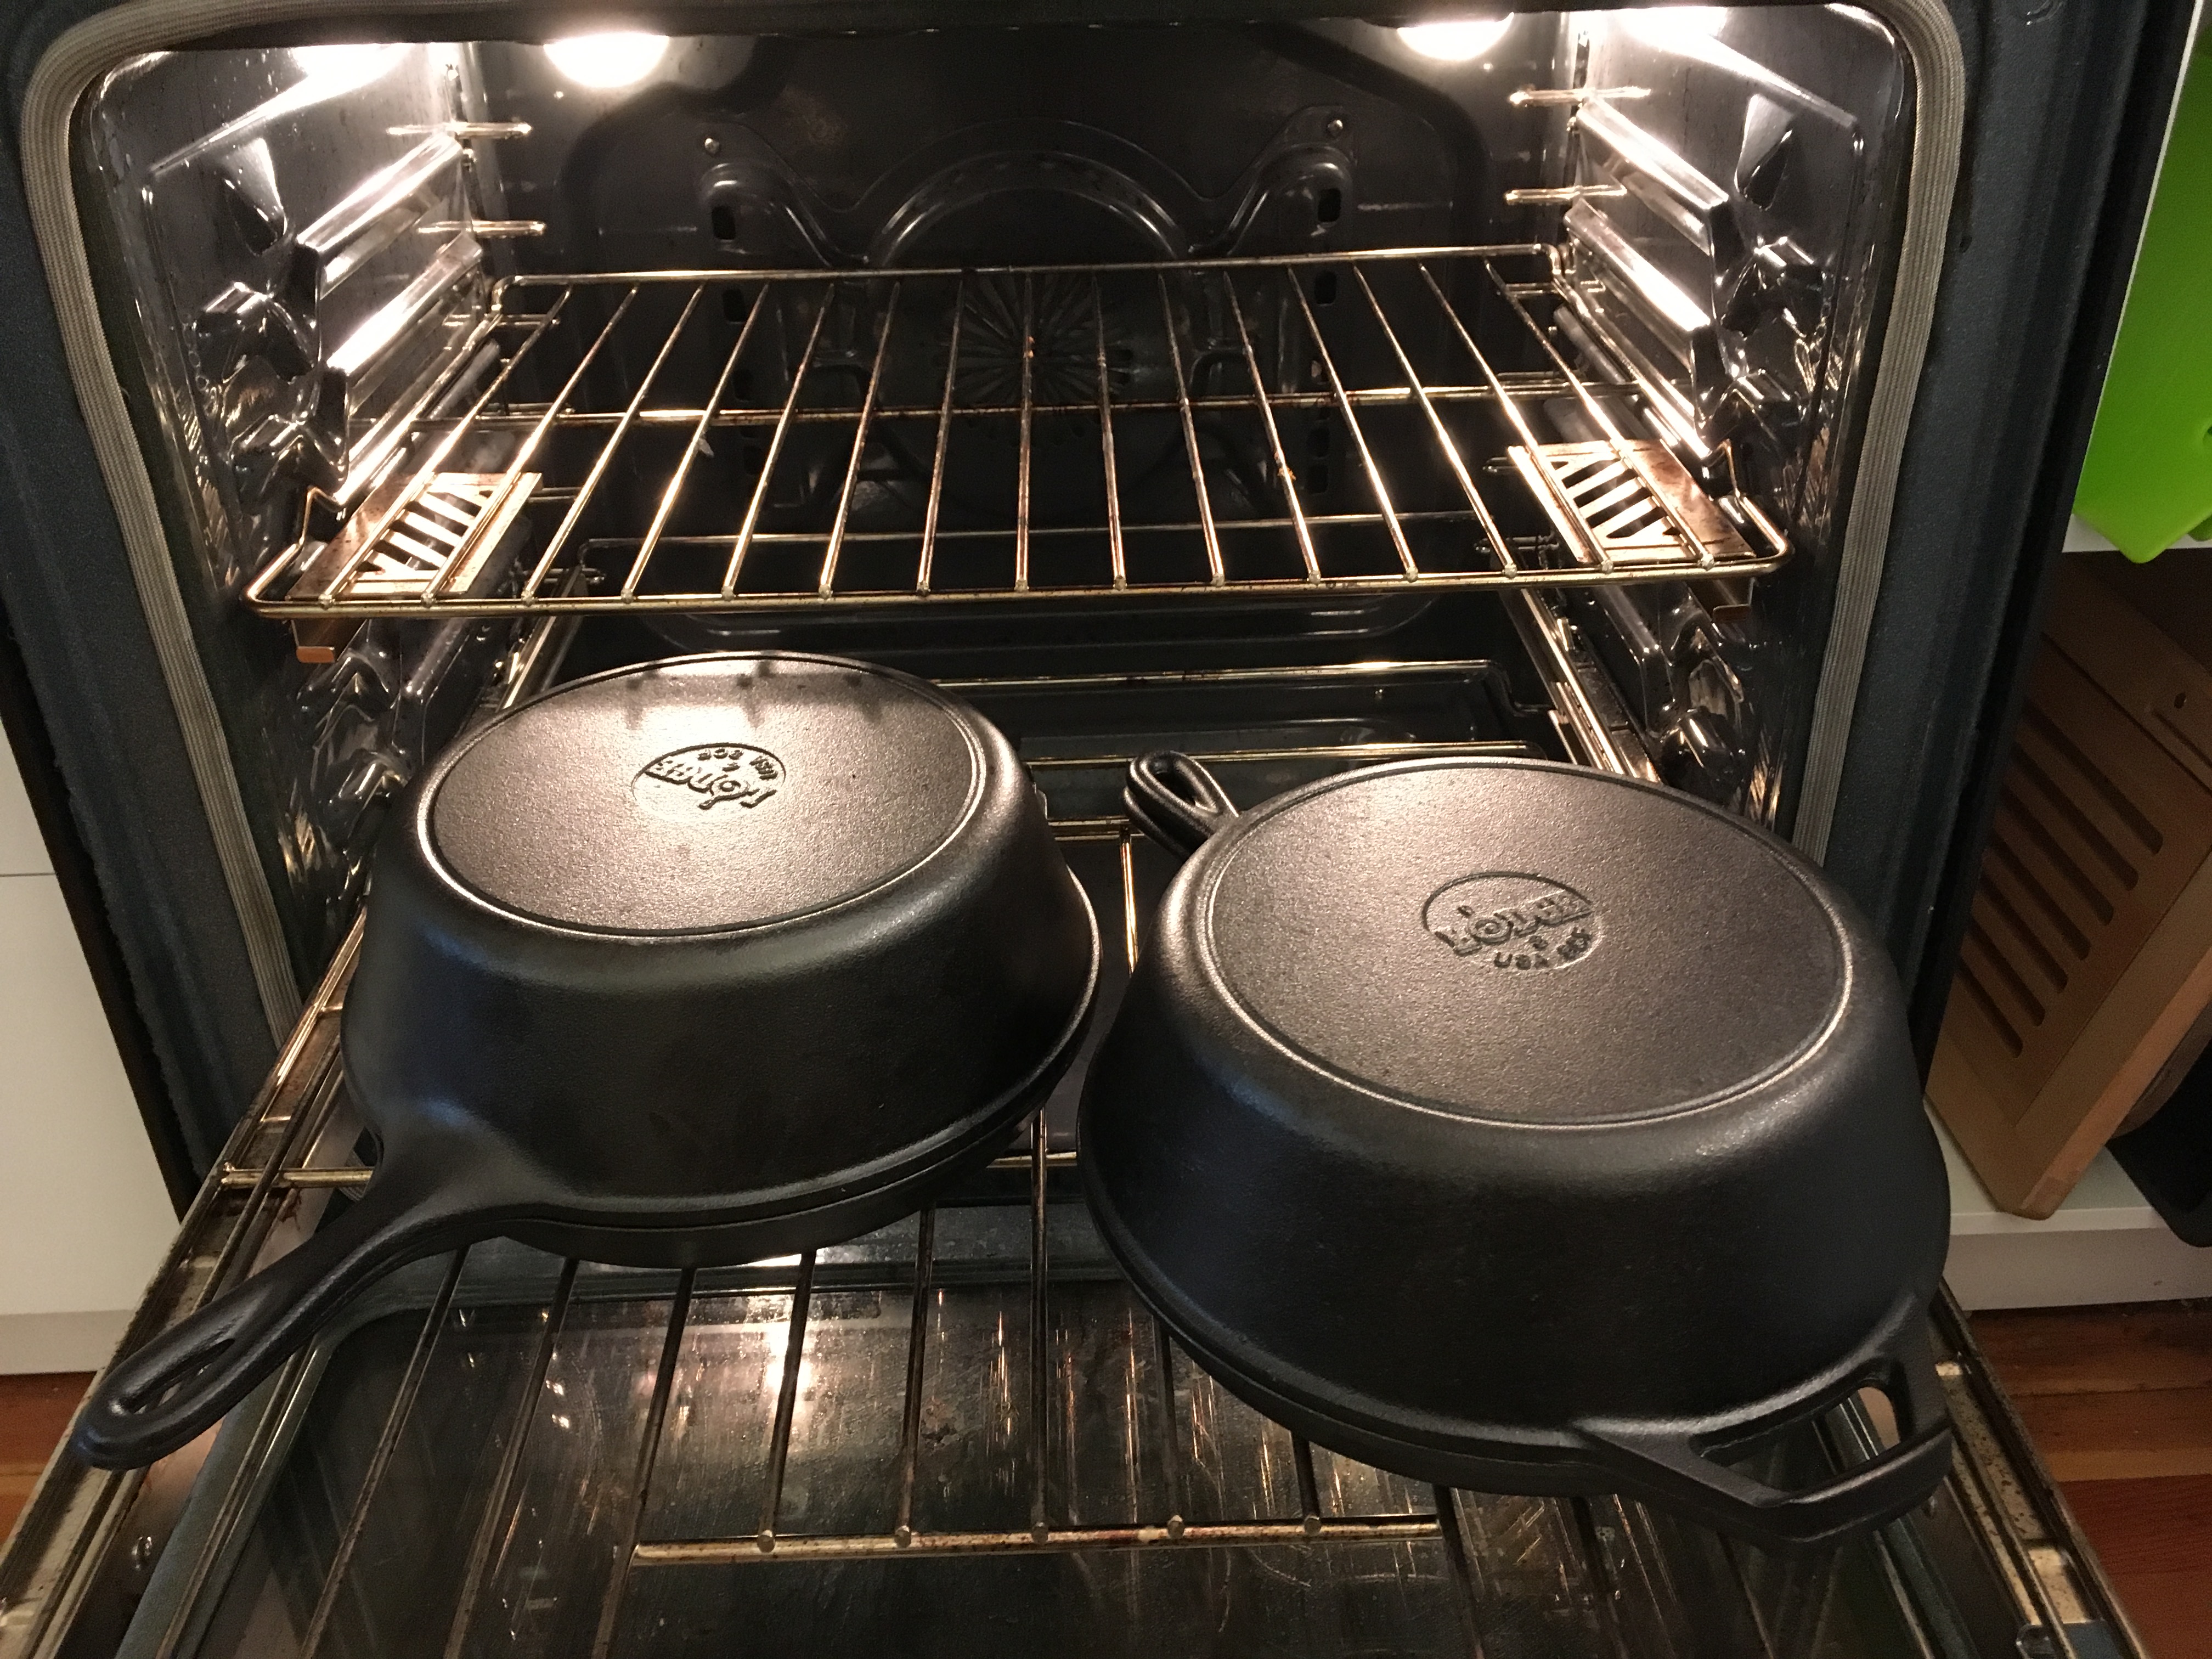
Dutch ovens or Lodge Pan combo cookers: When Jim Lahey of Sullivan St Bakery published his no knead bread recipe it was a revelation to the baking world. What, you don’t need to knead? But what you do need is the right pot for artisanal dough: one that is small enough to create its own steam at the beginning of the bake and is heavy-duty enough to retain really high heat. I love my Lodge combo cookers. You can’t beat the crust, crumb and lift of a loaf baked in a combo cooker. Put it in the oven, preheat to 500F and wait about 30 minutes before loading the dough into these cast iron cookers. They will be VERY hot and extra caution is needed when working with these pots. Most ovens can fit two combo cookers on a single rack at the bottom of the stove.  What makes a combo cooker perfect for baking bread is its shallow bottom and tall lid, making it easy to slide delicate risen dough on to its surface and a lid large enough to allow a full rise. My only complaint is that is does not accommodate large oval loaves.

Parchment paper: I started my bread career with pizza dough. Every cookbook and instructor called for cornmeal.  “Dust your bread paddle with ample cornmeal and that sticky dough will quickly slide off and into a hot oven” was the refrain. But it didn’t exactly slide and too often the cornmeal burnt in the oven and ruined the aroma and underside of the crust.

Enter parchment paper also called “bakers’ paper”.  Things don’t stick to it. I use a small amount to line a paddle or baking sheet and never experience the horror of dough not moving in one whole, shaped piece into the oven. I leave my loaves on parchment for the entire bake and it does not harm or affect the crust negatively.

img_6314.jpg
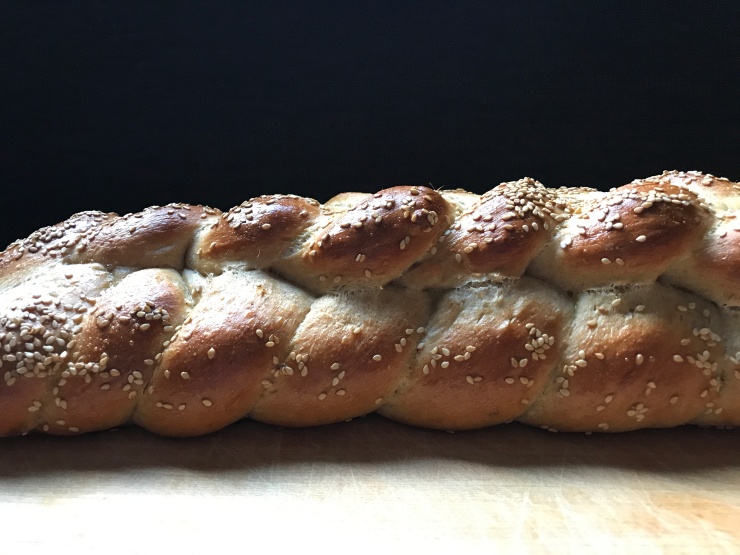
Bannetons and baker’s linen: Artisanal bread dough is risen in baskets to preserve the shape and to create a pretty swirling flour pattern on the finished crust. You plunk the shaped loaf in bottom-side-up, let it rise, then place a parchment-paper-lined paddle or rimless baking sheet over it and flip the loaf back over, right side up. I dust my bannetons liberally with rice flour which prevents sticking and also creates nice, white contrasting lines on the finished crust. I never wash my bannetons, because moisture encourages mildew. I use a natural bristle brush to clean the bannetons and store them in a dry, airy cupboard. Round bannetons should be no wider than eight to nine inches in diameter or your loaf will be too big for the combo cooker. Another option is baker’s linen liners that can be fit over medium sized bowls.

Shower caps: I used to put my rising banneton dough in closed plastic bags to prevent the dough from drying out until my friend Dushka suggested hotel shower caps. They fit snugly over the top of a banneton or linen-lined bowl and you can look inside to gauge the progress of your rise without having to take the shower cap off.  Brilliant! Never leave a hotel without taking one home.

IMG_6437
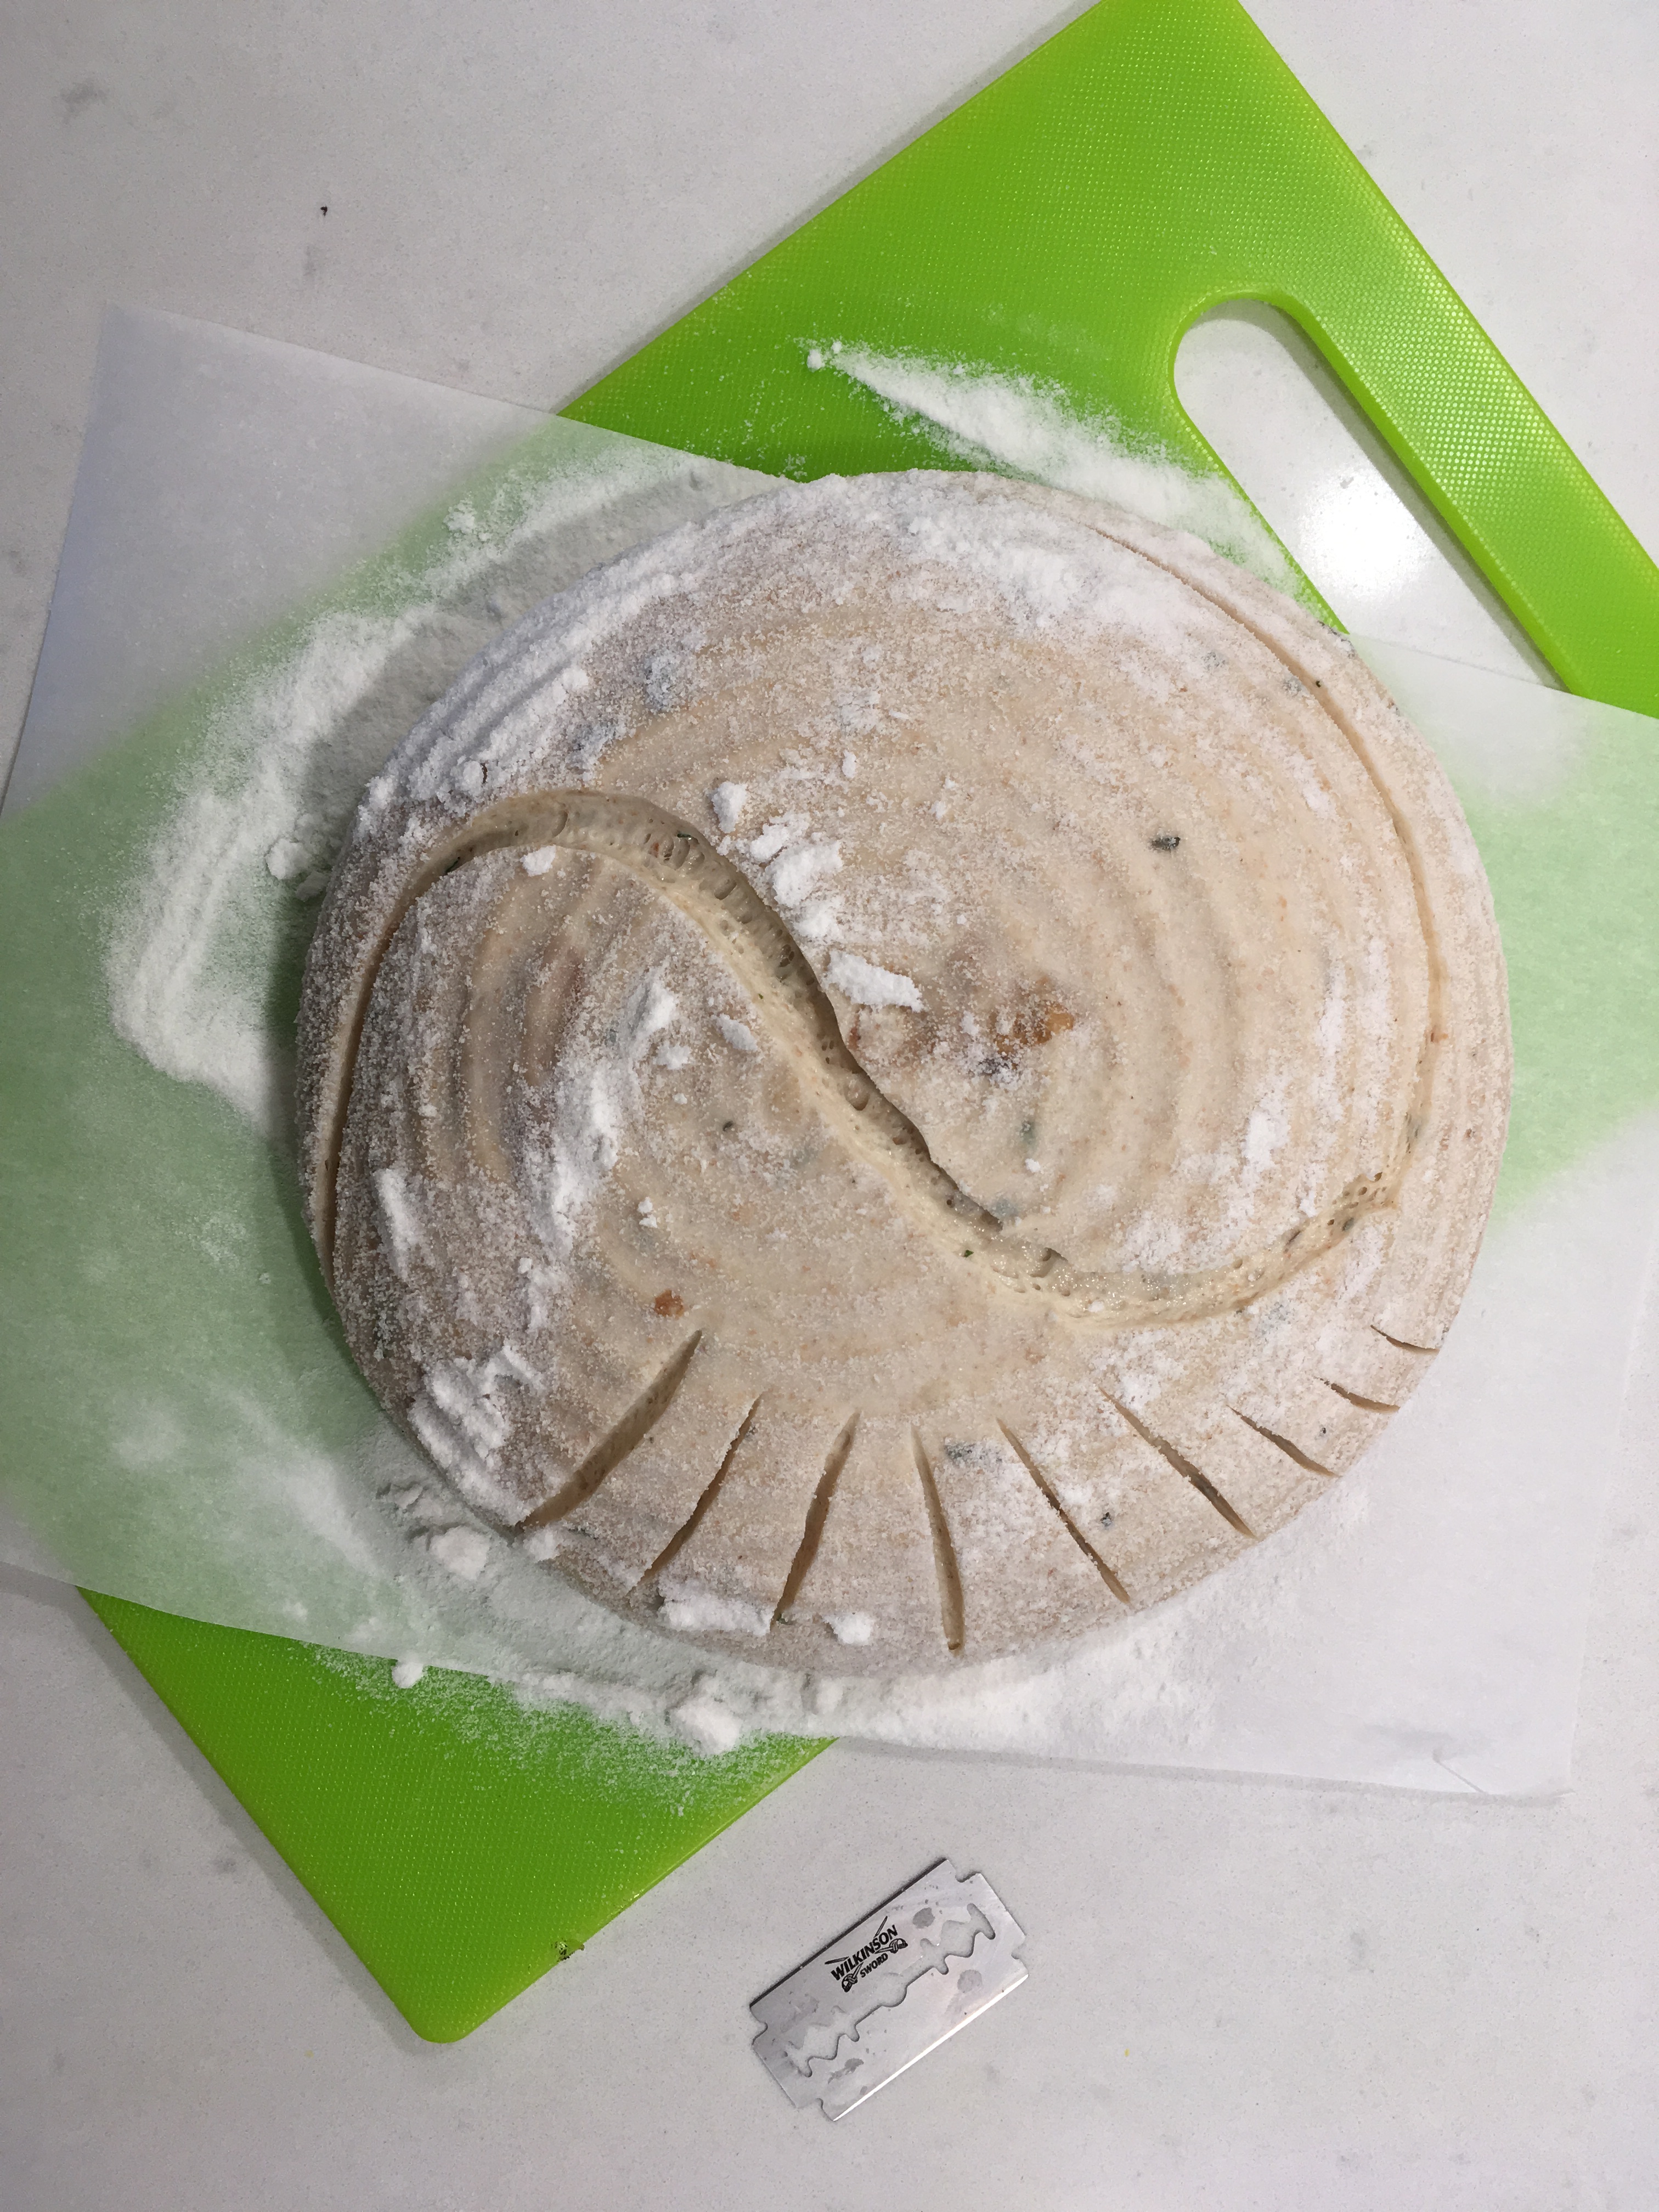
Razor blades and lamés: Just before your risen dough goes into the oven, it is time to score. A score allows hot air to emit during the bake without tearing open the crust. Bakers traditionally scored loaves in distinct patterns but nowadays it has become an art. The angle and depth of a score will affect the final shape of the loaf. I like to hold a slightly curved sharp blade between my thumb and index finger but others like to use a handle for the razor called a lamé. A sharp, serrated knife can do the trick, too.

Oven gloves: While the underside of my arms are littered with burn scars, I actually use and highly recommend oven gloves.  Heavy duty, extra-long gloves are the best protectors but hard to find.

56071585550__DC3B82DE-6B7F-4052-B2F4-EF322A7717ECDigital scale: I cannot bake without a scale, I am so used to weighing versus measuring flour, starter and water.  You need a scale that can “tare” back to zero so that you can put an empty bowl on the scale, tare to zero, add a pound of flour and tare back to zero, add 8 ounces of water and tare back to zero and so on. Zyliss makes a light, flat scale about the size of an Ipad.

IMG_0312Just three ingredients: Flour, water and salt: Organic flour makes a big difference.  I buy unbleached organic hard white flour by the 10 kg bag and am happiest when it is locally milled and has a date stamp to guarantee freshness. Locally grown, freshly milled whole rye, kamut, spelt and red fife all make incredible sourdough bread.

IMG_6472Salt.  Avoid iodized salt and choose sea salt. I like the big bags of coarse grey French salt from Ile de Noirmoutier that I found at Thrifty’s.

Water.  If your local tap water tastes great, use it.  In Toronto I bake all my bread with spring water.

Creating steam: Professional bread ovens have built-in steam injection. Bakers want steam during the first 10 minutes of baking for good crust development. If your oven does not supply steam, you can supply it yourself with a spray bottle or ice cubes. Sprayed water may crack oven tiles or pizza stones. Ice cubes won’t.  Heat a small aluminum baking pan in the bottom of the stove and toss in two or three cubes after you load the dough into the oven.

IMG_4303

A marmalade is born

I was starting to lose hope that I’d ever make a good jelly. All those loose and liquid results with fresh-from-the-orchard plums and cherries were getting me down. That is, until the Pilates Girls started to talk about marmalade – in the heat of summer, no less.  They started to swoon over tales of Seville marmalade, rolling their eyes in ecstasy remembering every slurp and mouthful, every stolen spoonful.

IMG_6465So very British of them, I thought in disdain, but their marmalade reverie was so very infectious, slipping deep into my flavour brain.

I took another look at the big fragrant box of Sungold cherry tomatoes I had ripening in the cellar under layers of paper bags. I’d harvested them on the vine – neon green – a good month ago. Now, their colour was like a pale sunrise, a little yellow, a little orange. They just weren’t their seductive, deep pumpkin orange selves, so sweet-as-sin in the heat of summer.

IMG_5723
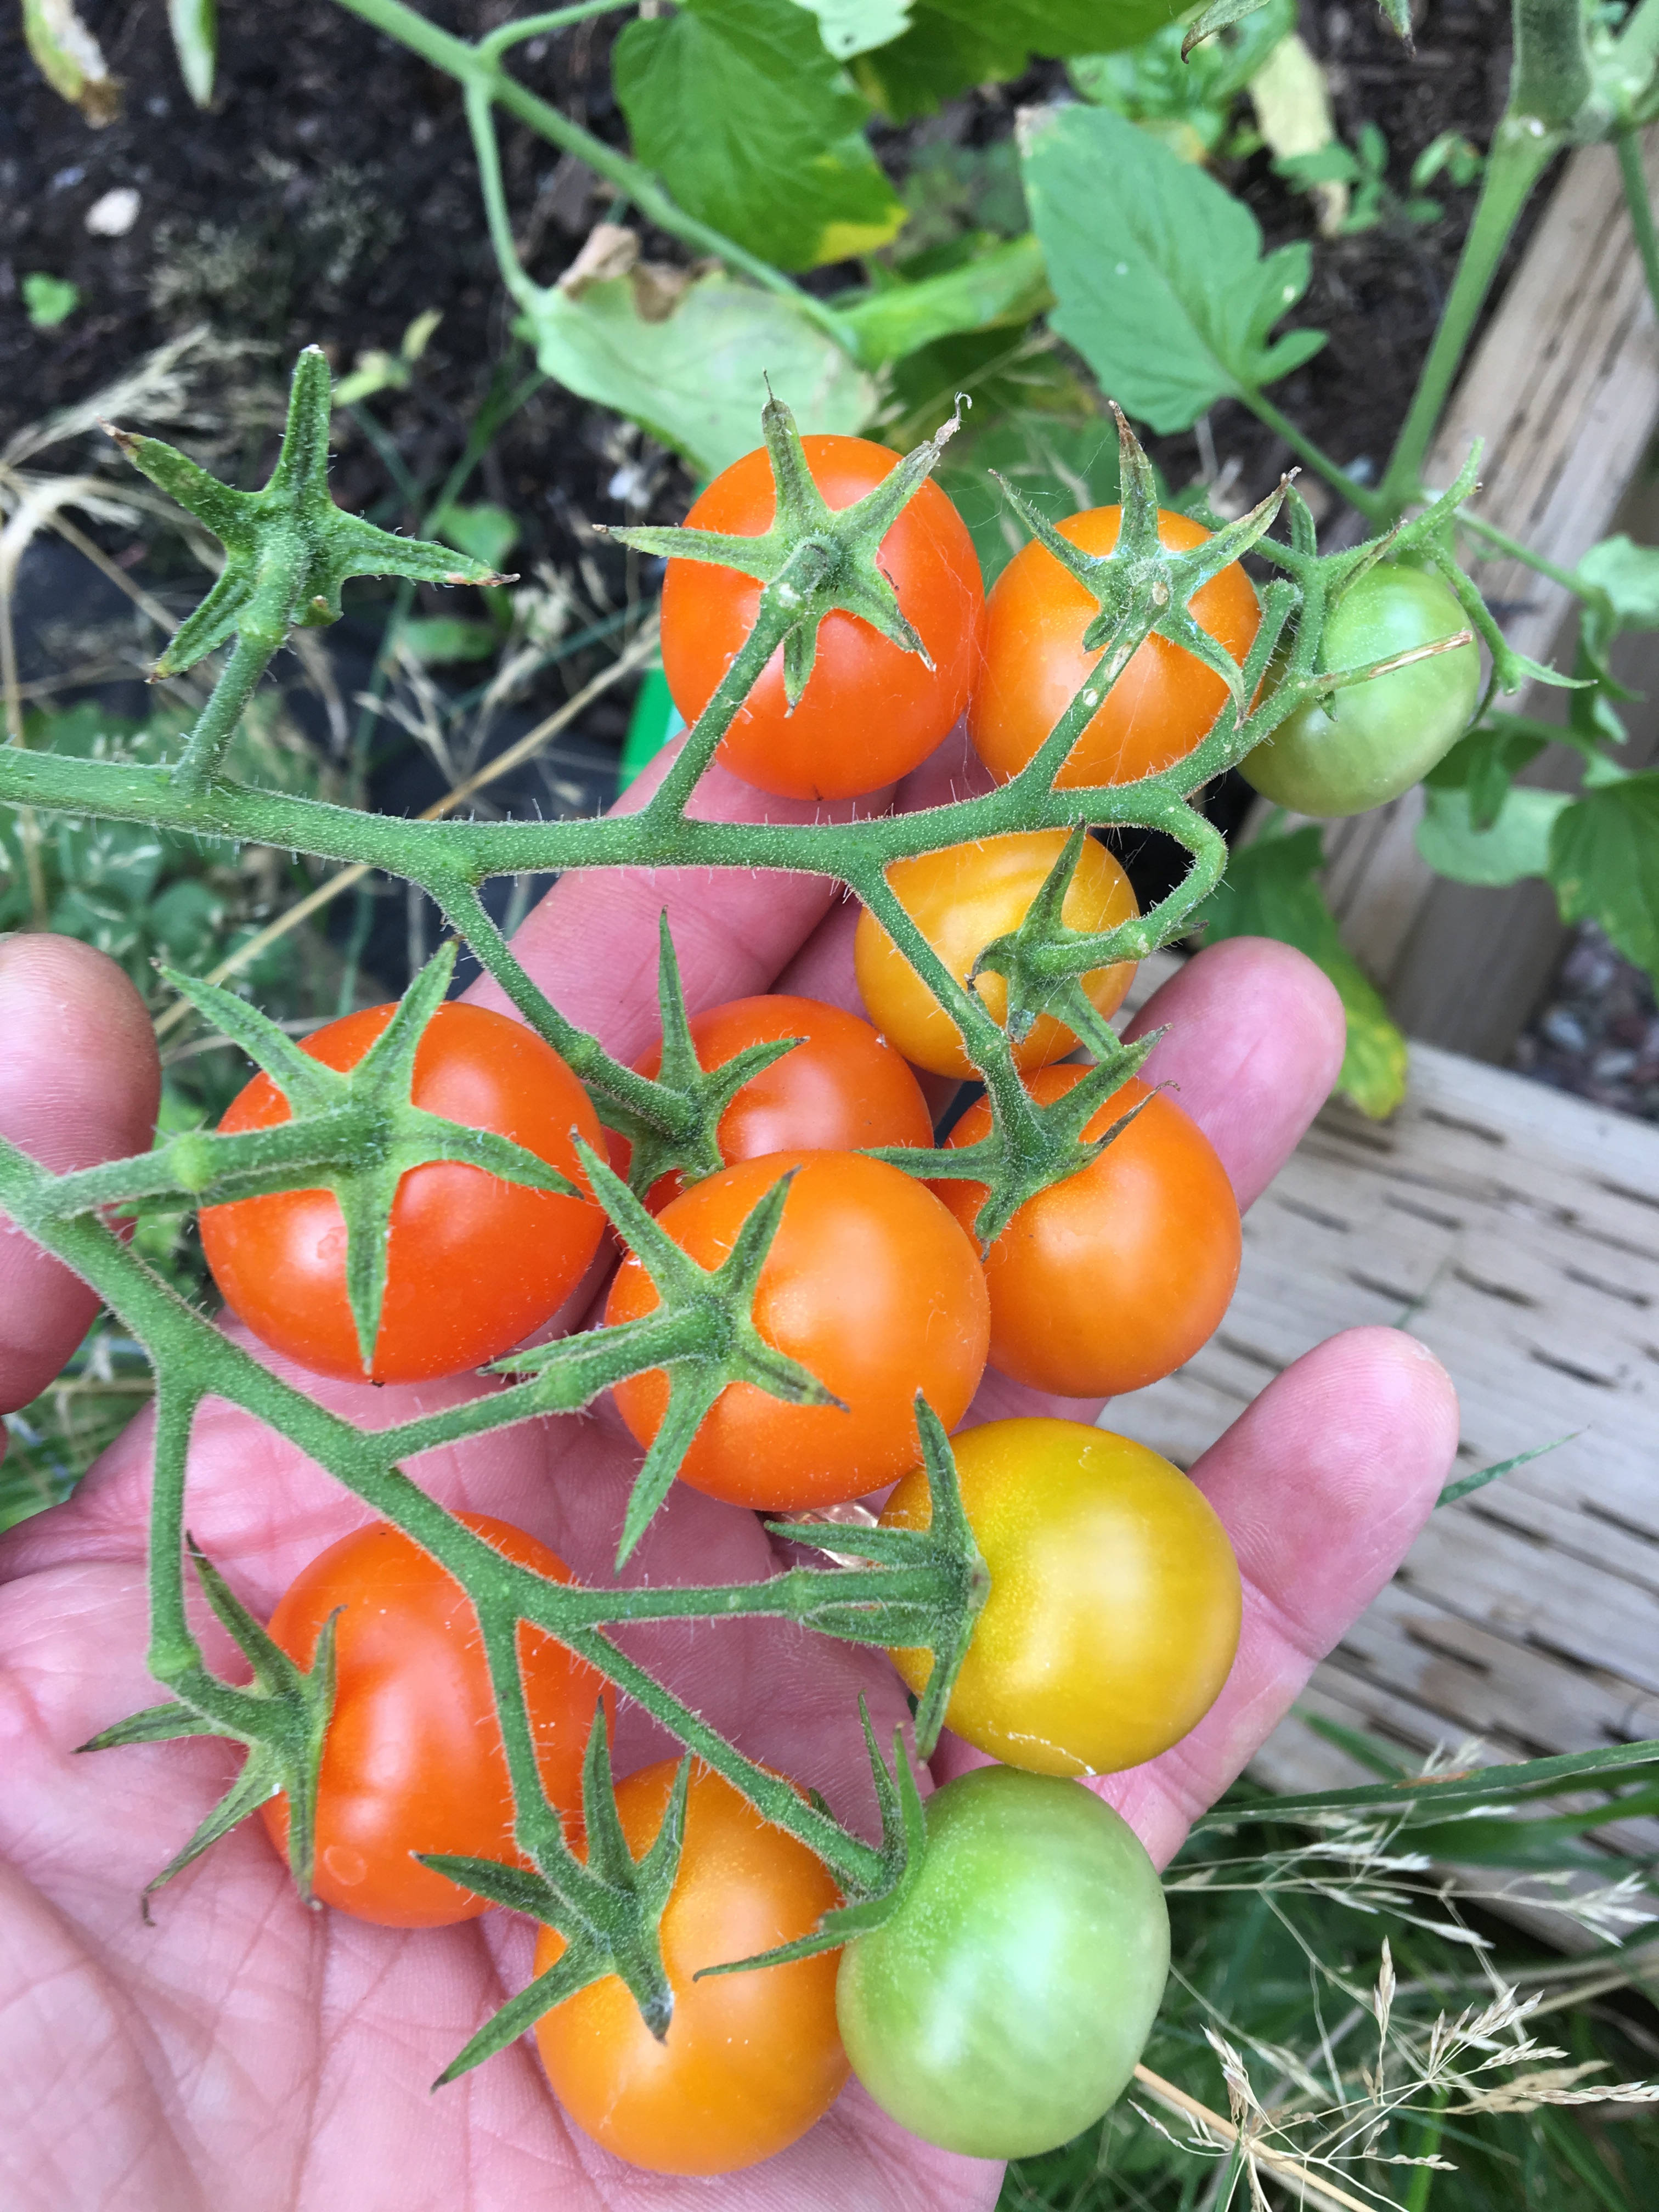
Here they were, half-ripened in my dark, unfinished basement and I could not ignore them. Nor could I forget that bag of organic lemons I’d bought recently…

I scanned the internet and was smitten with the cinnamon and saffron one author had added to her ridiculously difficult and multi-stepped recipe.  I stole the flavour combination and started to pluck the green stem ends clinging to every SunGold.

I had to make this easy. I reached for my  heavy, turquoise Cuisinart enamelled cast-iron pot that has braised heavenly concoctions all spring and summer in my oven, closed shut with the extra guarantee of a sheet of parchment paper.

I sensed this beast was up for the task. No lid. It had one hell of a thick base and a wide rim perfect for boiling off fruit into gelled perfection.

IMG_6274
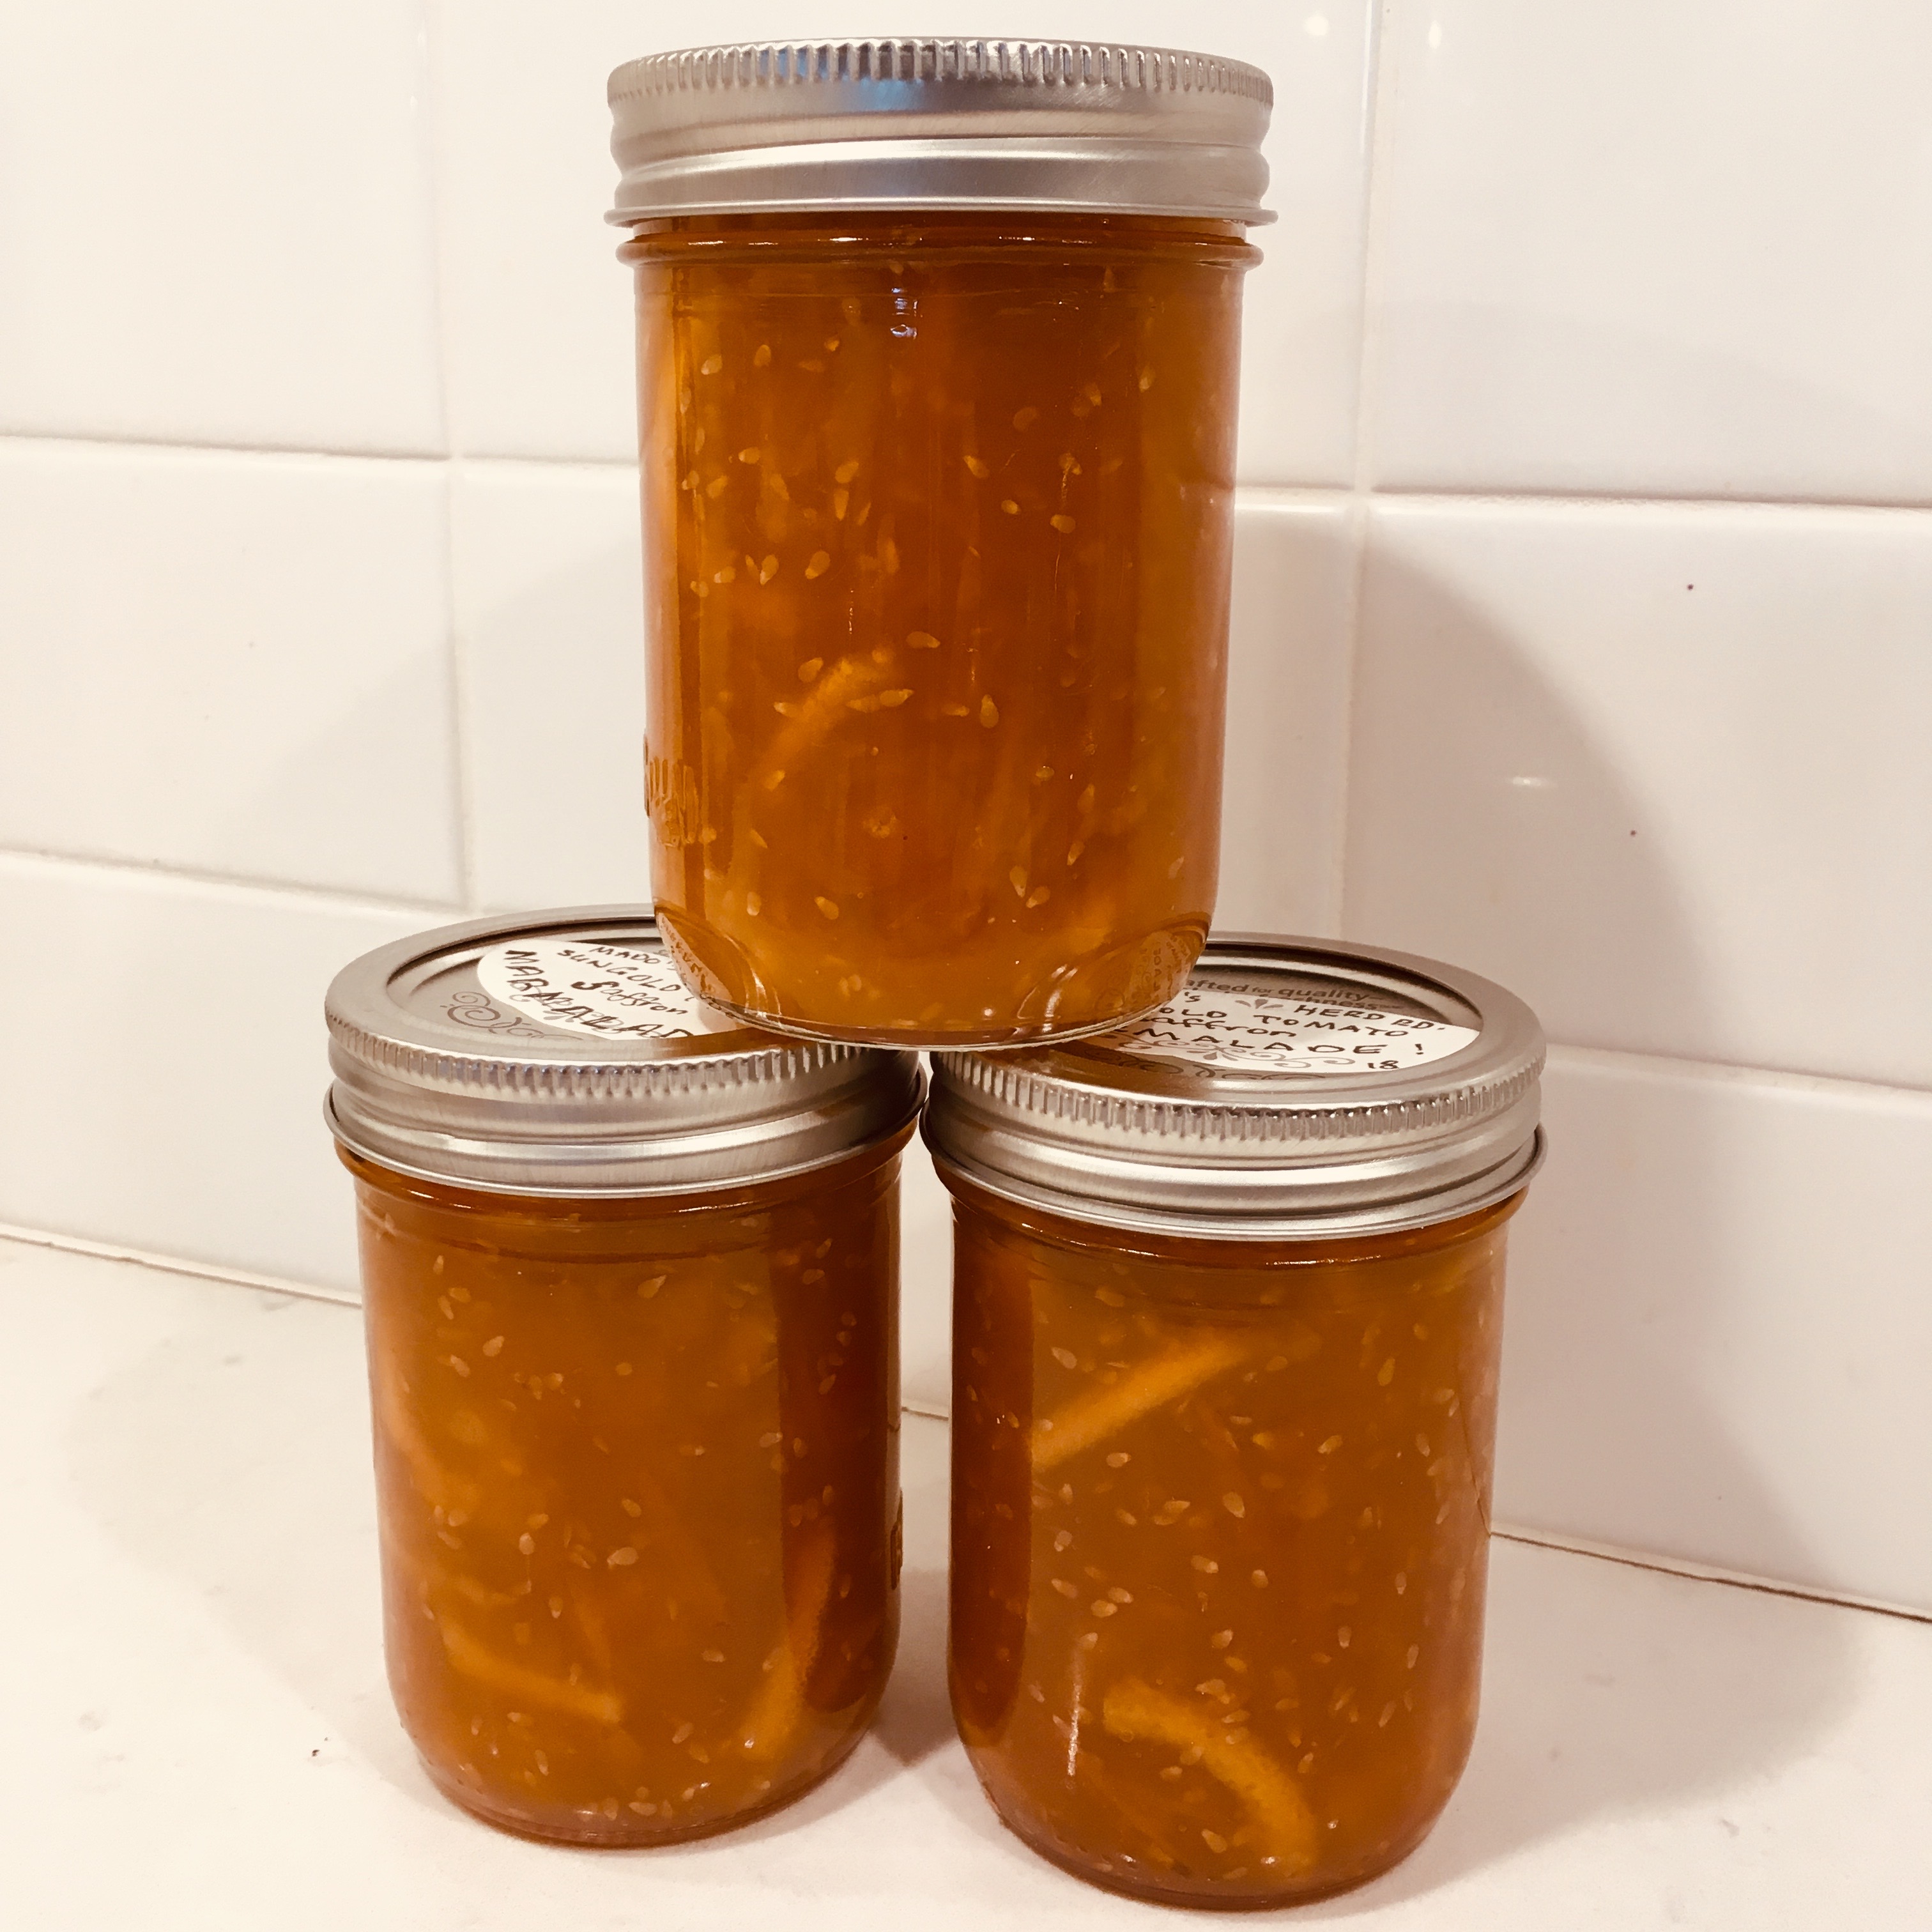
I had three and a half pounds of SunGolds the size of marbles. They looked so dainty and pretty  as they tumbled into the pot alongside cups of sliced lemons. I cranked the gas up high. In just a minute, liquid started to form in the base. After a short, five minutes the mixture was sloshing about. I dumped in the organic sugar and all that fruity sweetness shimmered to a gloss.

Promising, dared I hope.

I brought it to a boil and the skins made an orange line around the perimeter. I stirred occasionally, not continuously, and it wasn’t sticking or burning to the bottom. It made quick work of the liquid, reducing it down by a third. The orange line was a full inch above the liquid’s surface and it thickened and hardened.  I slid a knife under it and realized the line had gelled.

At first my wooden spoon dripped like fast falling rain when I tipped a maiden spoonful out and over the surface.  But in 20 minutes it was starting to cling, clump and sheet. All the little drops left in my spoon-resting dish started to sparkle and reflect.

IMG_6469
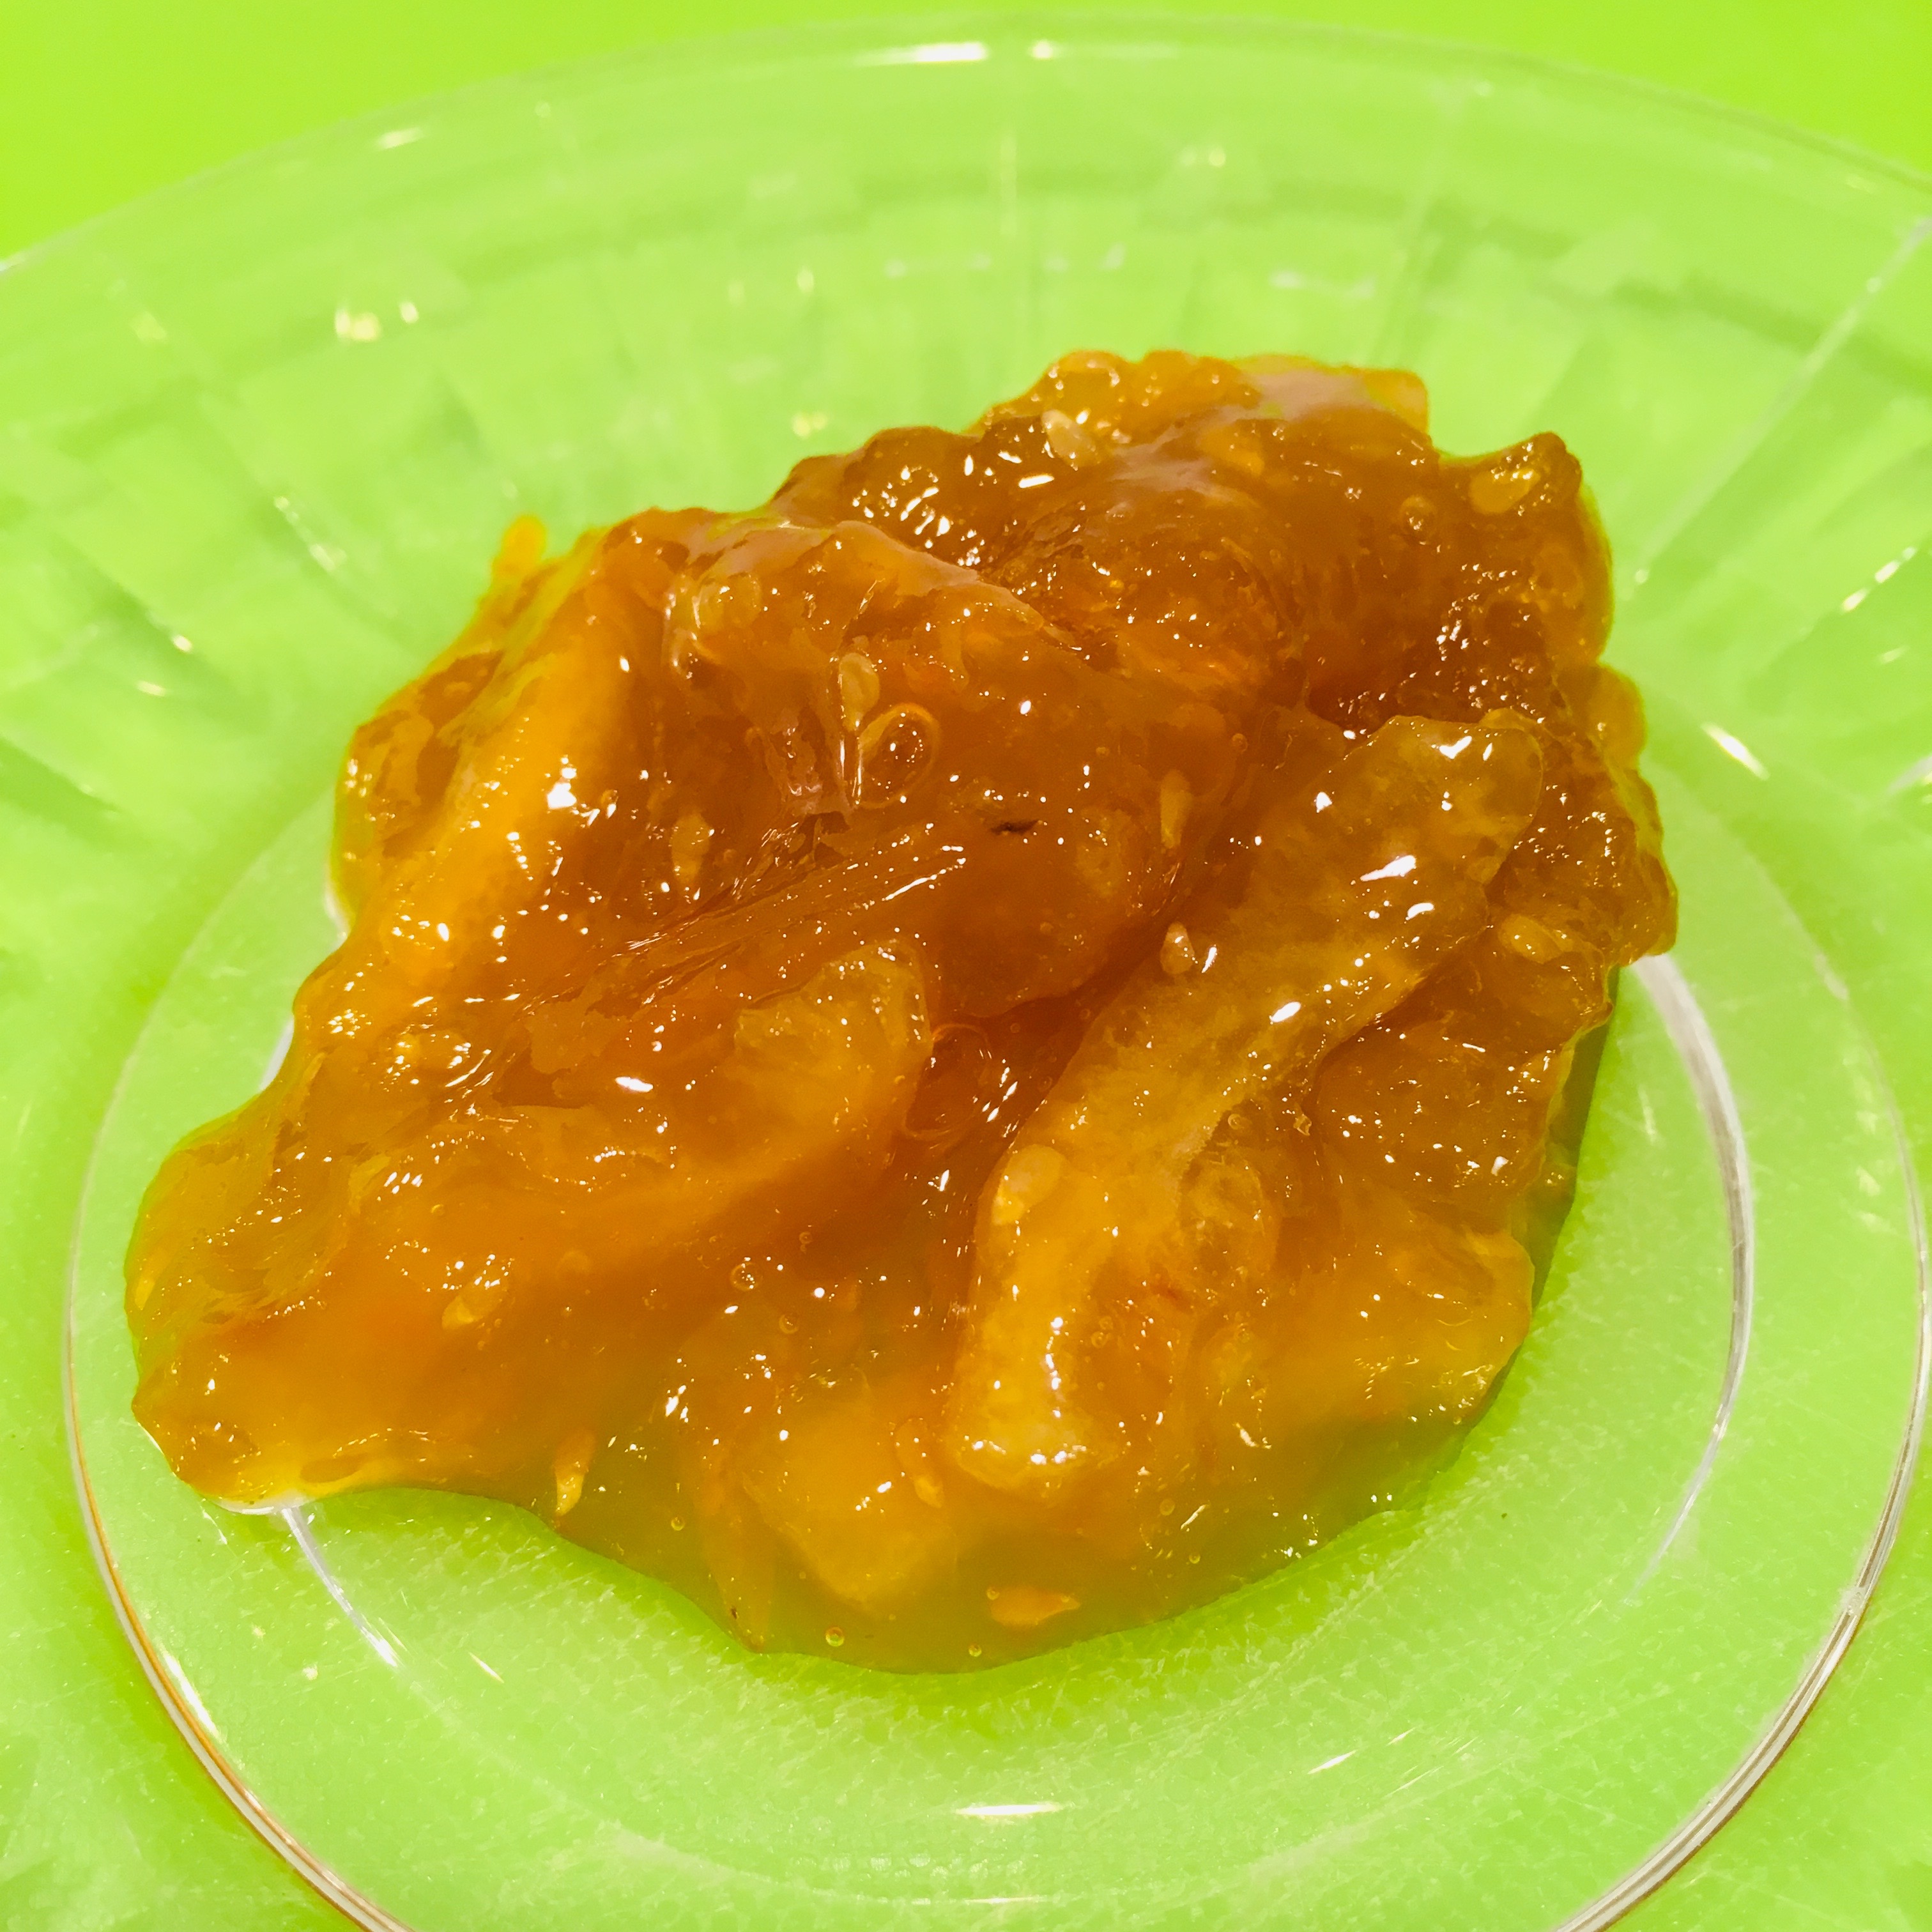
I ventured into this recipe carrying the baggage of a failed gel-maker. After the first ten minutes, I pulled out the Pomona’s Universal Pectin. I even filled a small bowl with sugar, ready to mix with the pectin powder to prevent that nasty clumping and frothing. I started to calculate, figuring this batch would need four teaspoons each of Pomona’s calcium water and pectin.

But just as carrying an umbrella stops the rain from falling, so did the appearance of that pectin box. It started up the natural gelling – instantly. Turning the spoon through this golden elixir took the push of oatmeal porridge. It was thick.  It would gel.

And, it smelt exotic. The earthy tomatoes had collapsed into skins swirling in a shiny syrup littered with tomato seeds. Lemon skins turned translucent, limping seductively on the spoon.  The cinnamon stick I’d cracked in half was swelling up like a wine cork. I waited for the final moment to gingerly tap the saffron bottle and let a few strands fall into the mixture to bleed their gorgeous tint. A marmalade was born.

Whether you pair this with cheese or slather on toast, this savoury-sweet marmalade will dance on your tongue. The lemon cuts the sweetness and the saffron slightly perfumes. A dollop on grilled fish offers delicious contrast and just a smidgen is the right condiment for dhal and rice.  With any luck and lots of gelling, this marmalade will make you swoon just like those Pilates Girls.

IMG_6464

SunGold Tomato Saffron Marmalade

  • Servings: 7.5 250 ml jars
  • Print

3 ½ lbs green sungold cherry tomatoes, ripened in basement in paper to a yellow-orange OR ripe red grape tomatoes

2 lbs organic lemons, seeded, quartered and sliced thinly

4 ½ cups organic white sugar

1 stick cinnamon, broken in half

Pinch saffron

In large, very wide and heavy enamelled caste iron pot heat tomatoes and lemons (without any liquid) until they sweat and emit liquid.  Add sugar and cinnamon and cook on high, stirring for 40 min.  Add saffron, check for gelling point. Process in sterilized jars with ¼ inch headspace for 10 minutes.

Time to get started. Sourdough!

I get asked about sourdough starters a lot and am happy to give some of my starter away to any aspiring baker. Often these people look really anxious when they take their baby starter away from my kitchen. They know this is a big step in their Bread Life and for many, a challenging one.

Not everyone is as obsessed with sourdough bread as I am. But I’m always willing to share my passion and grow more sourdough bakers.   IMG_4946

Last week it was my friend Alana from Food Bloggers Canada.  She asked for a starter recipe in a simple text and had no idea I would send back a two-page email.  But she’s going to give it a go and I hope you, dear reader, might try making your own starter, from ground zero, following these instructions.

Why have a starter? Well, without one you simply can’t make sourdough bread and  taste all of its deliciousness made with your own two hands. Like any living ingredient, if you starve or neglect it, it will die. It needs your nurturing to start your bread.

Why do you want to eat sourdough? Bread made slowly over the course of a few days has rich, layered flavours, tastes completely better than industrial, high-yeast, high-gluten bread and is often easier to digest.

If you follow my Instagram feed, you may want to bake sourdough because it’s such a looker  with its scored golden crust and large open crumb. But practice makes perfect.  I still get excited each and every time I open up my oven and see a well-risen loaf.  I still make mistakes, too. I love the mystery of bread-baking and its complexity. Good baked bread depends on many variables: timing, flour quality, temperature and the ripeness of your starter—to name a few.  The only way to get to know these principles is to dive in and flour up your hands.IMG_4302

Jeffrey Hamelman’s Bread: A Baker’s Book of Techniques and Recipes is my bible. Here’s his five-day “liquid levain culture” – bakers’ speak for sourdough starter.  I recommend that you go the extra mile and stretch this out to an eight-day process for best results.  Once you have this basic culture or starter, you can keep it alive for many years… but not decades!

When I attended the San Francisco Baking Institute in 2015, master baker Didier Rosada laughed in disdain when I bragged about the number of years I’d kept my starter alive.  After attending the course, I made a new starter to replace my teenaged one and did not regret the flavour-filled results.  Now, three years later, it is time for me to start afresh again.

Before you make your initial starter mix, consider what time works best to refresh (a.k.a. feed) both morning and night.  I like the 7pm/7am time frame.

Day One: Initial Mix

4.8 oz              organic whole rye flour

6 oz                 spring or distilled water

.2 oz                honey

Mix the ingredients well in a glass bowl and cover with plastic. Let stand in a warm area (75F to 80F) for 24 hrs. (This will look stiff and hard with very tiny bubbles on the underside after the first 12 hrs.)

Day Two: Two Feedings

5.5 oz              Initial mix (use half of Day One and throw out the remainder)

1.2 oz              organic whole rye flour

1.2 oz              organic, unbleached hard white flour

3 oz                 90F spring or distilled water

Mix the ingredients well in a glass bowl and cover with plastic. Let stand in a warm area (75F to 80F) for 12 hrs. Repeat (or refresh, in bakers’ speak)  in 12 hrs. Yes, you will have to throw out half of each mixture when you refresh. (After each feeding, you will watch it transform and grow, doubling, even tripling in size and smelling very sour.)

Day Three, Four, Five, Six and Seven : Two Feedings per day, every 12 hrs

5.5 oz              Initial mix (half of your last batch, throwing out the remainder)

2.4  oz              organic, unbleached hard white flour

3 oz                 spring or distilled water

Mix the ingredients well in a glass bowl and cover with plastic. Let stand in a warm area (75F to 80F) for 12 hrs. Repeat (or refresh, in bakers’ speak)  in 12 hrs. This white starter will bubble up and grow faster every day and night and should be ready to bake with by Day Seven.

Okay, now you’ve got your starter, but how are you going to keep it alive?  You’ve got to feed it,   once a week. Here’s how:

3.5 oz initial mix/mature starter

3.5 oz organic, unbleached hard white flour

3.5 oz spring or distilled water

Mix the ingredients well in a glass bowl and cover with plastic. Let stand in a warm area (75F to 80F) for 12 hrs. Refrigerate and refresh once a week.IMG_4753

How do serious bakers keep their sourdough starter alive?  They bake every day.  After they build a bread’s initial levain, they remove about an ounce and use that to start the next dough. All you need is an ounce or two to kick-start a bread! The most powerful, active and flavourful starters are those that are refreshed or used every day or two.

Before you get started, make sure you have a scale because serious bakers weigh all their ingredients. I like to use this Zyliss version found at Canadian Tire for $20 or less. You need a scale that can “tare”. That means you can put an empty bowl on the scale, reset to “O” (or tare) then weigh your rye flour, tare again to 0 then pour in and weigh the right amount of water. Tare away!

Local Sourdough

Whether you call it  Herd Rd Sourdough, Toronto Sourdough or Katmandu Sourdough,  its flavours and ingredients will entirely depend on where you bake it. (Adapted from page 153 of Bread: A baker’s book of technique and recipe)

Levain Build

4.8 oz              organic, unbleached, hard white flour

6 oz                 spring or distilled water

1.3 oz              ripe, mature starter (refreshed in the past 24 hrs)

Combine in a medium glass bowl 12-16 hrs before you make the final dough. Make sure the bowl is large enough for the levain to triple in size as it grows and bubbles up. Keep covered at room temperature. (I like to make this late at night, right before I fall asleep.)

Final Dough

1 lb 8 oz           organic, unbleached, hard white flour

3.2 oz              organic whole rye flour

14.8 oz            spring or distilled water

Levain Build (minus 1.3 ounce to be reserved in fridge for tomorrow or the next day’s bread)

Step one: Autolyse

Add all the final dough ingredients to the mixing bowl and mix on first speed until it forms a shaggy mass.  Cover with plastic and let stand 20-60 min.

Step two

Add .6 ounce/1 tbsp sea salt to the autolyzed dough and mix 1-2 minutes with a dough hook

Step three:  Bulk Fermentation at room temperatureIMG_3401

Transfer the dough to a large oiled bowl or oiled tub and cover for 1 hr 15 min

Stretch and fold the dough four times, lifting the dough to its longest extension, folding and pressing it back down,  repeat three times, turning the container by a quarter each time.

Cover and leave at room temp for 1 hr 15 min

Step four: Shape two loaves, place in well-floured bannetons and cover with shower caps.  Refrigerate 12-24 hrs. Gently flip each loaf on to a parchment paper-covered tray, score and slide into preheated  Lodge Combo Cooker pans or Dutch ovens.  Bake covered at 500 F for 20 min, carefully remove lids, reduce heat to 460 F and bake 20 minutes or until golden brown.

IMG_4303

An ode to damson plums

Many, many, moons ago, my friend Nora suggested damson plum jam.  I’d never heard of damson and didn’t know where I’d find them.  I was a novice canner, having put up my first batch of Seville marmalade sometime after all those Millennials were born.

There was a crew of us cooking ladies, back then, crowded in my steamy kitchen with my blue enamel canning pot frothing on the back burner. As dozens of Bernardin jars jiggled and clanked through sterilization, we peeled off Seville skins, arguing over the presence of white pith or not, before piling the peels on top of each other, slicing them into teensy strips no wider than a toothpick. Someone measured cup after cup of granulated white sugar, while the bossiest among us stirred circles of hot, sputtering, bubbling orange fruitiness.

We were kitchen warriors and we all agreed on everything except something:  The Gelling Point. The conversation grew even more heated when damson came into play.

But first, I had to find the little gems and naturally, I called Tony at The Harvest Wagon on Yonge Street, deep in the heart of fine food shopping La La Land.

IMG_6115Tony and I were on a first name basis ever since I interviewed him for a newspaper column and he revealed that his Rosedale customers didn’t really care about price (!)  All they wanted, he claimed, were tidy piles of the best looking bounty from every corner of the globe.

“Check in weekly,” he said cheerily before we hung up.

It was early September and all the other plums — yellow, green gage, Italian prune — had come and gone.  I was doubtful that this alien called damson would be found.

“Not many people request it,” he’d said earlier in our call. “But I’ve got a supplier in Quebec.”

Tony never let me down. A week later, I walked out of his store with a million dollars’ worth of the sour little gems in their dark purple suits. Nora and I set to work. After two hours of hard labour, we were at that crucial juncture that stops any jam purist from hyperventilating and pulling out a box of commercial pectin.

It’s called the gelling point but should be called pointless, since all the indicators leading to it – heat, natural pectin content, flavour and consistency – meld into one big messy, sugary fruit concoction stirred by a bossy broad who makes the call, erroneously, again and again.

That, my dear readers, is little old me.

I have this thing with jams and jellies. I always want to make them but get burnt out at the eleventh hour and make a totally impatient miscall on the gelling point.

Nora knows not to listen to my pectin theories anymore.  Like any sensible cooking partner, she calmly looks the other way when I hold up a jam-dripping wooden spoon, perilously close to her snout, and screech out “It’s sheeting!”. She just laughs when I open my freezer and yank out a little frozen plate. She snorts when I plonk a test blob of cooking jam on the frozen surface and claim that it’s “rippling just like the cookbook says” before our very eyes.

Nora doesn’t take any of my gel guff anymore. She makes the call. But when she’s not by my side to slap me into gel sanity, things go wonky.

It’s why my sister and I have made a tradition of basting Easter lamb with my secret Seville sauce that annually never quite gels into marmalade.  It’s why David found himself penning Blum Sauce on a recent Herd Road batch in my desperation to distract BC gel-sniffers.

I know few will believe me, but my most recent foray into the damson plum realm rewarded my tenaciousness with two crowning glories: a damson jam that neatly gelled without added pectin and a cake that is simply Plum Easy.

Plus, I didn’t have to call Tony, my uh, supplier.

I simply turned on Google Map and made my way to Sheila’s house in Mill Bay where a box of fresh-picked damson plums sat near her back door. Sheila had recently helped her friend denude a backyard tree of these little wonders and asked me after a Pilates class if I knew what to do with damson.

IMG_6113Did I know?

Memories of Nora’s knowing, raised eyebrows filled this cook’s heart with glee as David and I poured the purple mountain of Sheila’s picked damsons into a bag. We hurried them back to my new fancy kitchen where I started to measure and conjure up culinary fun times.  I had 9 lbs 3 oz of the little orbs to hand pit and was ready to go into a coma after the first dozen when I  developed a brilliant sleight of hand.  I dug my fingernails into each plum’s belly, eviscerated it,  separated pit from parent, netting 8 lbs 6 oz.  of readied product in just under an hour.

I was about to wrap up all those pits in a cheesecloth bag and add them to my jam session until my wiser-self asked Dr. Google a thing or two. I learned those plum pits weren’t going to improve my gelling odds, were devoid of natural pectin and might come in handy as pie weights. I washed, dried and bottled up 2 cups of the almond-like babies.

Then I made My Best Ever Damson Jam spiked with homegrown hot peppers which I present to you now, knowing that you’re unlikely to make it, but might not resist the second very easy recipe offered below.

IMG_6122

My Best Ever Damson Jam Spiked with Chillies

  • Servings: 7-8 250 mL jars
  • Print

Okay, you’ve read my story but ask Nora how good damson jam is. We may not agree on gelling point but we are both bedazzled by damson plums’ puckering, rich flesh and sweet skins that shrivel into dark magical ribbons when served on a toasted slice of home baked levain.

3 1/2 lbs pitted damson

5 cups granulated white sugar

3 tbsp fresh lemon juice

1 1/2 tbsp lemon zest

1 1/2 tsp coarsely ground dried red hot peppers

Preheat oven to 400 F.

Bake damson plums in a large baking pan, covered with aluminum foil for 30 min.

Transfer cooked damson into a large, wide-rimmed pot, add sugar, lemon juice, zest and ground chillies bring to a rapid bowl, stirring for 10 minutes until the magical gelling point occurs.

Ladle jam into sterilized jars leaving ¼ inch headspace and process for 10 min. 

IMG_6128

Plum Easy Cake

Sheila alerted me to this famous find, originally published by the New York Times and authored by Marion Burrows as “Original Plum Torte”.  Phooey.  This isn’t a torte, it’s a dead easy cake that you can pile upon its spooned batter a ton of ripe cut fruit, sugar and spice.  Here’s my over-the-top version with Damson.

¾ cup granulated sugar

½ cup unsalted butter, softened

2 eggs

1/2 cup unbleached white flour

½ cup spelt, kamut or whole wheat

1 tsp baking powder

Pinch of salt

2 cups pitted and halved Damson plums

¼ granulated sugar

2 tbsp lemon juice

1 tsp cinnamon

Preheat oven to 350 F. Butter a 9-inch springform pan, line the bottom with parchment paper.

Whisk together sugar and butter in a mixing bowl until light and fluffy. Beat in eggs.

In a small bowl, combine flours, baking powder and salt.  Fold dry ingredients into wet to create a stiff batter.

In a medium bowl, combine plums, sugar, lemon juice and cinnamon.

Spoon batter into pan, level with a spatula and top with fruit.

Bake 1 hour or until the top is golden brown and a cake tester comes out clean.  Remove from oven, allow to cool for 10 minutes, trace a butter knife around the edges of the pan and de-pan.

Serve warm or at room temperature.

IMG_6131