
Like any profession, bakers rely on good tools to get the job done right.
Oven: Choose electric over gas for reliable heat with less temperature fluctuation.
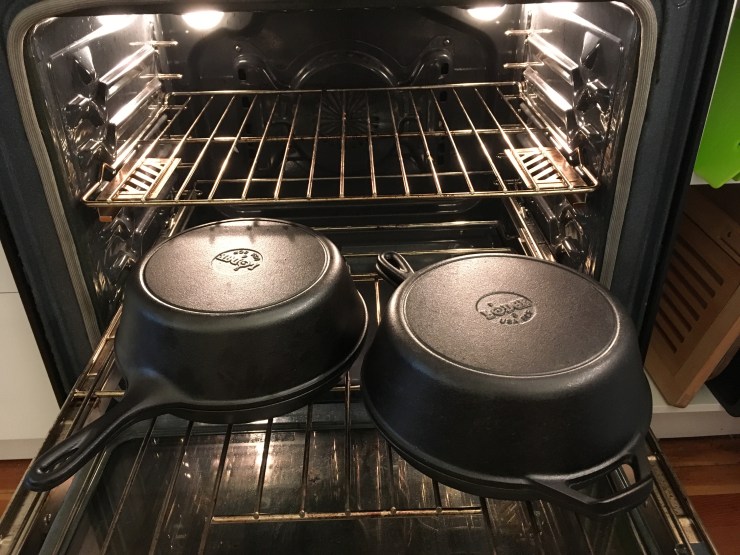 Dutch ovens or Lodge Pan combo cookers: When Jim Lahey of Sullivan St Bakery published his no knead bread recipe it was a revelation to the baking world. What, you don’t need to knead? But what you do need is the right pot for artisanal dough: one that is small enough to create its own steam at the beginning of the bake and is heavy-duty enough to retain really high heat. I love my Lodge combo cookers. You can’t beat the crust, crumb and lift of a loaf baked in a combo cooker. Put it in the oven, preheat to 500F and wait about 30 minutes before loading the dough into these cast iron cookers. They will be VERY hot and extra caution is needed when working with these pots. Most ovens can fit two combo cookers on a single rack at the bottom of the stove. What makes a combo cooker perfect for baking bread is its shallow bottom and tall lid, making it easy to slide delicate risen dough on to its surface and a lid large enough to allow a full rise. My only complaint is that is does not accommodate large oval loaves.
Parchment paper: I started my bread career with pizza dough. Every cookbook and instructor called for cornmeal. “Dust your bread paddle with ample cornmeal and that sticky dough will quickly slide off and into a hot oven” was the refrain. But it didn’t exactly slide and too often the cornmeal burnt in the oven and ruined the aroma and underside of the crust.
Enter parchment paper also called “bakers’ paper”. Things don’t stick to it. I use a small amount to line a paddle or baking sheet and never experience the horror of dough not moving in one whole, shaped piece into the oven. I leave my loaves on parchment for the entire bake and it does not harm or affect the crust negatively.
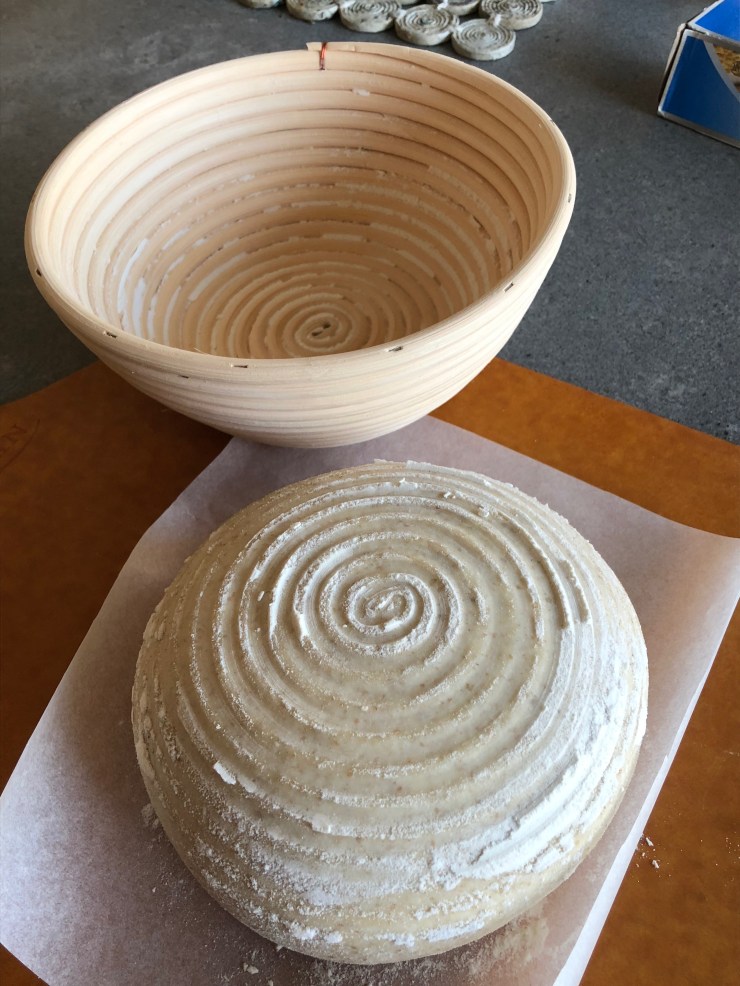
 Bannetons and baker’s linen: Artisanal bread dough is risen in baskets to preserve the shape and to create a pretty swirling flour pattern on the finished crust. You plunk the shaped loaf in bottom-side-up, let it rise, then place a parchment-paper-lined paddle or rimless baking sheet over it and flip the loaf back over, right side up. I dust my bannetons liberally with rice flour which prevents sticking and also creates nice, white contrasting lines on the finished crust. I never wash my bannetons, because moisture encourages mildew. I use a natural bristle brush to clean the bannetons and store them in a dry, airy cupboard. Round bannetons should be no wider than eight to nine inches in diameter or your loaf will be too big for the combo cooker. Another option is baker’s linen liners that can be fit over medium sized bowls.
Shower caps: I used to put my rising banneton dough in closed plastic bags to prevent the dough from drying out until my friend Dushka suggested hotel shower caps. They fit snugly over the top of a banneton or linen-lined bowl and you can look inside to gauge the progress of your rise without having to take the shower cap off. Brilliant! Never leave a hotel without taking one home.
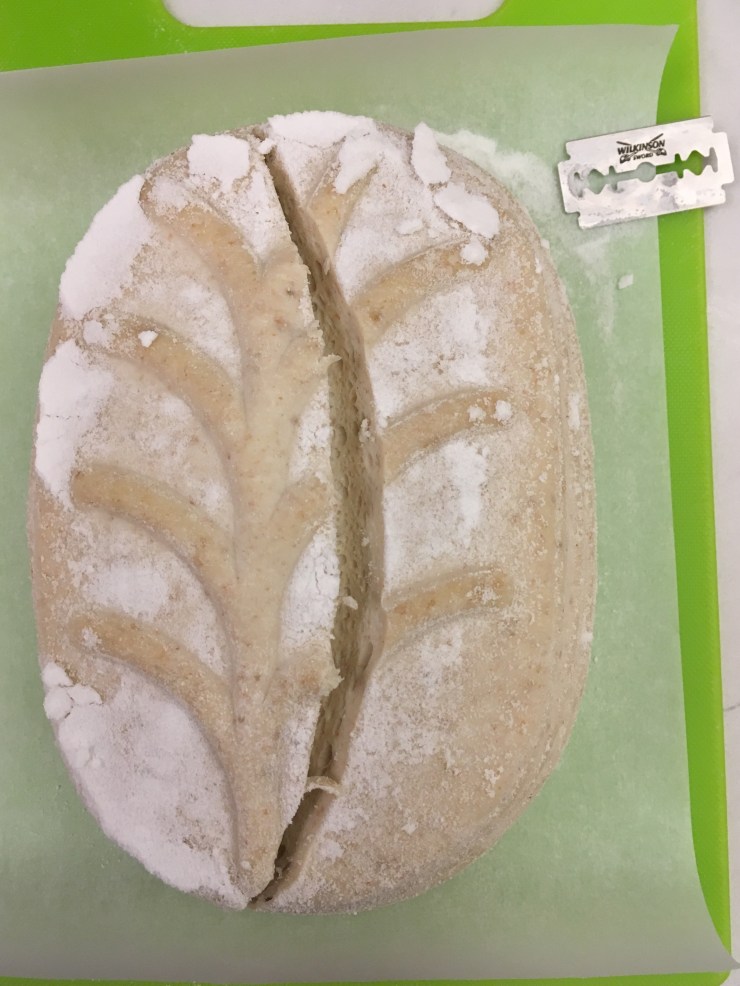 Razor blades and lamés: Just before your risen dough goes into the oven, it is time to score. A score allows hot air to emit during the bake without tearing open the crust. Bakers traditionally scored loaves in distinct patterns but nowadays it has become an art. The angle and depth of a score will affect the final shape of the loaf. I like to hold a slightly curved sharp blade between my thumb and index finger but others like to use a handle for the razor called a lamé. A sharp, serrated knife can do the trick, too.
Oven gloves: While the underside of my arms are littered with burn scars, I actually use and highly recommend oven gloves. Heavy duty, extra-long gloves are the best protectors but hard to find.
 Digital scale: I cannot bake without a scale, I am so used to weighing versus measuring flour, starter and water. You need a scale that can “tare” back to zero so that you can put an empty bowl on the scale, tare to zero, add a pound of flour and tare back to zero, add 8 ounces of water and tare back to zero and so on. Zyliss makes a light, flat scale about the size of an Ipad.
 Just three ingredients: Flour, water and salt: Organic flour makes a big difference. I buy unbleached organic hard white flour by the 10 kg bag and am happiest when it is locally milled and has a date stamp to guarantee freshness. Locally grown, freshly milled whole rye, kamut, spelt and red fife all make incredible sourdough bread.
 Salt. Avoid iodized salt and choose sea salt. I like the big bags of coarse grey French salt from Ile de Noirmoutier that I found at Thrifty’s.
Water. If your local tap water tastes great, use it. In Toronto I bake all my bread with spring water.
Creating steam: Professional bread ovens have built-in steam injection. Bakers want steam during the first 10 minutes of baking for good crust development. If your oven does not supply steam, you can supply it yourself with a spray bottle or ice cubes. Sprayed water may crack oven tiles or pizza stones. Ice cubes won’t. Heat a small aluminum baking pan in the bottom of the stove and toss in two or three cubes after you load the dough into the oven.


Tools are key! Thanks for this. Re:salt we might have to get you on the west coast tide pools and rocks to collect your own sea salt.