The Power of Challah

I bake and give away a lot of freshly baked bread. I’ve been baking bread weekly, sometimes daily, for many moons and my floury perspective has offered insight on what Joe Eater likes best in the bread department. And it’s challah, hands down.

Essentially, we bread lovers eat with our eyes first. Appearances matter.  Just the sight of one of my golden, glossy braids is enough to bring most of my beneficiaries to their knees. Sprinkle on some sesame or poppy seeds (or both) and you’ve got a bagel hybrid that screams for a slathering of cream cheese,  followed by an unabashed crescendo of jam.

“What’s not to love?” my Long Island New York mother-in-law used to ask.

Ethel, of course, would only take a sliver of a slice, knowing full well that the honey, milk, butter and eggs that enrich and enliven challah were the kiss of dietary death for a diabetic like her.  But that wouldn’t stop her from kveln about my challah.

My friend Danny, on the other hand, used to scrunch and contort her mien whenever she came face to face with one of my challahs.

“No! No, you can’t do this to me!” she’d wail, tossing the gift loaf back into my hands like a hot tamale.

Turns out she was an addict.

Then there was Don. He ignited my baking passion and passed the challah gene down to our offspring.

I’d find him drooling and star struck, gazing with deep longing at my just-out-of-the-oven golden, glossy loaves.  I’d start wielding my bread knife, slashing it through the air, marking the end of each word with a vicious swipe   “Don’t you dare” Slash, slash, slash!  “devour it all!”  He’d feign to cower then leave only crumbs in his wake.    

Oh, the allure, the gloss and glimmer of a challah’s golden crust, twisting and turning seductively before our hungry eyes. Blessedly for us bakers, it is a no-brainer of a baking feat. Sure, you need to have the larder well stocked with milk, honey, eggs and butter, but you’ll find the braid an easier dough trick than your average high hydration, Tartine-style boule.

What’s more, this is a bread recipe that will make you a baking icon among friends and family. You don’t have to capture wild yeast for 10 days to make this baby rise and if you practice this just once, you’ll soon be a baking pro worthy of  Zoom coverage at the socially-distanced table.

But before you plunge into this bake, let’s talk flour:  Seriously good flour, that’s local, freshly ground and can be delivered to your door. 1847 Stone Milled Flour https://1847.ca  produces a variety of organic stone milled flours in Fergus, Ontario that bring this challah out of the land of white bread and into a world of healthy, rich flavour.

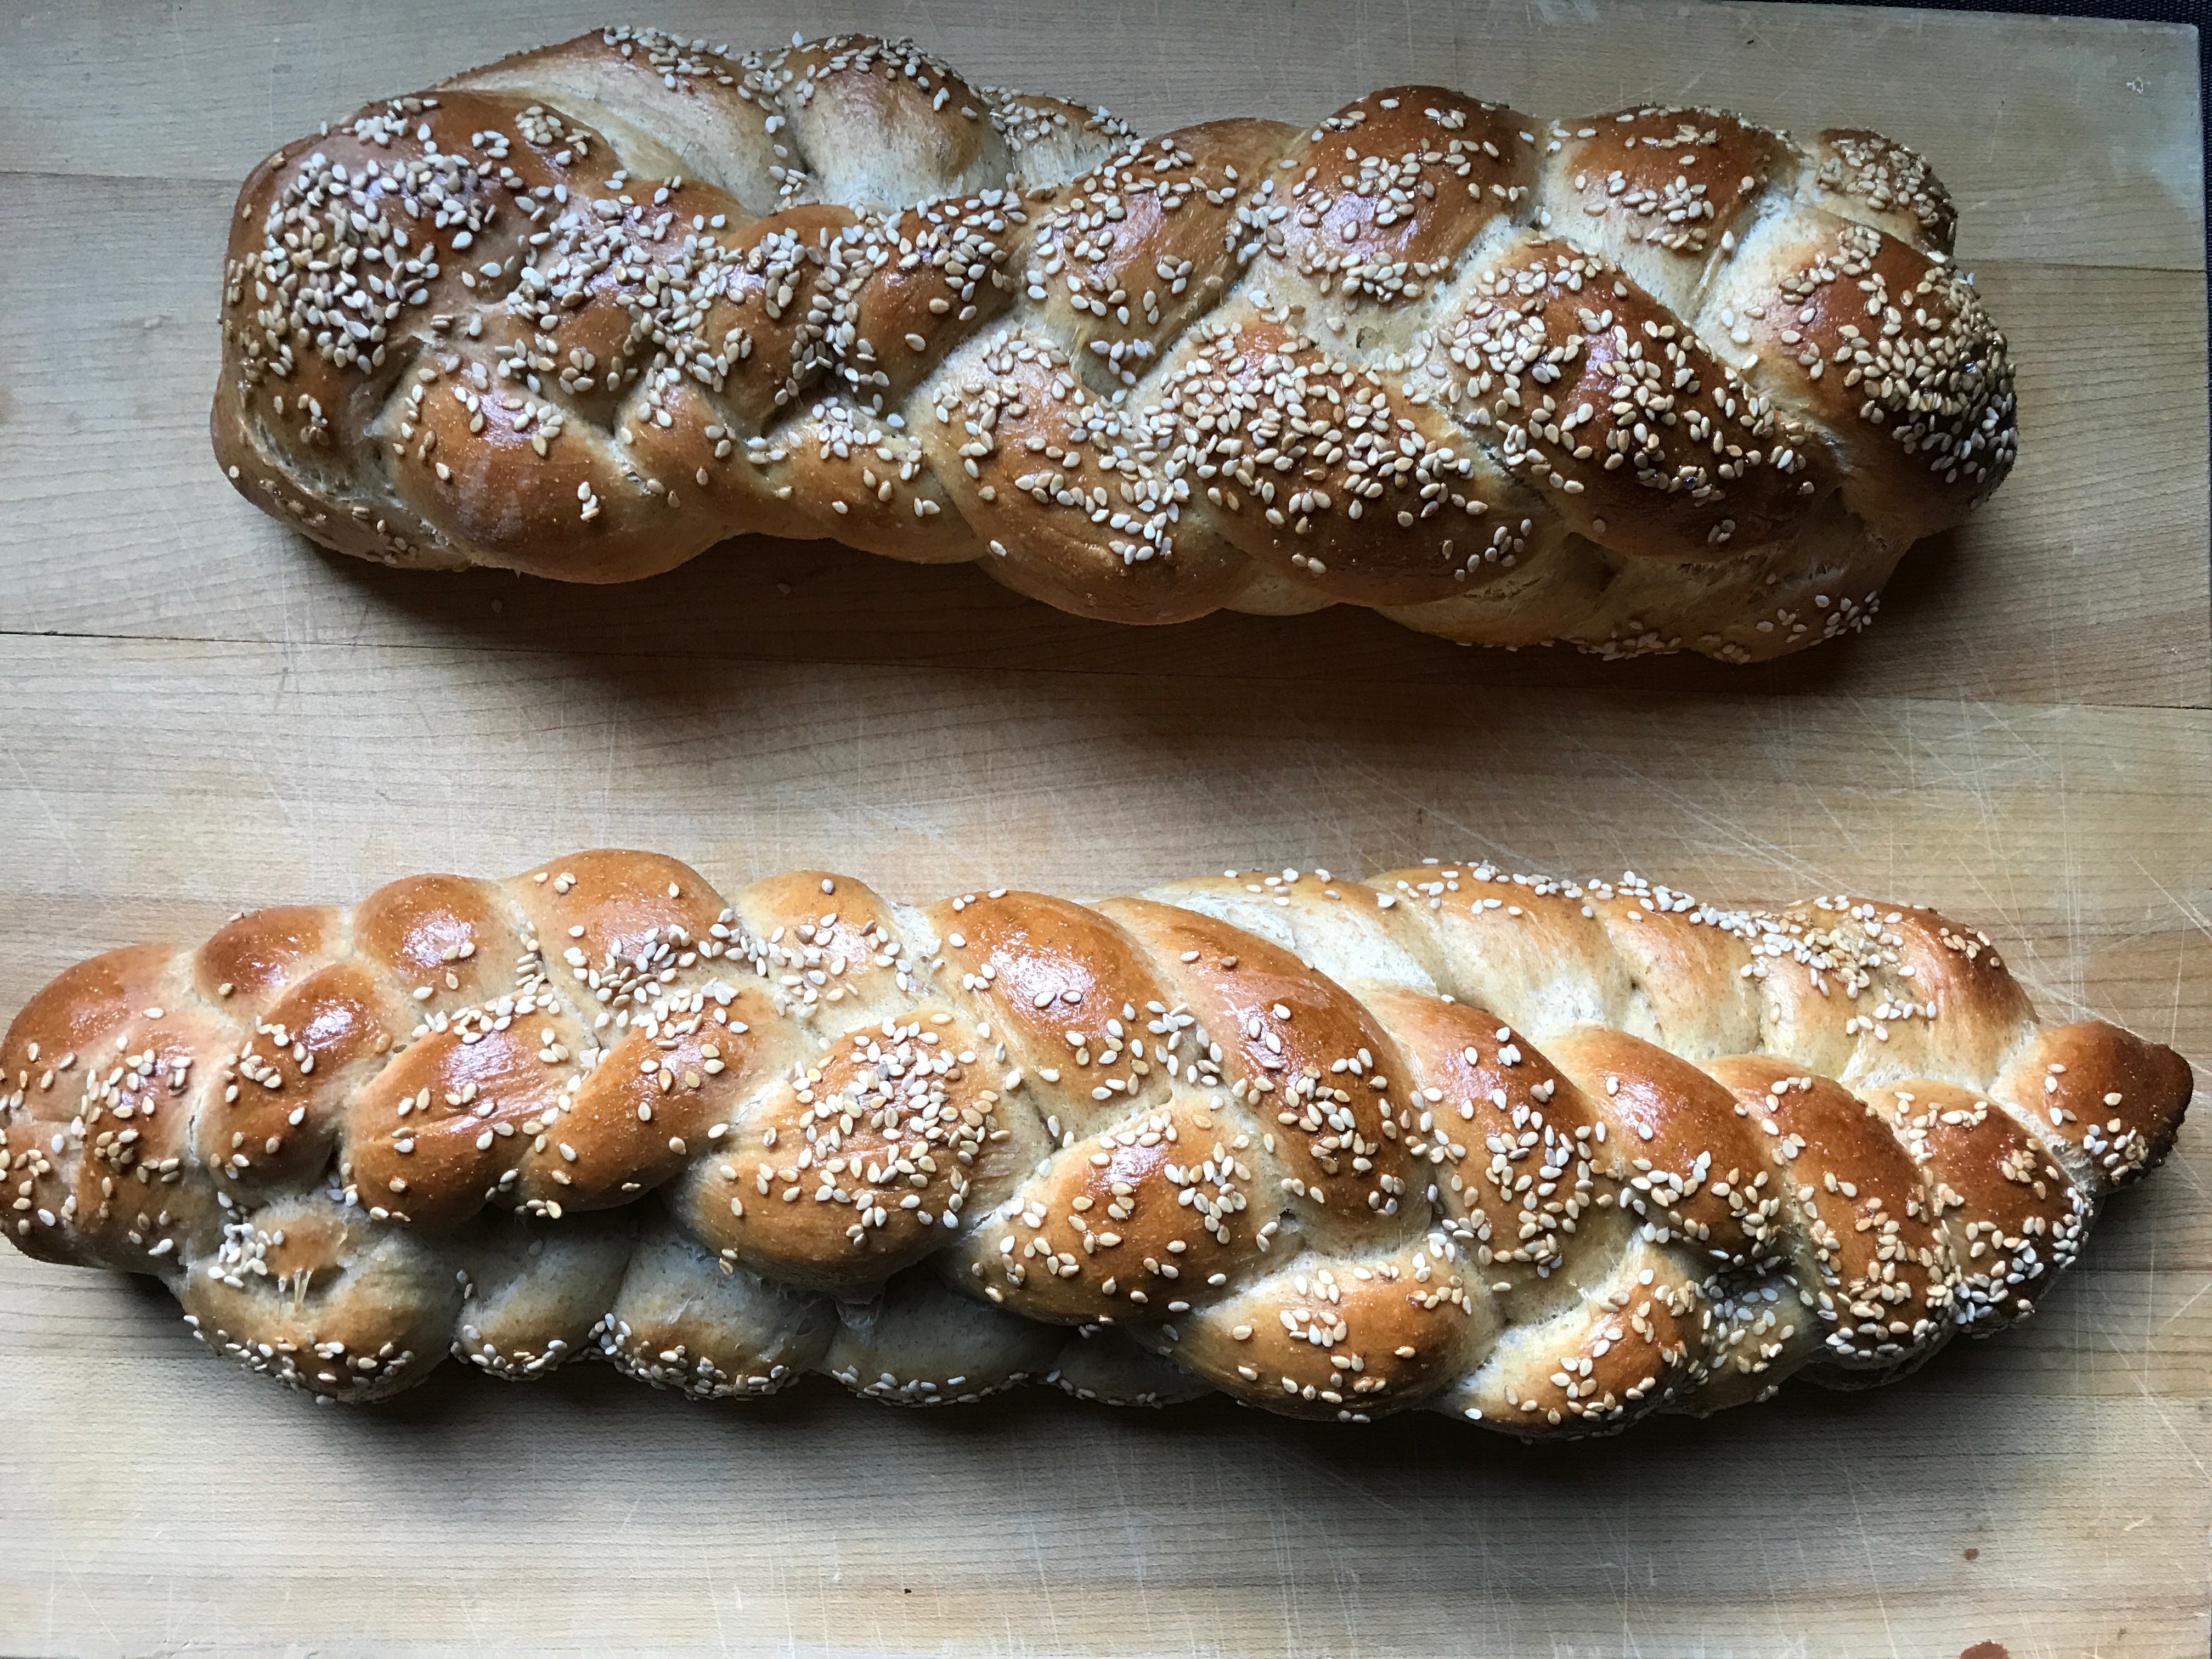
1847 Challah, Sponge Technique

Despite the name, this challah recipe doesn’t date back to 1847. I created it  recently to feature 1847’s Red Fife and Daily Grind, but both of these whole grain flours can be substituted with other brands.

Sponge

2 cups warm milk

4 eggs  lightly beaten

¼ cup   honey

9 oz/2 cups     1847 Red Fife

4.8 oz/ 1 cup   PC Organic All purpose, unbleached flour

1 tsp                instant yeast

Final Dough

¼ cup               melted unsalted butter

.6 oz/1 TBS      salt

10 oz               1847 Daily Grind (whole grain multi-purpose flour)

12 oz               PC Organic All purpose, unbleached flour

1                      egg, beaten

¼ cup               sesame seeds

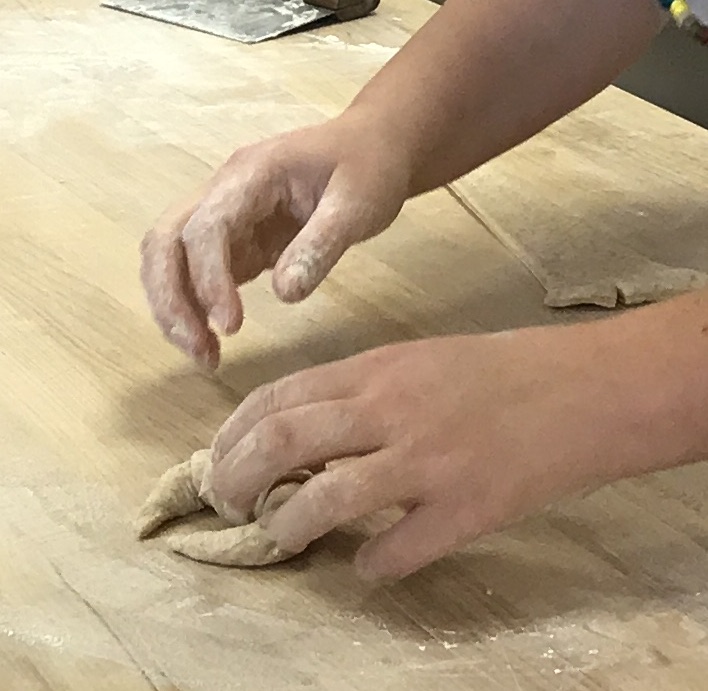
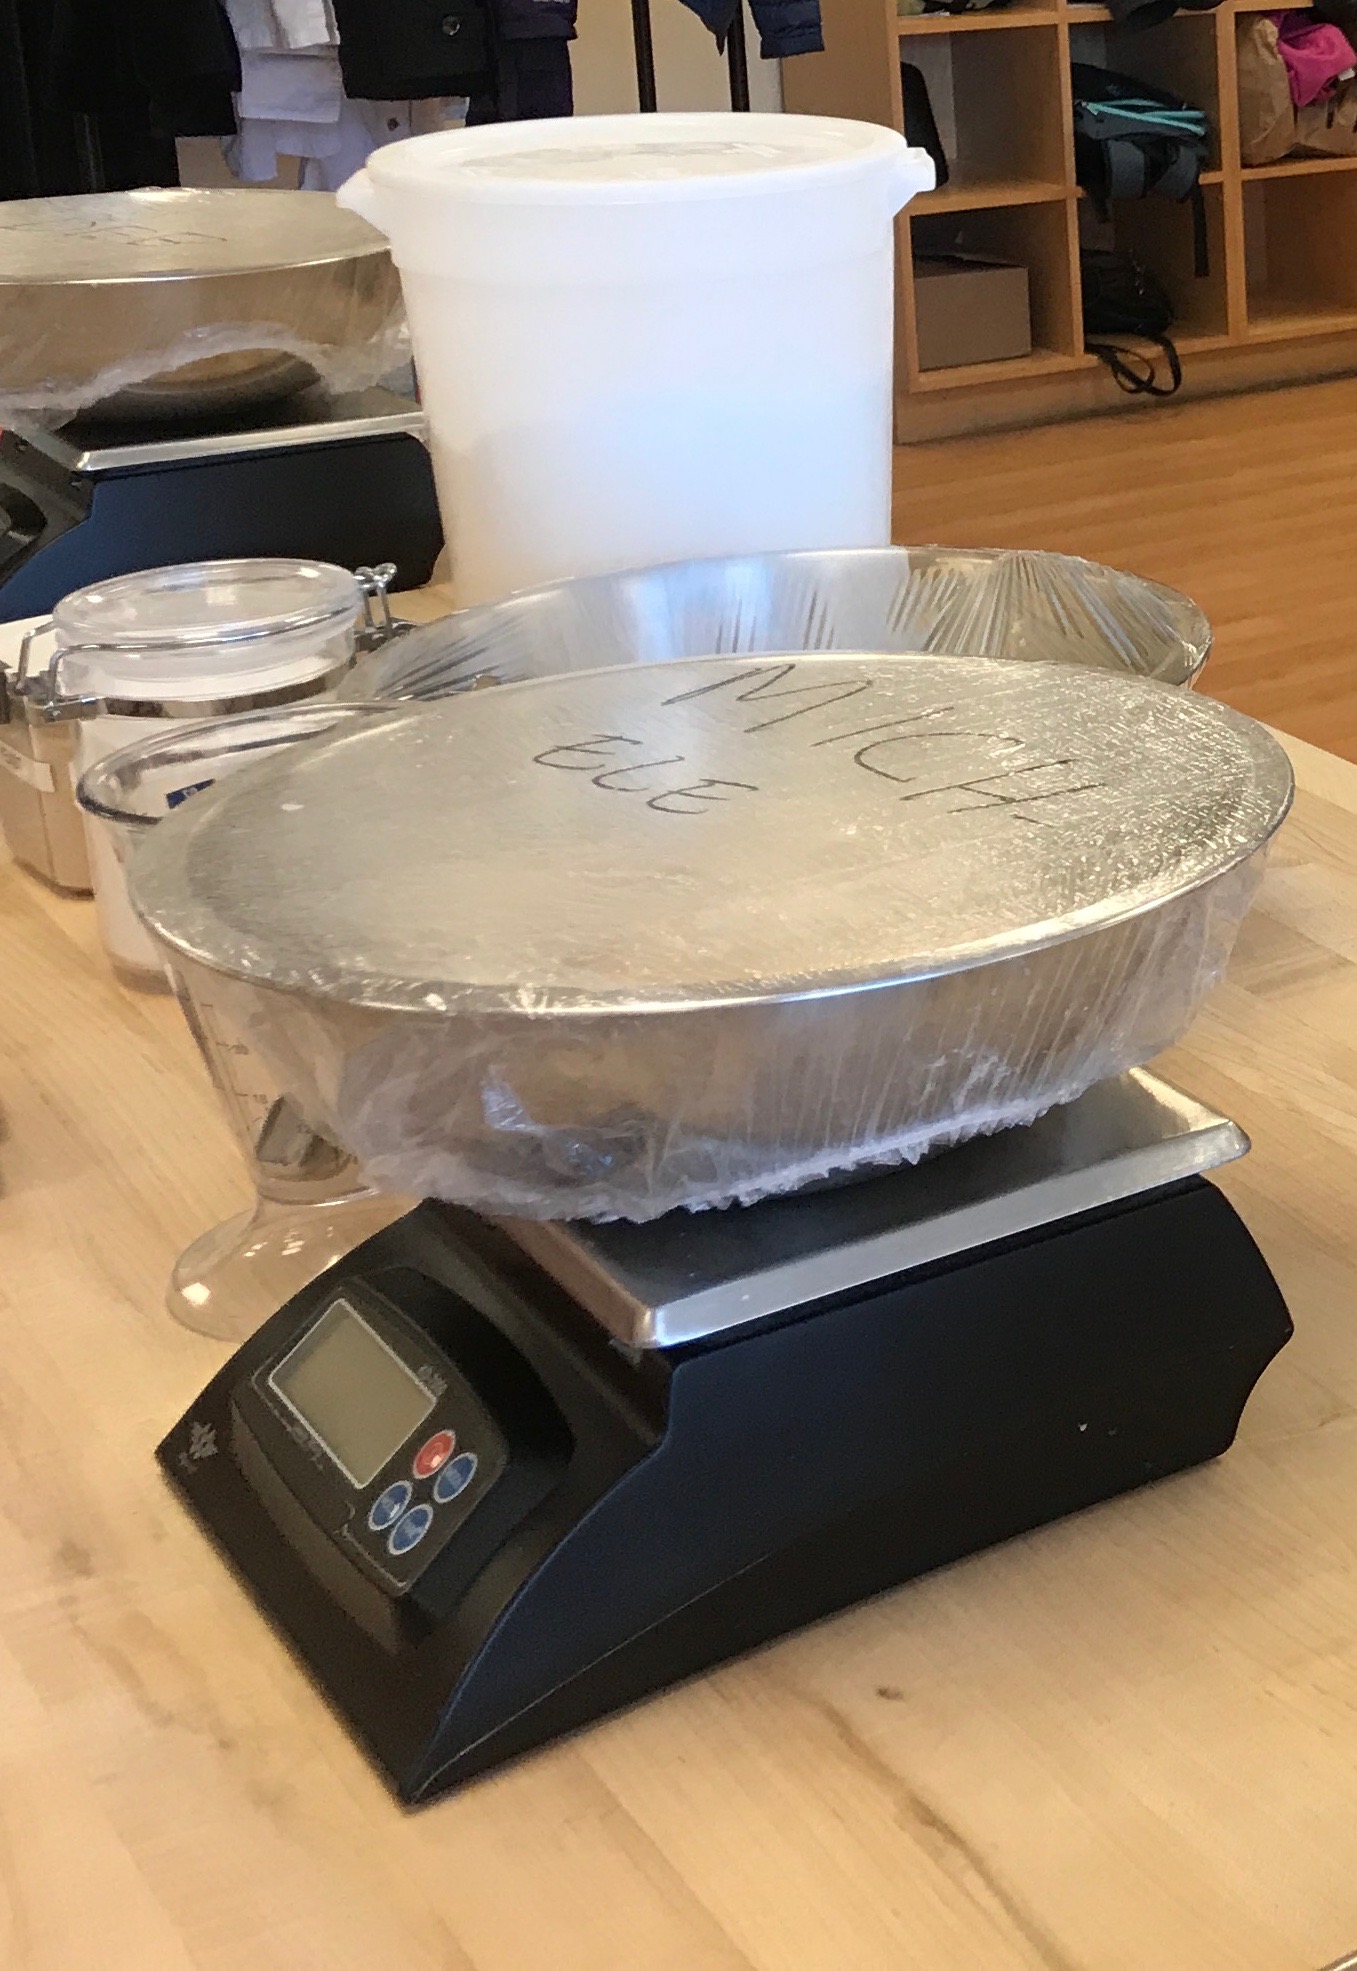
Combine all the Sponge ingredients in the bowl of a KitchenAid mixer using the paddle attachment until just mixed. Cover and leave at room temperature for 2 hrs or until the surface is covered with small holes, just like a sponge.

Add butter, salt, Daily Grind and all-purpose flour to the sponge.  Using a dough hook, mix for 8 min or until the dough balls up around the hook. Add a tablespoon or two of flour during the last 2 min of the mix if the dough is not pulling away from the sides of the bowl.

Transfer to an oiled plastic bin with cover for a bulk ferment (or proof) of 2hrs. (Alternately, slow down the ferment and put it in the fridge overnight for 8-12 hrs)

Line two baking sheets with parchment. Place the room temperature or refrigerated dough on a lightly floured surface. Use a dough scraper to cut in half.  Cut each half into thirds. Roll out each piece to create six long ropes. Make two simple braids with three strands each and place on baking sheets. Cover with a clean dish towel or oiled plastic wrap and let rise for 1 hour or until doubled in size.

Bake in a preheated 350 F oven for 25-30 min or until internal temperature reaches 190 F 

Experiments in Einkorn

When the curious around me ask, “What have you been baking these days?” and I reply “Einkorn” I might as well kill that conversation. Enunciating these two simple consonants, Ein then Korn, is an instant entrée to “Huh?” and glazed-over eyes.

Perhaps the most ancient among ancient grains, Einkorn is grown here in BC and is in desperate need of a makeover. Few seem to know how tasty it is.  Or the delight a baker such as me has when poking my schnoz into a freshly milled bag and inhaling the sweet wonder that is Einkorn.

I bought my first bag from Flourist.com who shipped my flour over the Georgia Strait from their Vancouver bakery and mill. I liked buying an organic, traceable grain that is freshly milled right before packaging. I also liked seeing a line drawing of all their producers, including Einkorn grower Lorne Muller of Swan River Valley, Manitoba.

When I read the flowery descriptor under the 2 kg bag of Einkorn priced at $24.95 (compared to $15.95 for whole spelt) I was not a believer.  It said, “This flour showcases the taste of ancient Einkorn wheat, with a flavour that shines in everything from pastry crust to sourdough bread”

Them’s fighting words, I thought. How could this unknown, nobody grain be so tasty in so many baking applications?

It was time to test.


First, I made pancakes, sourdough einkorn pancakes with frozen wild blackberries. They were good but, in my mind, just ol’ pancakes.


Second try was stupendous: Einkorn Banana Bread. I found a recipe posted at The Perfect Loaf under “my top three leftover sourdough recipes”.

Like pancakes, I’ve made banana bread a million times but never has it domed so high (and not fallen) with a porous, sourdough bread texture. img_4124.jpg Einkorn offered up a nutty, sweetness. This quick bread was addictive and thanks to einkorn, high in protein, fibre and eye-healthy carotenoids and lutein.

My next try, 50% Einkorn sourdough levain (recipe below) was fated for success the moment I watched the dough twirl around my KitchenAid dough hook in a remarkable creamy softness, as if whipping cream.  Yet, this was a whole grain.

Things got einkorn crazy when my friend Wilma and I scarfed down several helpings each of my next test: Pear Tarte Tatin.  This gluttony, after a particularly filling sushi-making party, had never been witnessed before by her partner or mine.

All we girls could say is “The einkorn made me do it.”

It may not have hurt that the pears were so sexy and that this tart oozed with butter and sugar, yet never have I received such personal affirmation for a whole grain dessert.

If Einkorn could dance on the tongue for dessert, could it go solo soaked and sprouted in a jar? I measured out one quarter cup of BC-grown kernels purchased at Cowichan Bay’s True Grain bakery. After a 12 hr soak, the kernels had plumped up. Some had split. After another 24 hours, little white tails emerged on most of the kernels.  I topped that evening’s salad with a couple of spoonful’s adding a sweet, crunchy nuttiness to simple microgreens and grape tomatoes.

The finale of my Einkorn tests hit a crescendo with risotto. My top recipe taster and ardent Arborio rice fan was aghast at the suggestion.  But when faced with my creation at the dining table, he quickly returned to the pot for seconds.

I would never have tried this had I not tasted and devoured friend Randy’s superb farro risotto.  If Randy could do it, so could I, especially knowing that farro is Italian for spelt and einkorn’s Italian appellation is piccolo farro or little spelt.

Listening to my inner Marcella Hazan, I went to the stove, pulled out a medium saucepan and heated up some olive oil and a knob of butter. I tossed in sliced leeks, diced cremini mushrooms and fresh rosemary stirring and sautéing until the  juices emerged. In went a cup of einkorn kernels, which I sautéed for 2-3 minutes getting the pan adequately dry and toasty before adding sliced, reconstituted porcini mushrooms and a big splash (3/4 cup) white wine that filled the kitchen with an intoxicating aroma. Over the course of 30 minutes, I slowly added mushroom stock by the half-cup-full stirring and cooking the kernels in their uncovered pot until they were soft, tender and truly nutty.

True confessions: Einkorn kernels will not melt into the same creamy luxuriousness that an Arborio or Navarro rice can but Parmigiana Reggiano is always at the rescue.  Freshly ground black pepper is another must.

Experimenting the gamut of Einkorn, from sweet confections to healthy raw sprouts made me a believer. It turns out Flourist wasn’t being flowery in that description at all.  This grain can do it all.IMG_4144

50 Per Cent Einkorn Levain

This dough is very extensible and stretched a yard when I scraped it from the mixing bowl to a plastic bin. I got the same results during stretch and folds. It baked up high, with a dark mahogany crust with traces of raisin and cinnamon in the air.

Levain:

1.8 oz            liquid starter

5.2 oz            Spring water

8 oz               Unbleached, organic white hard/bread flour

In a medium bowl, dissolve starter in water with a fork. Add bread flour and knead into a ball.  Cover with plastic wrap.  Let stand at room temperature for 12-16 hours.

Final dough:

Levain (minus 1.5 oz)

1lb .6oz         Spring water

2tbsp             honey

1lb                 Whole Einkorn

8 oz               Unbleached, organic white hard/bread flour

Dissolve levain in spring water in stand mixer bowl. Add honey, Einkorn and bread flour. Use the paddle attachment at low speed, mixing until a shaggy mass. Cover and autolyse (let stand) for 20 min.

.6 oz                     sea salt

Sprinkle dough over with sea salt, using dough hook, mix at low for 3 min.  The dough will separate from the sides of the bowl and create a firm ball.

Transfer to a large oiled bowl or covered plastic bin.

Bulk fermentation: 1 hr. 40 min  (Stretch and fold once, after 50 min)

Shape two loaves and place in bannetons dusted with rice flour.  Cover each with a large plastic bag and refrigerate immediately, 12-16hrs

Preheat dutch ovens at 500F for at least 30 min, bake 20 min covered, reduce to 460F and bake 20 min uncovered. Transfer to wire racks to cool.

Things I learned in KAF baking school, Part Two

Side-by-side taste testing is a gift.

On the last day, we taste a flight of varietals: five whole wheat baguettes, side-by-side. Our “control” baguette contains King Arthur White Whole Wheat flour and the others contain Salish Blue (a perennial wheat in development at the Bread Lab), Sprouted Skagit 1109, Cairn Spring Espresso T-185 and Cairn Spring Edison Unsifted. 

Newbie bakers rarely know the difference between all purpose and bread flour, let alone this wide range of locally-grown wheat varietals with alluring names.  We taste them straight-up without butter, observing crumb, inhaling aroma, analyzing crust and interior, making mindful, slow chews, ruminating on each variety. We dub this our “munch and think” session. One is Mr. Moist, the other Crispy Crust, another so very sweet. None of these baguettes has the loft and rise produced by 100% white bread flour, but all five excel in delivering a unique, wheaty flavour.  

Oh, The Baguette. This long, phallic, day-only-fresh loaf is the epitome of French bread baking and never ceases to send me into performance panic. Despite suffering years of bakers’ baguette trauma (BBT), I’m actually able to follow our instructor Jen’s shaping instruction. She demos once, twice, then for the final demo, she asks us to call out command steps for her to follow: “Place the dough good side down. Deflate. Letter fold, folding top then bottom. Observe the dough lip and seam. Use left hand to turn dough from the top of the lip over your thumb and tap closed with right palm. Repeat turn, twist and tap across the length of the dough. Turn the dough 180 degrees and pull the top side of dough to the table, pulling it over your left, lightly floured thumb and close with right palm tap. Repeat. Repeat. Repeat. Time to roll. Spread your floured fingers out wide and roll from the middle to the tips of your baguette. ”

Big breath. I return to my bench and practice. Four times. 

Two out of four ain’t bad, right? I’m hesitant to attach my initialized label to the underside of these horrendous duds. 

“There is no bread shame,” Jen assures, after a thoughtful examination of the first 20 baguettes that roll out of the oven. She is about to launch into a frank discussion of the flaws and achievements before her promising not to reveal anyone’s label.  

A tiny, terrified “Eeaak” issues forth,  en masse.

“This snake swallowed a mouse,” she says pointing to my first try. “And this one, well…” She says something way less hurtful than my first baguette mentor did years ago when I was apprenticing at a downtown Toronto bakery.  

“Just stop, Madeleine,” he called out to me shaping at the bench, pointing to my disastrous results.“I can’t sell any of those!”  

Croissants are not easy.

In fact, I’d label them advanced with a capital A.

A truly delicious, flaky croissant requires three consecutive days of attention. It wants butter that contains even more fat than normal, demands lots of finicky measurements, and exponential folding. The goal is flaky, honeycomb layers totalling 54 –  if you get it right.   

I’m thrilled to find “Sprouted Wheat Croissants” in my red KAF folderbecause I came to this course hoping for whole grain solutions to old school deliciousness. To make eight of these crispy morsels, we use 130 gm of sprouted wheat flour and 130 gm of all-purpose (King Arthur’s, of course). 

Croissant Day One, we make a simple yeasted, enriched dough and whack a 100 gram piece of unsalted, 85% fat European-style butter with a rolling pin into a thin, very pummeled five-and-a-half-inch square.  Day Two, we “lock in” our little square of chilled butter, sweetly swaddling it in the dough we made the day before. Then we get violent, methodically whacking, pounding and rolling our dough-butter combo into submission. We chill it, then whack and roll again several times. On Day Three, we roll out our sixth edition of an eight-by-16-inch rectangle, slice it into four equal parts, cutting each in half on the diagonal. Who says bread isn’t a science?

Like kids cut loose in a candy store, we adult learners happily fashion four crescent shapes and four pains au chocolat.  We each sign our name in black Sharpie pen on the parchment paper that holds our creations.  I swell with pride as I watch my croissant offspring enter KAF’s industrial convection oven, so big it can accommodate a six-foot-tall rack on wheels.  Butter aroma engulfs the room and the flaking begins. 

I post my baked beauties on Instagram and a follower asks, “Are these really yours?”

Even flour temperature matters.

“When a recipe says a pinch of yeast, what’s that mean?” instructor Geoffrey asks the class on Day One eliciting a dazed response.  

“I mean, do you want to use two fingers or threeto pinch with?” 

We respond with silence.  Just moments earlier our hallowed baking leader was talking about grams and the scientific accuracy of it all. Now we are pinching, for God’s sake. 

“If your kitchen is hot and humid, you will two finger pinch. But if the room temperature is moderate, go for three. Who can tell me why?” he asks.

One of the brighter lights among us chirps out, “The hotter the room, the faster the ferment.”

“Exactly,” says Geoffrey, “Temperature and time are two big tools for fermentation. Madeleine, I’ve put a thermometer on your bench and would like you to tell me our flour and pre-ferment temperatures.” 

Hands trembling, I insert the probe into the fluffy flour bin then into a silver bowl full of bubbling biga, calling out “66 and 66.5 F” to Geoffrey, who scribbles them on the whiteboard before us.  

At this juncture, my brain fizzles right out. Overloaded with data, my memory stick cannot download another formula or fraction. My screen goes blank during the full 10 minutes we devote to final dough temperature (78F is optimum) and how it can be controlled through a 1,000 – step equation to determine the temperature of water we use to make the initial dough.

Luckily, after days of deliberation, I get it. If we bakers can understand and compute all the variables: temperature, time, flour attributes, leavening strength and the list goes on… we can bake on a timetable producing consistent quality. As a home baker, albeit a serious one, the science of bread can only bolster the magic of my art. 

IMG_3695

KAF Spelt with Honey

Here’s an easy yeasted bread perfect for beginners. This dough is more forgiving if you are just learning to shape a boule or batard. Plus, spelt is an ancient grain with a nice, sweet nuttiness.  

600 g whole spelt flour

200 g unbleached bread flour

580 g water

2 g instant yeast

16 g salt

28 g honey

Scale flours, water and yeast in a mixing bowl, mix until just combined and cover with plastic wrap. Allow to rest at room temperature for about 20 min.

Add honey and salt and mix 1-2 min or until the dough begins to develop strength. Cover and ferment for 2 hours, folding every 30 minutes.

On a lightly floured surface, shape into boules or batards an place in floured bannetons. Cover with shower caps and retard in the refrigerator overnight.

Preheat Lodgepan combo cookers in oven at 500 F for 30 min.

Flip each loaf onto a parchment paper lined baking sheet and score.

VERY carefully remove heated combo-cooker from oven, slide loaf on parchment paper into pan, close with lid and return to oven for 20 min. Reduce heat to 460 F, remove lids and bake until golden brown and crusty, 15-20 min.


Baking at King Arthur Flour, Part 1: The things I learned in baking school

A scraper is your best friend, especially if you have two

First, we bakers need a white, plastic scraper with King Arthur Flour’s logo embossed on the surface. It’s light and flexible, a strong yet perfectly calibrated plastic that bends in the grip while its curved edge scrapes clean each bowl of messy dough we mix. We find it tucked inside our red recipe folders, compliments of KAF. My bench partner leans over and whispers, “Complimentary now, huh? I think I stole one before. Can’t bake without it.”

Instructor Geoffrey intones, “Dough is always sticky” and demos a clean scrape, lifting a mass of Multigrain with Biga dough in big chunks to the bench (a.k.a. our working surface). Once this dough hits the wooden bench it does exactly as expected. It sticks.

Enter scraper number two. It’s a big piece of stainless steel with a wooden handle and a straight, six-inch edge, sharp and strong enough to cut bulk mounds of dough in clean strokes or measure rolled-out rectangles of dough to the required specs. Better still, it cleans off that ever-present mixture of flour and water that accumulates on our wooden benches incessantly.  Wet dough leaves scat. We bakers obsessively scrape it away (following the wood’s grain if your bench partner suggests). If time permits, we use it to scrape clean our white plastic scraper, too.

IMG_3535
A docker has nothing to do with boats
.

A mysterious tool is on display at the front of the classroom. We are watching Geoffrey demonstrate “Caraway Rye Crisps”. It’s our first baking venture on Day One of the KAF course and Geoffrey doesn’t touch the docker, leaving me curious. I drag this massive white roller flecked with nails across a sheet of freshly rolled-out cracker dough. Instantly, this torture device tears my carefully rolled out dough into shreds.  I opt to make lavash and use a fork to finish the work

Dough has muscle.

According to Jen, our Day Four instructor, dough muscle can vary in strength from loosey-goosey to weightlifter tight.  Day Four happened to be Halloween and Jen is dramatically dressed as a pre-Industrial baker in a floor length dress and apron, her long hair wrapped beneath a layered scarf. Jen points to her clenched fist and dabs the pad below her thumb.

“That’s firm,” she says authoritatively.

“But this,” she says pointing to her flabby underarm muscle that’s impossible to see under the billowing waves of her costume’s fabric, “is absolutely not!”

Geoffrey’s approach to dough muscle did not include his or anybody else’s body parts.

Pushing a bowl full of dough towards us, he says “touch it, feel it.”  After another mix, he beckons again “touch it, feel it.” He chants these four words like a mantra all through the course.

“Touch it, feel it,” after a proof. “Touch it, feel it,” after a pre-shape.  We dip thumbs and forefingers into every mass of gunky dough he offers, pulling messy strands, pinching and prodding, disgusted by the gummy residue that clings like glue to our nails and knuckles.

“Dry, never water-wash your gooey hands,” instructs Geoffrey as he dunks his fingers into a nearby bin of flour, a cloud of flour lifting up. He pulls them out slowly, and methodically rubs off all the gnarly bits into a waste-bin below. He waves his dry, but still visibly floury and crusty hands in our direction and chuckles.

“That’s a bakers’ patina.”

Baker's Patina

Dough texture – and dough muscle – changes all baking day long.  Once fermented or proofed, we poke it again to test strength. Geoffrey calls this “the doorbell ring.” Depending on the bread type, we see that poke spring right back up, leave a deep indent, or something in between.

A baker’s touch is as vital as a tasting spoon, worth every sticky, messy, floury imprint it makes on our minds.

Scale it and tare it.

Baking relies on precision. Flour measured by volume (with measuring spoons or cups) is not recommended. Our individual baking stations are each supplied with a big black scale. Geoffrey says he prefers metric since “the math is easier and grams are more precise.” Bakers are constantly making computations, whether it is tripling a recipe or cutting an industrial mix into one-fortieth of its original size. Those 16 Imperial ounces in a pound just add confusion to the tally.

We start every recipe by measuring out all our ingredients on the scale.KAF Day Four

“The tare button is our best friend,” instructs Geoffrey. “Or it can be the opposite.” As soon as we put an empty mixing bowl on the scale, we tare and the screen returns to zero. We spoon in all-purpose flour and tare. We add rye and tare. We rely on the tare button to refresh the screen and weigh each ingredient separately, but if you inadvertently tare mid-stream, or worse still, your scale times out and goes blank, you can find yourself looking at a huge bowlful of  ingredients containing, God forbid, an unmeasured ingredient that can ruin the whole lot.

Scaling liquids is also tricky. The numbers on a scale just can’t keep up with a fast pour. Better to measure liquids separately and slowly. Scaling gooey blobs of honey or molasses is terminally slow and messy. Handy trick? Use an oiled spoon and honey or molasses slides off effortlessly. Worse still, tiny morsels of instant yeast (living time bombs, in the world of leavening) are so light and airy our scales can’t discern their 1 gram increments. As a result, we bakers sometimes have to ditch science and use our senses instead. It’s that combination of these two forces – one scientific and the other learned by the senses—that creates the mighty and delicious alchemy of baking.

(To be continued, next week)

IMG_3545

Rye Lavash with Maldon Salt, Chili Flakes and Rosemary

Adapted from “Caraway Rye Crisps” this recipe highlights rye’s awesome flavour and is a no-brainer, requiring next to no kneading nor any yeast.  Go ahead and cut these into fussy rectangles for traditional crackers but I prefer baking this out in two large sheets and dubbing it lavash.  Once cooled,  break into long, random sticks and serve alongside dips, paté or cheese.

114g unbleached, all-purpose flour

114g  whole rye flour (we used KAF Pumpernickel)

1 tsp baking powder

¾ tsp salt

25g diced, cold unsalted butter

118g water

20g dark molasses

Maldon salt

Chili Flakes

Dried Rosemary

Preheat oven to 400 F. Line two baking sheets with parchment paper.

In a large bowl, combine all purpose, rye, baking powder and salt. Using a pastry blender, cut in butter until it resembles coarse meal. Scale water in a bowl, tare, and scale in molasses by drizzling from an oiled spoon.  Add liquids to dry and combine with a curved edge plastic scraper kneading into a rough dough. Wrap in plastic, flatten into a disc and refrigerate for at least 15 min.

Place the disc on a lightly floured surface, cut in half and roll out each to 1/16thinch thickness.

Transfer to parchment lined baking sheets. Sprinkle with salt, chili flakes and rosemary and use the rolling pin to press in gently.

Bake 9-12 min or until golden brown.  Transfer to a rack to cool.  Break into pieces, if desired.

KAF Day One

Got juice

Three years ago, David and I became the proud owners of an apple orchard on Vancouver Island. It was August and ten, old trees stood before us in three, neat rows above a carpet of burnt, golden grass.  The hot, Cowichan Valley sun beat down on our Torontonian brows as we gazed up, knowing nothing, surveying our orchard’s branches.  

I pulled the closest apple off a tree and opened my mouth.

“What are you doing?” David asked, incredulous.

I bit off a big chunk and chewed, holding his gaze. I continued to chew, hoping that somehow the taste and texture would improve. 

But it didn’t.  

I spat it out and recognized the first unripe flavour of my new occupation.  Apple Orchard Aug 2016

Beside the orchard was a long, gravel driveway up to the house, guest house and barn. It was lined with plum trees, all of them heavy with yellow, orange and red plums each no bigger than a cherry tomato.  They hung like grape clusters and beckoned sampling. I started with a demure, meek sampling that turned into rapid gobbling followed by voracious hoarding. 

David’s watching eyes bugged. 

Each plum was sweet, juicy and too plentiful for the pouch I’d fashioned in my t-shirt, now fully stained and attracting a buzz of nearby wasps.   

David picking High Russets
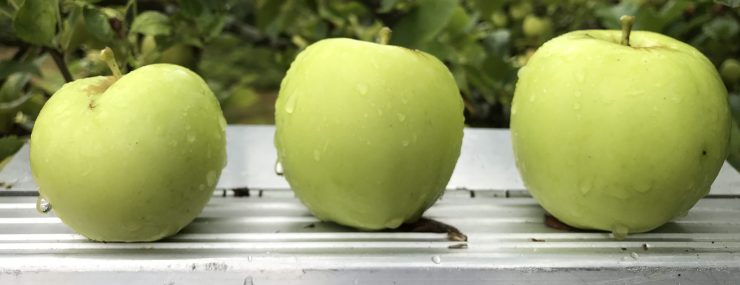
David, my apple farming husband, is still incredulous three years later as he lugs 15 boxes full of apples into the back of the SUV. It’s our third annual harvest and the first to go to McBarley’s juice and fermentation facility in Duncan. It’s not even the fall and we have harvested and boxed all of Number Two and Three trees. (These round, red and green apples the size of a fist resemble McIntosh apples – but doesn’t every Ontarian call apples that?)   Classic Red No 2

Never before have we nabbed the apples from Two and Three before the ravens execute their robbery. But here on the West Coast, David and I often wait for the wildlife to inform us. Their radar goes off like a living, breathing Brix meter. This year, all it took was a murder in the orchard for me to get out there and taste our wares. 

“It’s really good,” I say to David, mouth full of apple. “Try it.”

“Sweet!” is his reply.

We’re both incredulous. 

The brown, dry grass below the trees is littered with scat. We argue over their provenance. Is it bear, deer, rabbit or the neighbor’s lab? We know elk don’t venture in these parts, but then again, we never know what can happen here.  Just a few months ago, six gargantuan black steer (set loose from a neighbouring field) sauntered past our windows at dawn, way before our caffeine had kicked in and we had the wherewithal to run outside and follow them.

But I digress.  The apple harvest.  With tall, old trees like ours, it has to happen with ladders, a tool David was thrilled to purchase at Adam’s Tool and Tarp in Duncan and load into his brother’s pickup.  He bought an eight and 10-foot pair, neither which is easy to lug across the orchard let alone manoeuvre around our tall, leafy apples trees with their outstretched, unruly boughs.  

“It must be stable,” said our arborist Gordon McKay in his thick Scottish brogue, as I climbed up the rungs one wet, bone-chilling March morning several years ago. It was the only piece of instruction he’d given me in the past half hour that had made total sense. 

Number 7 beauty shotMcKay had started with the buds, pointing out their difference, which I could not discern. 

Then he spoke about cutting angles, which I quickly confused.  

Finally, he spoke about “last year, this year and next year’s growth”, at which point I was terminally lost, yet climbing up an eight-foot ladder. 

Just clip and hope for the best, I told my shivering self, dressed in two layers of long underwear and holding Japanese cutting shears in my right hand. My tree mentor’s instructions had floated right over my baseball cap into that gleeful empty field I call my memory. Luckily, the arborist was nearby on the other ladder, up another tree, clipping away expertly at breakneck speed. I faked a good hour of pruning until I snuck away, sighting urgent bathroom needs. Both McKay and I knew – there and then – that I didn’t have what it took to prune, but I might have some talent in the harvesting department.

Fast forward to August 2019.  My baseball cap and pony tail are stuck in a branch and I can’t move my head. An inch. I’m up on the top rung of an eight-foot ladder.  All I can see is apple leaves, spider webs, branches and one fat, out-of-reach 2-pound honker of an apple. But if I move too far to the right or left, it will be suicide, by hanging. A professional (i.e. Lee Valley) apple harvester’s bag is slung across my chest. It probably weighs 15 lbs and despite weight-lifting at my Mill Bay Pilates classes, I know I’m a goner. So I do something unusual for me: I wait. I breath. I listen to the jungle call of a nearby Pileated Woodpecker and thank my lucky stars that I get to be an apple farmer stuck in a tree overlooking Herd Road lake.  

Harvest box 2&3
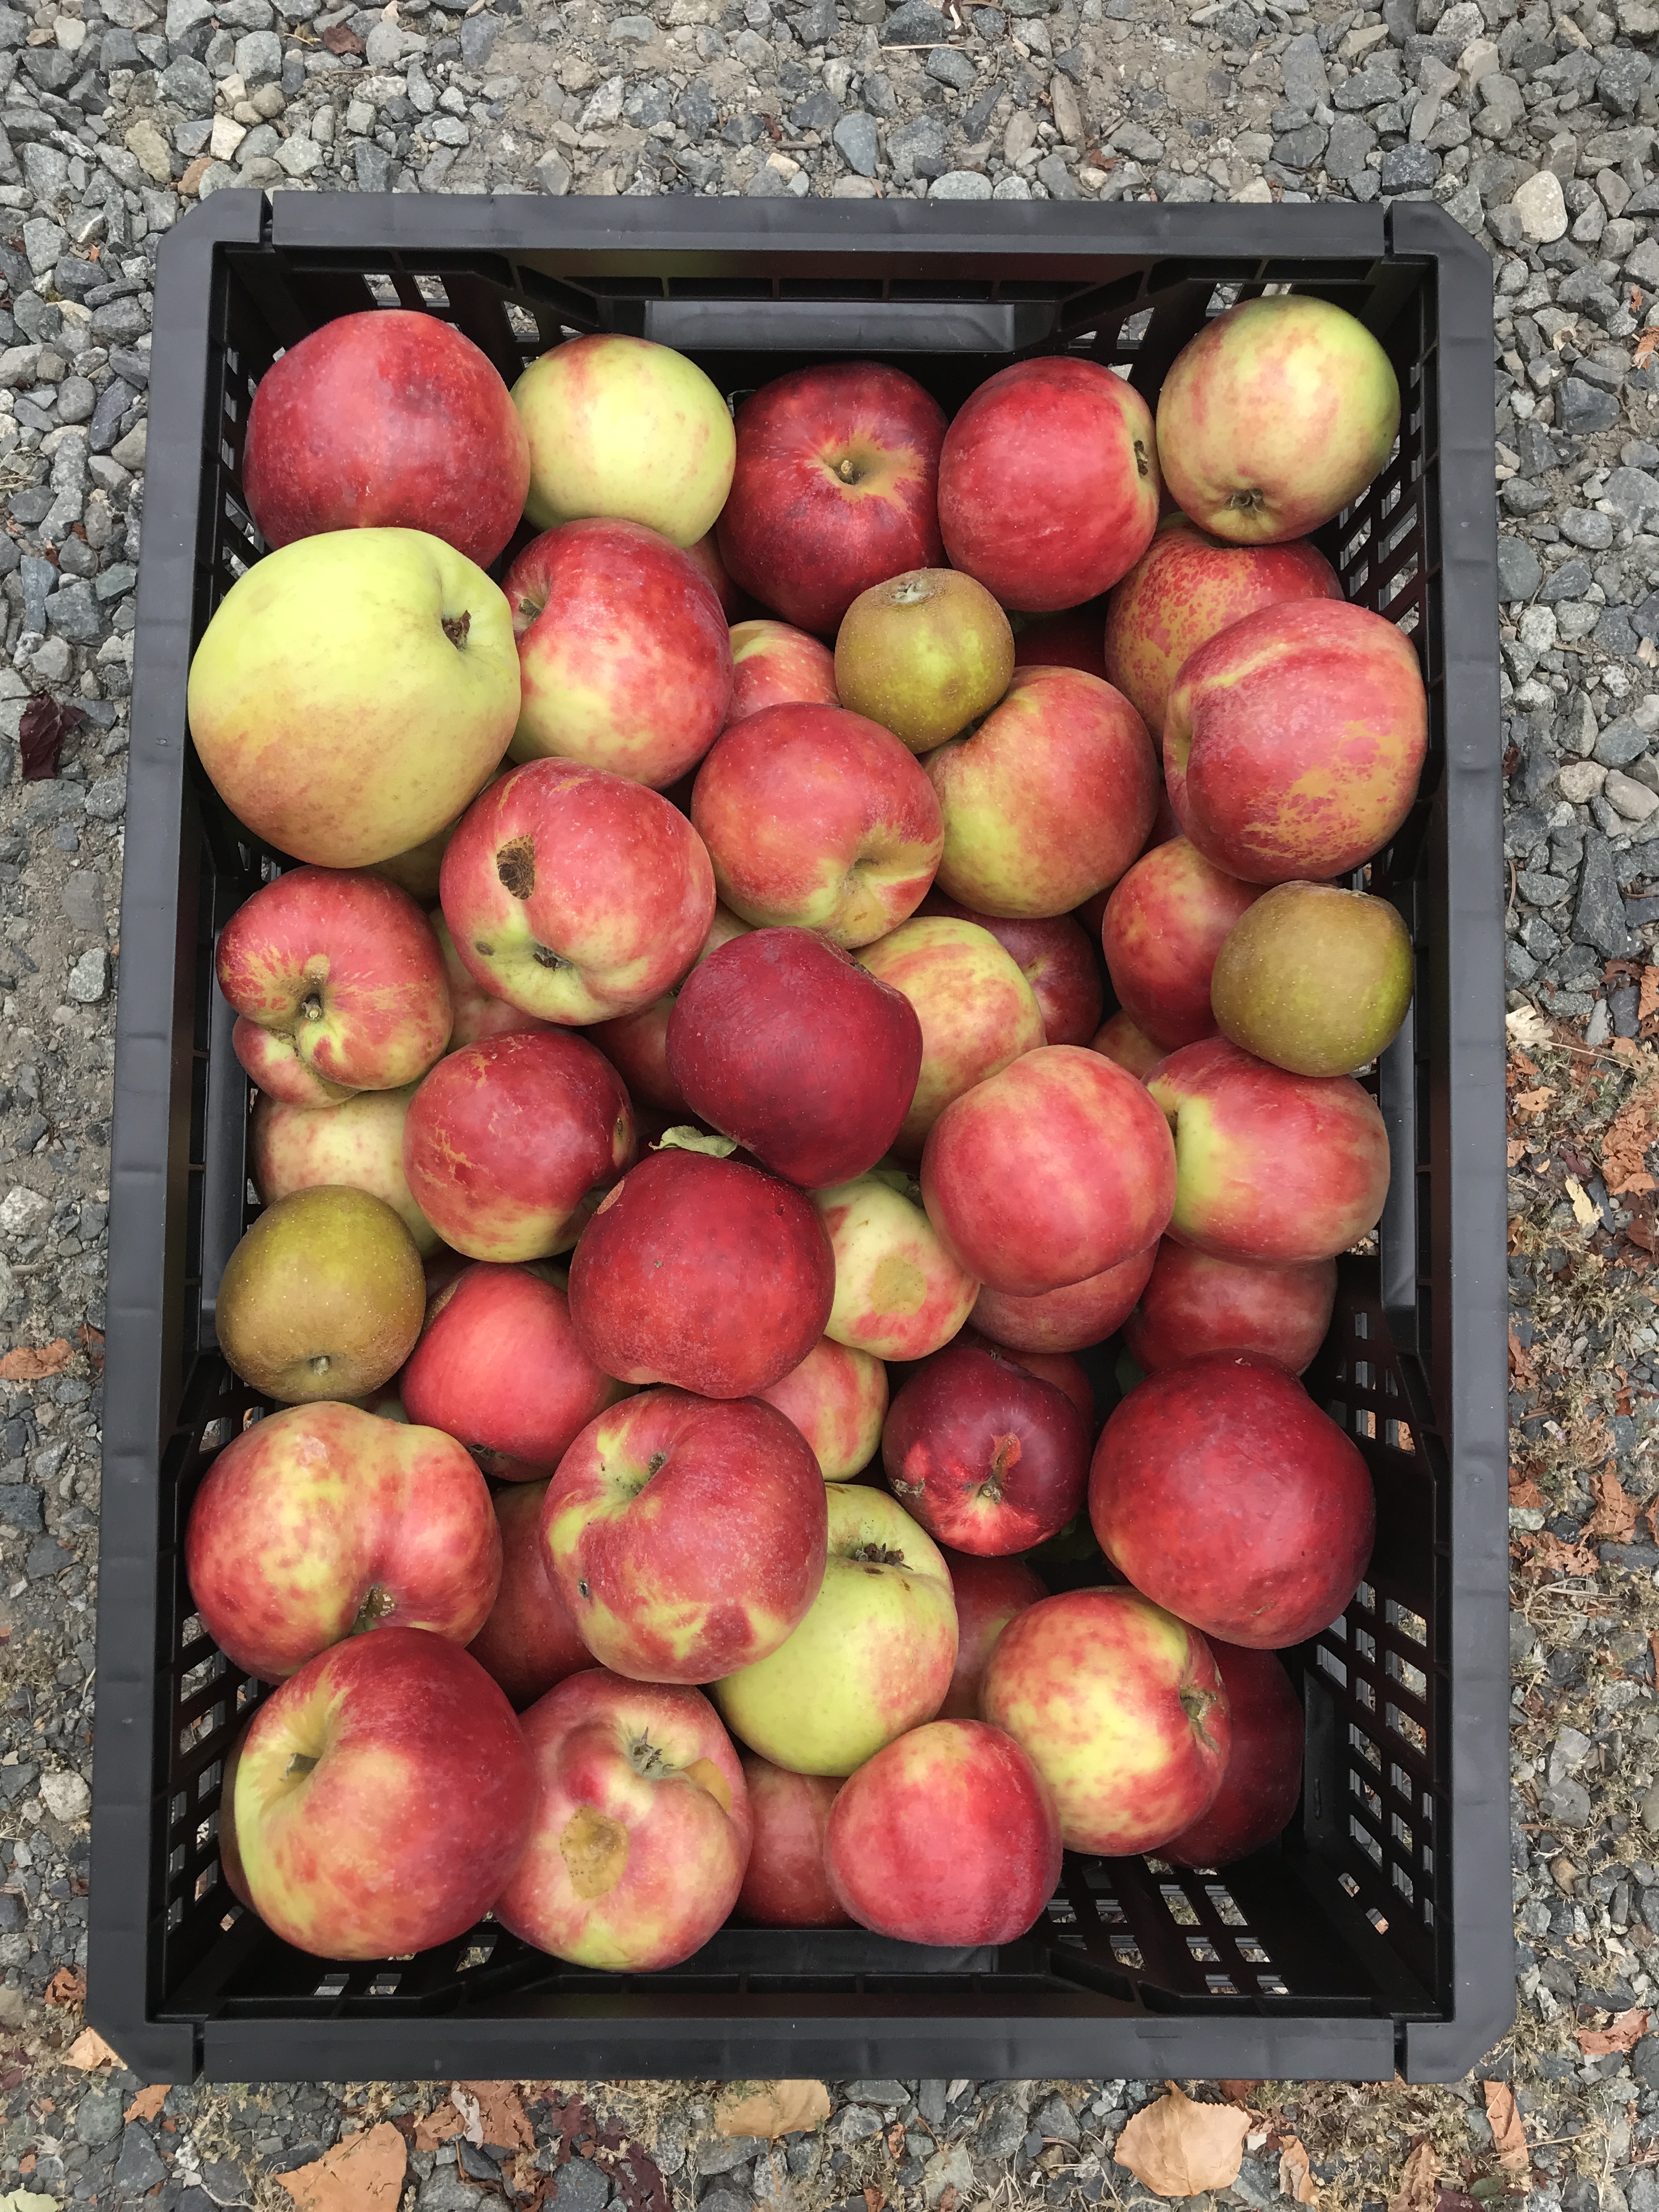
David and I are killing this year’s harvest.  Four or five full apple boxes are at the base of Number 8, the only tree we sort of know the varietal name for, due to its rusty, russet skin. Because we’re professionals, we don’t pretend to know the true varietal names of any of our ten trees but we are carefully recording their appearance, taste and botanical behaviour like the untrained scientists that we are.   

One summer, we took samples from each of our ten trees to the BC Tree Testers at the Cobble Hill Fair. Despite the combined  wisdom of three experts riffling through onsite reference books, slicing, tasting and considering… they came up empty, sighting the more than 10,000 different apple varieties and their unfamiliarity with our mysterious ten. Thus, we can only be certain all ten trees are different varieties, likely planted around the time David and I were born. We fondly refer to our apple family as Tree One through Ten, a habit that seems scientific but at the same time, really appeals to my Chinese sensibilities.  

A perennial Food Mama, I cannot let the offspring of my offspring go to waste. Thus the harvest, the ladders, the collapsible boxes, the shears and bags all spring into action once the ravens descend on the orchard. They huddle like dark shadows at the base of our trees and diffuse in a tactical squad when we walk or drive by. Once I’ve pulled all the easy to reach apples from the low hanging branches and dump that first bag of hard red orbs into a box, the ravens have returned to the perimeters, invisible in the high branches of our pines and firs emitting an intermittent  “scaaaw”, a staccato, almost digital “blonk” or my favourite, a continuous stream of gurgling water. 

Timing is tricky. Really tricky.  Mother nature doesn’t give a hoot about any of the dates I’ve put into GoogleCal but booking an apple squeeze is imperative. We know our trees don’t all ripen at the same time. Rather, they ripen up the line from Number One (ready in mid-August) to Ten (done in early October). 

But it took us three years to learn to stagger one year’s harvest into three drop-offs at McBarley’s. 

Our newbie harvest of  ‘16 was crushed in Courtney, a 3-hour drive away. Pressing Matters have a $300,000 German-made mobile apple juice maker that travels across the island and even ferries to many of the Gulf Island apple farms during the season. Yet this year, it was grounded. 

“Why?” I asked, making my first apple farmer business call.

“Cause nobody has apples this year,” laughed the gruff farmer on the other end of the line. “You bring ‘em here and wait for us to juice them.”  

David and I were the fourth truck full of apples to pass through Pressing Matters farm gate early one October morning.  We unloaded, adding our harvest to a ramshackle sea of cardboard boxes filled with pockmarked apples of every size and variety. Apple Juice Boxes in SubaruMany hours later, we left with 5L boxes full of hot pasteurized juice packaged into vacuumed plastic bags. Just like boxed wine, this juice comes out of a tap and is shelf-stable for 6 months without refrigeration.   

Next year, Pressing Matters went mobile and we found them at a small farm in Cedar, an easier 45-minute drive away. The truck in the lineup ahead of us had three times as many apples as we did. 

A mobile pressing machine like this requires four or five to operate and at McBarley’s they run the unit outside in their parking lot. Customers like us just drop off our apples, watch them get weighed and sign up for pasteurized juice, hard cider, or both. 

It sounds simple but the rub is in the timing. Ask any farmer and she’ll tell you to check that almanac, or your horoscope or better still, the waxing moon to know best harvest times. Yet to run a facility like McBarley’s, it’s all about scheduled dropoffs and pickups  for hundreds of folks like us avec les pommes. We opted for a three-stage harvest this year hoping 2019 will translate into the sweetest juice and  best bubbly vintage, ever. 

I know Number One through Ten will drink to that. 

Sourdough baking with Sarah Owens

It’s because of cookbook author Sarah Owens that this baker has started to travel with her dough. I put it in a big plastic tub in the trunk of my car or strap it into my bike carrier, ready to drive off to meetings or Pilates classes with living, bubbling yeast. I pack water and a cloth so I can stretch and fold the dough with wet hands every half hour and clean up my doughy fingertips afterwards.

IMG_6038
Pulling beet levain dough in the car during a tennis game

My life goes on and so does the ferment. It’s got to! Sarah’s technique requires half a day of fermentation.

If you think that’s crazy, you’re unlikely to want to bake from SOURDOUGH: Recipes for rustic fermented breads, sweets, savories, and more.

But then again, you’d never have the pleasure of taking the lid off a Lodgepan combo cooker in a 500F oven and seeing cheddar cheese ooze out of a hot, chili-spiked bread. Your palate would never notice the delightful zing and bite of both fresh and candied ginger folded into a sweet, buttery cake or enjoy the crunch of poppy seeds in a turmeric-tinged artisanal levain loaded with leeks.

Turmeric scallion leek levain
Seeded Turmeric and Leek Levain

This cookbook has opened a new world of baking for me. Never before had I used sourdough starter to make anything other than bread, but now I’ve tried it in cakes, cookies, popovers, even crackers. The wild yeast adds a depth of flavour to these baked goods and a bubbly crumb. (Besides, I refresh my sourdough starter weekly, if not every few days, and I’d much rather add it to an innovative recipe than throw it away.)

Sourdough bakers believe that good bread needs a very slow rise.  Often, that’s a three-day process that requires more waiting than action. Sarah’s bread recipes are no-knead and include a range of flours, from buckwheat to kamut to emmer.

Beet Bread (found on my copy’s stained page 55) asks you to plunge into a slurry of roasted beet puree, levain and three different flours and “mix with your hands until completely hydrated and no lumps remain.” IMG_6053

I was game. My fingers emerged a bright, gooey pink and my banneton might be stained for life but every cakey, sweet bite of this levain was worth it.  Think velvet cake without the sugar.

IMG_6059Sarah really understands flavours and how to pair them.  A former rose horticulturist with the Brooklyn Botanic Garden, this woman knows and loves blossoms, buds, roots, seeds and fruits. She bakes like a true artist and luckily for us, she’s written down all of her highly novel, well-tested creations. Who would have thought to make popovers with spring chives and dandelions? Or pair cocoa-spiced pork with rhubarb in a pot pie?

Admittedly, I have had a little trouble with a couple of her recipes. Brooklyn Sourdough is minimalist in terms of ingredients but calls for a five to six minute “slap and fold” method that I was unable to master.  My boule-shaped loaves looked like pancakes when I pulled them out of the oven. Ditto for the Friendship Loaf.

IMG_6074
Honeyed Spelt and Oat Levain

But neither of these disappointments will stop me from raving about the feathery-light, wide open crumb of Honeyed Spelt and Oat Levain.  Or from trying more of Sarah’s out-there ideas.

Sourdough was her first cookbook yet it won la crème de la crème of cookbook awards in 2016: the James Beard. No wonder she has 26,000 people following her on Instagram.

Last Christmas, my son gave me Sarah’s second cookbook Toast and Jam: Modern recipes for rustic baked goods and sweet and savoury spreads. This beauty of a book contains as equally a novel approach to preserves, as it does to sourdough baking.  I’ve got a sumac tree outside my window that I’ve been eying for her jelly recipe not to mention some gnarly organic carrots from my garden, bound to dazzle in her Spiced Carrot Levain.

If it weren’t for this cookbook author’s mighty contribution to baking, neither me nor my dough would be travelling together in such a delicious way.

IMG_1006